
28 rounds · filed under dense · 23 of them
Home decor · added 26 Sep 2026
Eucalyptus Sprig Crochet Jar Cover Pattern
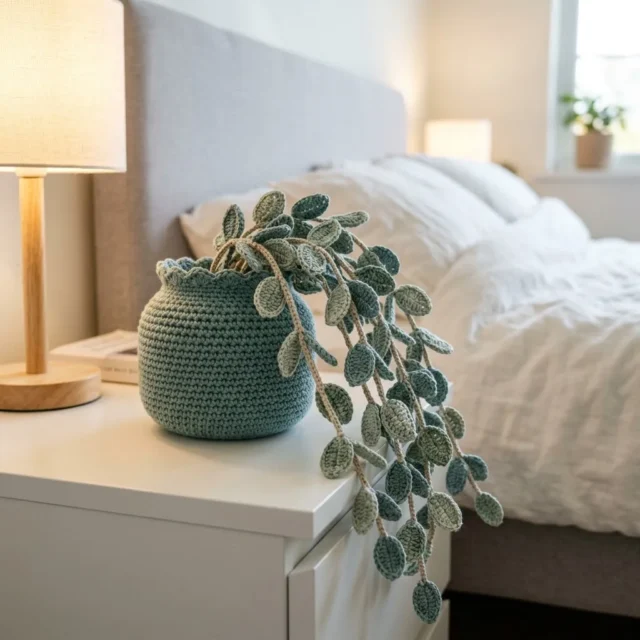
Single crochet builds a firm, ridged jar cover topped with pointed eucalyptus leaves on chain vines.
- Skill
- Intermediate
- Time
- 4-6 hours
- Hook
- 4.0 mm
- Yarn
- Worsted
- Rounds
- 28
About this pattern
Worked entirely in single crochet, the jar body comes off the hook dense and firm, with almost no give between stitches. Cotton yarn on a 4.0mm hook packs the loops close together, so the fabric stands on its own the moment you set it down rather than slumping like a looser acrylic piece would. Each row reads as a clean horizontal band, which is what lets the front-loop-only round later read as a sharp line rather than a blur.
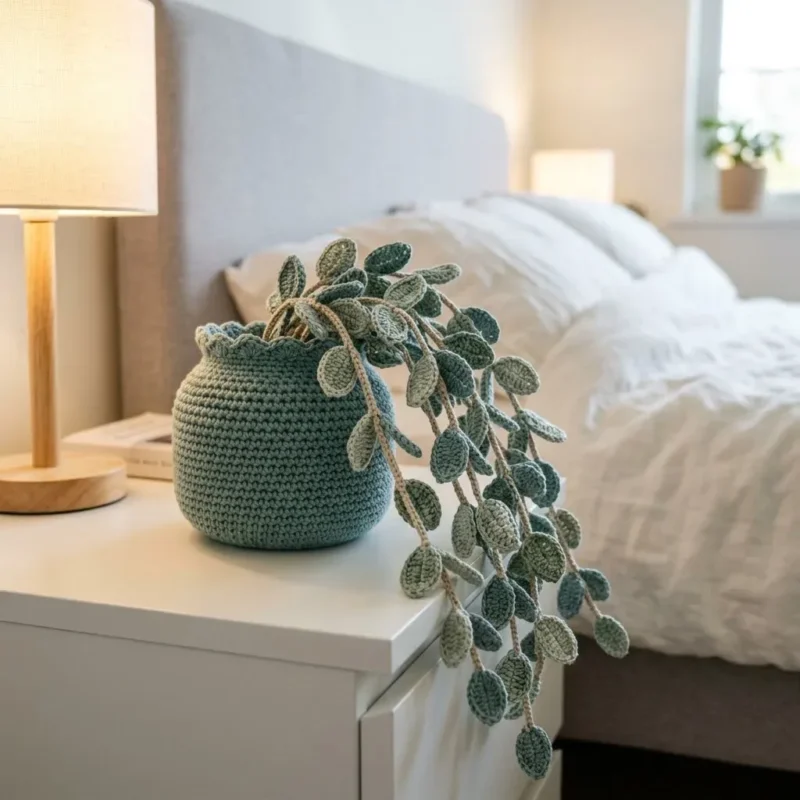
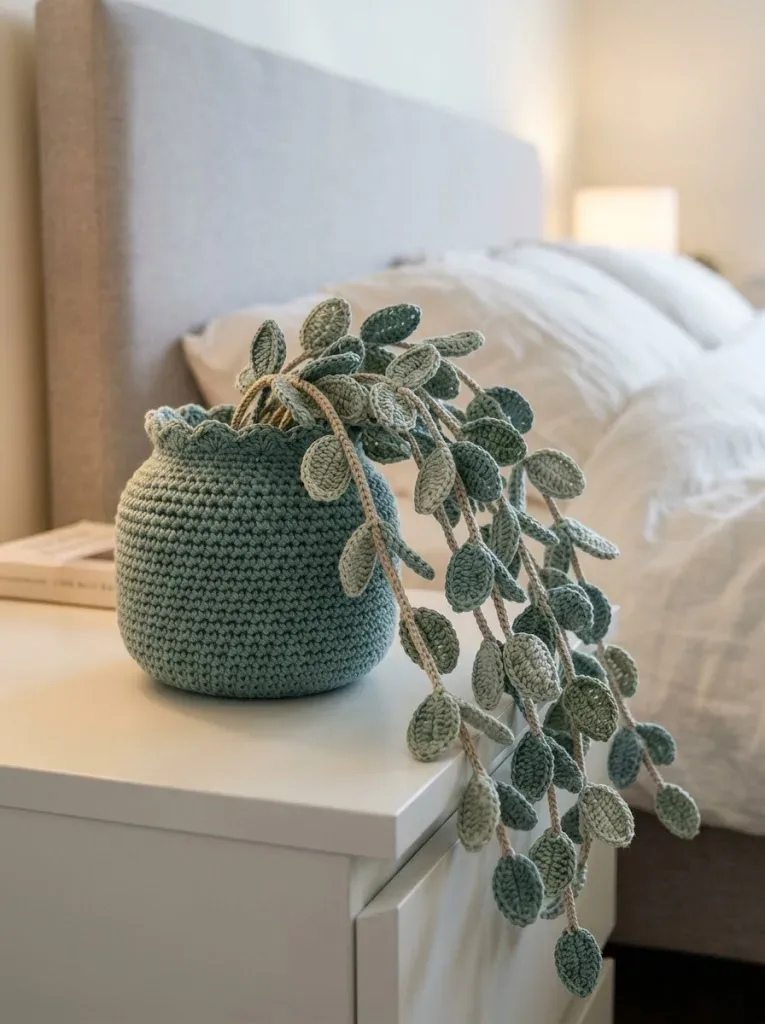
The shape starts flat as a disc, then turns a corner into a straight-sided cylinder that holds a jar or votive candle inside it. Once the Sides section is done, slide it over a jar and let the tan vine trail down the front, leaves resting against the glass. The stiffness of the cotton fabric means the cover keeps its cylindrical shape even off the jar, so it stores flat-bottomed on a shelf without collapsing.
The swatch in numbers
- Rounds
- 28
- Parts
- 4
- Level
- Intermediate
- Time
- 4-6 hours
- Hook
- 4.0 mm
- Yarn
- Worsted
The yarn and the hook
- Worsted weight cotton yarn (weight category 4) in sage green or dusty eucalyptus, approximately 200 yards for the jar
- Worsted weight cotton yarn in two coordinating green shades for the leaves, approximately 150 yards total
- Worsted weight cotton or cotton blend in tan or light brown for the vines, approximately 50 yards
- 4.0mm (G/6) crochet hook for the jar
- 3.5mm (E/4) crochet hook for the leaves and vines
- Using a slightly smaller hook for the leaves creates a tighter fabric that holds the leaf shape better.
- Stitch marker
- Yarn needle for weaving ends
- Scissors
- 14 single crochet stitches and 16 rows = 4 inches in single crochet using 4.0mm hook
- Gauge matters more for the jar than the leaves. If your jar is coming out too stiff or too floppy, adjust your hook size.
Stitches, spelled out
ch chain; st stitch; sts stitches; sl st slip stitch; sc single crochetDense; hdc half double crochetDense; inc increase; dec decrease; flo front loops onlyRidge; shell shell stitchLace.
Tension and hand-feel
After Round 5 of the Base (30 stitches), lay the disc flat and check the stitch density against the stated gauge of 14 sc and 16 rows to 4 inches on the 4.0mm hook.
If the disc feels loose or the edge ruffles instead of lying flat, drop to a smaller hook; if it cups upward, size up half a millimeter and rework the base.
Base
Part 5
Your finished leaf should be a slightly pointed oval shape, about 1 inch long.
Beginner tip: If your leaves are curling, try relaxing your tension slightly. Cotton yarn can be unforgiving if you crochet tightly.
Vine Pattern The vines are simple chains with leaves attached at intervals.
Step 1: Using tan yarn and 3.5mm hook, ch 80 to 100 depending on how long you want your vine.
Step 2: Sl st in second ch from hook and in each ch across. Fasten off.
This creates a sturdy, slightly textured vine that looks remarkably like a real stem.
Make 4 to 6 vines of varying lengths for a natural look.
Attaching the Leaves
Thread your yarn needle with the tail from one leaf. Position the leaf along the vine where you want it. Stitch through the base of the leaf and wrap around the vine chain two or three times. Secure with a knot on the back and weave in the end.
Space your leaves approximately 1 to 2 inches apart along each vine. Vary the placement so some leaves face left and others face right. In nature, eucalyptus leaves don’t line up perfectly, so embrace the randomness.
Pro tip: Attach leaves in pairs, one on each side of the vine, for that authentic eucalyptus look.
Finishing Your Eucalyptus Sprig Crochet Jar
Once all your leaves are attached to the vines, arrange them inside the jar. You can simply drape them over the edge, or you can add a small amount of polyester fiberfill or tissue paper inside the jar first to give the vines something to rest on.
Sides
Here’s where we create that lovely curved belly shape.
Eucalyptus Leaf Pattern
Each leaf is worked in rows, back and forth. You’ll make approximately 40 to 60 leaves total, depending on how full you want your arrangement.
Don’t let that number scare you. Each leaf takes about 2 minutes once you find your rhythm. This is perfect for making a few at a time while watching TV.
Use your two shades of green randomly for natural variation.
Notions
Stitch marker Yarn needle for weaving ends Scissors Optional: fabric stiffener or diluted white glue for extra leaf structure
Skill Level Beginner to Intermediate
If you’ve never crocheted before, I’d suggest practicing a basic circle first. But if you’ve made a hat, a coaster, or worked any project in the round, you have all the skills you need for this eucalyptus sprig crochet pattern.
Finished Dimensions Jar: Approximately 5 inches tall and 5 inches wide at the widest point Trailing vines: Approximately 12 to 18 inches long each
Abbreviations and Stitch Definitions
Let me walk you through every stitch you’ll use. Even if you know these already, a quick refresher never hurts.
FLO = Front loop only. Work into just the front loop of the stitch instead of both loops.
The Crochet Jar Pattern
This jar is worked from the bottom up in continuous rounds. Don’t join at the end of each round. Instead, use a stitch marker to track where your rounds begin.
How the texture is built
- The Base increases add exactly 6 stitches per round, spaced one stitch farther apart each time (sc1+inc, then sc2+inc, then sc3+inc), which is what keeps the growing disc flat instead of curling into a bowl.
- Round 9 of the Sides is worked in front loops only, leaving the back loops of Round 8 exposed as a ledge; this is the construction line that reads as a sharp corner where the base meets the wall of the jar cover.
- Part 5 (the leaf) is worked flat and finishes with Row 2 leaving remaining stitches unworked, so only one side of the oval gets a second pass. That partial row is what pulls the tip into a point instead of a rounded end.
If you swap the yarn
| DK weight cotton | Produces a smaller jar cover at the same stitch counts; drop to a 3.5mm hook for the Base and Sides to keep the fabric from getting airy, and expect to work more rows to reach the same height. |
|---|---|
| Worsted weight acrylic | Keeps the stated hook sizes and stitch counts but softens the whole piece; the jar body drapes more instead of standing rigid, and the leaves lose the crisp, slightly stiff quality cotton gives them. |
| Cotton-linen blend, worsted weight | Adds extra body to the leaf fabric, making the pointed tip from Row 2 hold its shape even more firmly than pure cotton; the jar sides gain a slightly rougher hand and a bit less stretch. |
Colorways
- Sage and Sprig Base and Sides worked entirely in sage green; leaves alternate between the two coordinating greens as you move along each vine; vine chains in tan.
- Dusty Eucalyptus Base and Sides worked in dusty eucalyptus instead of sage; darker of the two leaf greens used for Row 1 of each leaf, lighter green reserved for the pointed Row 2 tip; vine stays tan for contrast against the muted jar body.
Washing and blocking
Hand wash in cool water and avoid wringing, since cotton single crochet holds water and twisting can distort the round shape of the Base.
Lay flat to dry with the jar cover slipped over a jar or similarly sized form, which keeps the cylindrical Sides from drying with flat spots.
Store slipped over an empty jar rather than folded flat, so the firm cotton fabric keeps the shape set by the increase rounds.
When it does not look right
- The base cups upward instead of lying flat after Round 5.
- The increases have drifted out of their spacing, likely from miscounting the sc-then-inc sequence; recount so each round adds exactly 6 stitches evenly spread, using the stitch marker to anchor the round start.
- Round 9 doesn't show a visible ridge where the base meets the sides.
- Stitches were worked through both loops instead of the front loop only; frog back to Round 9 and work into the single front strand of each stitch to leave the back loop exposed as a ledge.
- The tan vine chain twists or kinks once leaves are attached.
- The chain was worked too tightly on the 3.5mm hook; relax tension on the chain stitches and smooth the vine flat before weaving in the leaf tails.
Close-ups
Questions people ask
What size jar does the finished cover fit?
The pattern is proportioned for a standard jar shape, but height is adjustable by working more or fewer of the plain rounds in the Sides section before and after the increase rounds. The increase rounds themselves (Round 9 and Round 15) should stay in place to keep the belly curve correct.
Can the leaves be made in a single green instead of two shades?
Yes, one color works fine structurally since the shaping comes from the stitch pattern, not the color change. The two-tone version simply lets Row 1 and the pointed Row 2 tip read as separate zones on the leaf.
Does the finished cover need blocking?
A light wet block helps the Sides lie flat and crisps up the front-loop-only ridge at Round 9. Since the cotton fabric is already firm from the single crochet stitch, blocking mainly evens out tension rather than reshaping the piece.
New patterns, as they are filed
One short email when a batch lands, with the feel of each.