
20 rounds · filed under ridge · 4 of them
Garments · added 13 Oct 2026
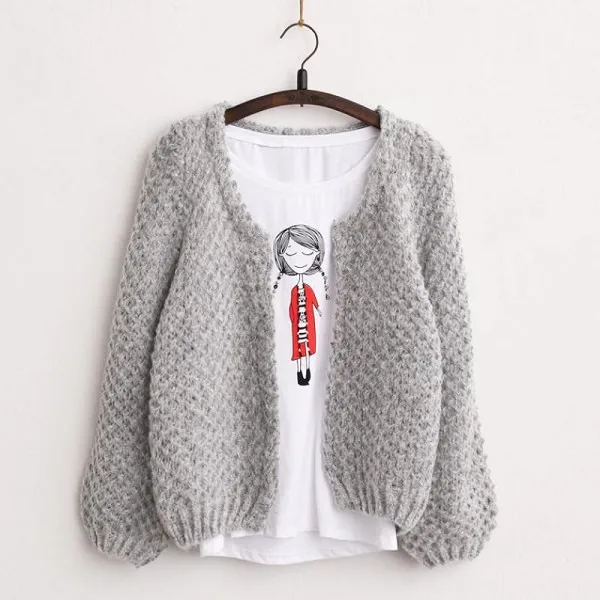
Toddler cardigan with ribbed cuffs worked in double crochet
Double crochet and post-stitch ribbing build a dense, stretchy toddler cardigan with ribbed cuffs and a flat, straight body.
- Skill
- Intermediate
- Time
- 4-6 hours
- Hook
- 6.5 mm
- Yarn
- Worsted
- Rounds
- 16
About this pattern
Rounds of plain double crochet build a fabric that is dense and a little stiff at first touch, with no give side to side until you reach a post stitch section. At the cuffs and at the top of the main pattern, front post and back post double crochet alternate to pull the stitches into vertical ribs, and that ribbing is what gives the edges their stretch. Everywhere else the fabric holds its shape rather than draping, which suits a small cardigan meant to stay put on a toddler.
The body starts as a tube of double crochet rounds, then opens into three flat panels — a back and two front sides — each worked straight with no shaping. Sleeves are picked up directly from the armhole openings and worked in rounds down to a ribbed cuff. Once the panels and sleeves are done, the shoulders are slip stitched together, leaving a gap along each side for the arm to sit in — fold the second front over the back, line up the stitches, and seam.
The swatch in numbers
- Rounds
- 16
- Parts
- 5
- Level
- Intermediate
- Time
- 4-6 hours
- Hook
- 6.5 mm
- Yarn
- Worsted
The yarn and the hook
- > U.S K/10 ½ 6.5mm Crochet Hook
- > Lion Brand Vanna’s Choice ( Any Worsted Weight Yarn) Silver Blue – 510 yards
- > Tapestry Needle / Darning Needle – To weave in ends
Stitches, spelled out
st stitch; dc double crochetDrape; FPdc front post double crochetRidge; BPdc back post double crochetRidge.
Tension and hand-feel
After the first few rounds of double crochet, lay the work flat and measure a 4 inch span — you are aiming for about 12.4 stitches and 7 rows across that square.
If your stitch count runs higher than that in the same space, the fabric is coming in tighter than it should and will sit smaller and stiffer than the 28.5 to 29 inch flat width the pattern expects, so go up a hook size; if it runs lower, drop down a size so the ribbed cuffs still have something to grip.
Arms
Main Pattern
First Front Side
Back
Second Front Side
How the texture is built
- The post stitch rounds (R16-17 on the arms, R2-R3 on the main pattern) sit at the start of each section rather than scattered through the body — that placement keeps the ribbing concentrated at the cuffs and the upper body where stretch is needed, while the rest of each piece stays plain double crochet.
- No increases or decreases appear anywhere in the 88-stitch main rounds or the 24-stitch front sections, so every panel is a straight rectangle; all of the shaping in the finished piece comes from how the panels are seamed, not from stitch counts changing within a round.
Putting the pieces together
If you swap the yarn
| Cotton, worsted weight | Stitches sharpen and the post stitch ribs read more clearly, but the fabric loses stretch and sits heavier on small shoulders; keep the same K/10 ½ hook or drop half a size if the dc rounds feel loose. |
|---|---|
| Wool-blend, worsted weight | The ribbed cuffs gain more spring and hold their shape around the wrist better, and the body drapes softer against the body; watch gauge closely since wool blends often work up a touch smaller on the same hook. |
| Acrylic-cotton blend, light worsted (DK-worsted) | The overall fabric comes out thinner and more pliable, so size up to a larger hook than K/10 ½ to keep the stitch count matching the 12.4 dc per 4 inch gauge, or expect the finished cardigan to run narrower than 28.5 inches. |
Colorways
- Split front panels Work the Back in one color and give the First Front Side and Second Front Side a second color each, keeping the Arms and the ribbed R2-R3 band at the top of the Main Pattern in the Back's color to frame the collar.
Washing and blocking
Machine wash the finished cardigan on a gentle, cold cycle, since the yarn listed is acrylic and holds up well to regular washing without felting.
Lay it flat to dry rather than hanging it, so the weight of the wet fabric does not pull the double crochet rounds or the ribbed cuffs out of shape.
Reshape the cuffs and panels by hand while still damp, then store the cardigan folded rather than on a hanger to keep the shoulder seams from stretching over time.
When it does not look right
- The cuffs sit loose and slide instead of gripping the wrist
- The front post and back post stitches in R16-17 were likely worked too loosely, flattening the ribs — redo those rounds with a firmer tension so each fpdc and bpdc pulls tight around its post.
- The shoulder seam puckers or the
- The slip stitch seam was likely started from the wrong edge or miscounted past 12 stitches — recount from the outside stitch toward the neck before seaming so the unworked stitches leave an even armhole gap.
- The body panels bow or flare instead of lying flat
- Since R4-R20 of the Main Pattern and the front sections have no increases built in, flaring points to uneven hook size or tension drifting tighter or looser row to row — check your 4 inch gauge square again and keep the hook size consistent across all the plain dc rows.
Questions people ask
Why does the ribbing only show up at certain rounds instead of through the whole cardigan?
The front post and back post double crochet rounds are placed only at the arm cuffs (R16-17) and near the top of the Main Pattern (R2-R3), which is where stretch is actually needed. The rest of the piece is plain double crochet, which keeps the body of the fabric firm rather than ribbed throughout.
Does the body need to be worked in the round the whole way?
No — the Main Pattern starts in the round for the post stitch band, then turns to worked-flat rows for R4-R20 so the tube can open into a cardigan front. From there, the Back and both Front Side panels continue flat.
How are the sleeves attached — seamed on afterward or picked up?
The Arms are picked up directly from the armhole opening by joining yarn and working 32dc evenly around, then continuing in rounds. There is no separate sleeve piece to seam in afterward.
What size toddler does this fit based on the measurements given?
The pattern is sized for a toddler 1-2 years, with a flat lay width of 28.5 to 29 inches, a length of 16 inches, and an arm length of about 10 inches. Those numbers are worth checking against the child's current sweater before starting, since the fabric has limited stretch outside the ribbed sections.
New patterns, as they are filed
One short email when a batch lands, with the feel of each.