
9 rounds · filed under drape · 2 of them
Kitchen & Home Accessories · added 15 Sep 2026
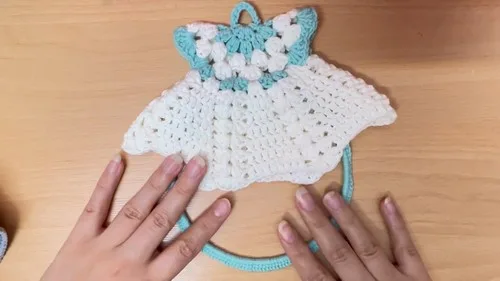
Fan stitch crochet towel holder with a wrapped ring
Double crochet fan clusters build an open, lacy round that wraps a 12cm ring into a sturdy towel holder.
- Skill
- Intermediate
- Time
- 4-6 hours
- Yarn
- Worsted
- Rounds
- 3
About this pattern
The fan clusters built from double crochet leave the fabric closer to open lace than blanket-weight crochet: each chain-1 space punches a small gap between clusters, so thick yarn worked on a snug 3-millimeter hook still lets light through rather than packing solid. This is fabric with body but not heaviness, holding a distinct scalloped edge instead of curling, because the double crochet stitch builds outward fast enough to keep the mesh open round after round.
The rounds spiral out into a single flat disc, its edge scalloped by the fan repeats, and that disc then sits inside a 12-centimeter ring wrapped edge to edge in single crochet. Hang the finished piece from a hook or knob near the sink and loop a hand towel through the ring so it stays put through repeated grabbing, or mount the disc on its own as a small round wall accent.
The swatch in numbers
- Rounds
- 3
- Level
- Intermediate
- Time
- 4-6 hours
- Yarn
- Worsted
The yarn and the hook
- Thick yarn in two colors (Your choice of colors)
- A ring (12 centimeters in diameter)
- A crochet hook (3 millimeters)
- Scissors
- A needle
Stitches, spelled out
dc double crochetDrape.
Tension and hand-feel
After round 1, lay the 12 double crochets flat and check the circle sits without doming or curling under, since the 6-chain foundation ring should open into a flat round rather than a tight cup.
If it curls, loosen tension slightly on the next round's chain-1 spaces so the fan clusters have room to spread as wide as the round beneath them.
Main Pattern
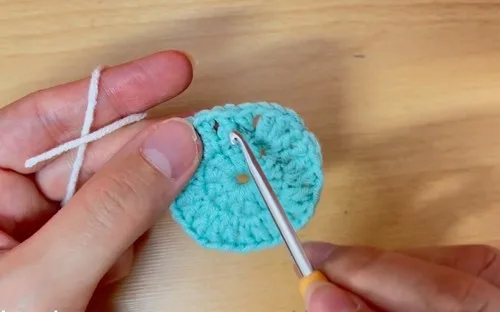
Foundation Ring: Start with the blue yarn. Make 6 chains and connect them into a circle with a slip stitch.
How the texture is built
- Each fan cluster's chain-1 space becomes the exact point where the next round's increase lands, so the piece grows from 12 dc to paired clusters to triple clusters along a straight line up the disc, which is what keeps it flat instead of pulling into a cone.
- The color change to white lands on round 3, the same round where cluster size jumps from two double crochets to three, tying the visible color break to the structural jump in stitch count.
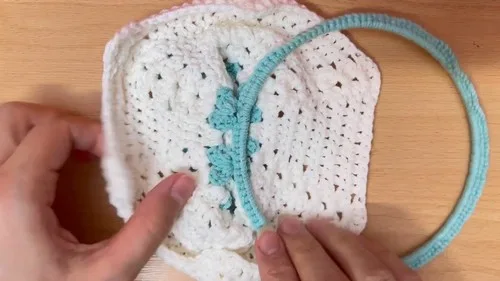
- The 12-centimeter ring is worked in single crochet directly over the ring itself rather than joined through the disc's stitches, so the wrap forms its own sturdy shell before the disc is stitched onto it as a separate step.
Putting the pieces together
If you swap the yarn
| Cotton, worsted weight | Gives the fan clusters firmer stitch definition and less stretch, so the disc holds a sharper edge; still pairs with a 3mm hook. |
|---|---|
| Acrylic, bulky weight | Rounds build up faster and the finished motif grows larger overall; needs a bigger hook so the chain-1 spaces don't tighten shut. |
| Wool-blend, DK weight | Softer drape through the fan clusters, but needs a smaller hook than 3mm to keep the stitches dense enough to hold the disc's shape. |
Colorways
- Sky and Snow Blue for the foundation ring through round 2, white for round 3 and any rounds after, blue again to wrap the 12cm ring so it echoes the center.
- White Center Reverse White for the foundation ring through round 2, blue starting at round 3 for the outer fan rounds, white to wrap the ring so the hanging loop matches the center instead of the edge.
Washing and blocking
Hand wash the finished holder in cool water, since two colors worked side by side can bleed if machine-washed hot.
Reshape the disc flat while still damp, pressing the fan clusters open so the chain-1 spaces sit even before drying.
Store flat rather than folded, since folding a disc built from stacked double crochet rounds creases the ring-side spot and takes a while for the stitches to relax back out.
When it does not look right
- The disc cups instead of lying flat.
- The cluster increase fell behind the round's circumference; confirm each round adds one more double crochet per segment as the pattern specifies, and add an extra dc in a fan segment if the edge still pulls in.
- The ring peeks through the single crochet wrap.
- The single crochets went in with too much tension or too few stitches to close the gaps; work the wrap snug, stitch against stitch, with no skipped spots around the 12cm ring.
- The color join at round 3 looks bulky or crooked.
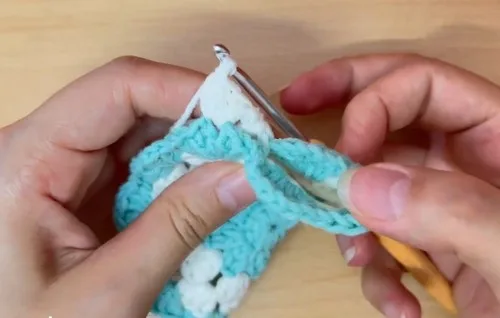
- The join started mid-round instead of at the slip-stitch closing point; break and reattach the white yarn exactly between two stitches at the round's start, then weave the tail in along that same seam.
Close-ups
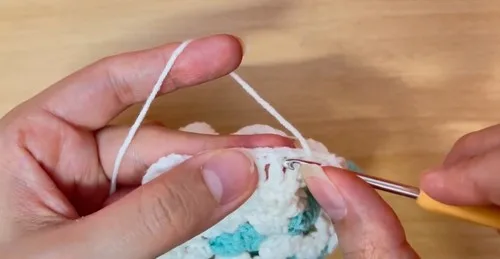
Questions people ask
What size ring does this pattern need?
A 12-centimeter ring is worked in single crochet to hold the finished disc. A slightly larger or smaller ring will still work, but check the disc's finished diameter against it before wrapping.
Why use such a small hook with thick yarn?
A 3-millimeter hook worked with thick yarn keeps the double crochet clusters snug rather than loose, so the fan pattern holds its open chain-1 spaces without sagging into a floppy mesh.
How does the crocheted disc attach to the ring?
Once the ring is fully wrapped in single crochet, the disc is stitched to it directly, with stitches spaced evenly around the edge so the weight of a hanging towel doesn't pull the disc off-center.
New patterns, as they are filed
One short email when a batch lands, with the feel of each.