
8 rounds · filed under drape · 2 of them
Kids Crochet · added 30 Sep 2026
Open Mesh Fishnet Shrug for Little Girls
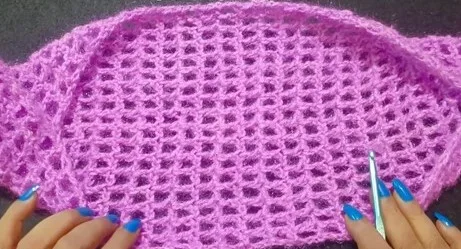
Double crochet mesh builds an open, stretchy net texture in this fold-and-seam fishnet shrug for little girls.
- Skill
- Beginner
- Time
- 4-6 hours
- Hook
- 5.0 mm
- Yarn
- Worsted
- Rounds
- 4
About this pattern
This crochet fishnet shrug is the perfect lightweight layering piece for every season. Designed with an airy mesh pattern, it is both stylish and practical, giving you a breezy garment that can be worn over dresses, tops, or casual outfits.
The pattern is beginner-friendly, requiring only simple stitches to create a rectangular panel that is folded and seamed into shape. You can easily customize the size by adjusting the starting chain length or adding rows for a longer fit. Whether you want a casual bolero for everyday wear or an elegant cover-up for special occasions, this versatile design offers endless possibilities for personalization.
The swatch in numbers
- Rounds
- 4
- Level
- Beginner
- Time
- 4-6 hours
- Hook
- 5.0 mm
- Yarn
- Worsted
The yarn and the hook
- Crochet Hook Size: 5.0 mm
- Yarn of choice
- Scissors and tapestry needle for finishing
Measurement
- Chain length should run from shoulder past elbow to desired sleeve length (example uses 35 chains)
Stitches, spelled out
ch chain; st stitch; sl st slip stitch; sc single crochetDense; hdc half double crochetDense; dc double crochetDrape; inc increase; dec decrease; mr magic ringDense; fo finish off.
Tension and hand-feel
After the first few rows of the chain-1 mesh, lay the piece flat and check that the starting chain edge spans from the shoulder past the elbow toward the intended sleeve length, since that chain sets the width of both sleeves at once.
Main Pattern
Chain length should run from shoulder past elbow to desired sleeve length (example uses 35 chains).
How the texture is built
- Round 1 sets the stitch count with a single row of double crochet across the foundation chain and nothing in the following rounds adds or removes stitches, so the mesh keeps the same width in every row from the first cuff edge to the last.
- Rounds 2 through 4 are worked flat, turning at the end of every row instead of joining in the round, because the finished piece needs to stay a single open rectangle that can be folded and seamed afterward rather than a closed tube.
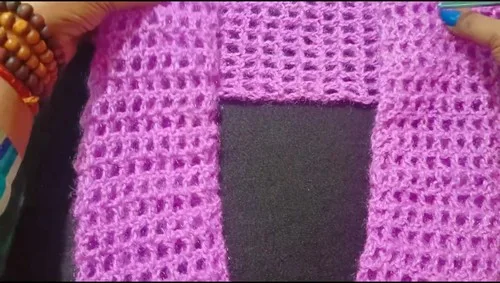
- No stitches are joined mid-fabric; the shaping for sleeves, back, and armholes happens entirely in assembly, where the side seams close the outer edges up to the shoulder mark and the un-seamed portion left below that mark becomes the armhole opening.
Putting the pieces together
If you swap the yarn
| Cotton, DK weight | Produces a crisper, less stretchy net with sharper diamond holes that hold their shape well on small shoulders; drop to a smaller hook than 5.0 mm if the mesh opens up too wide. |
|---|---|
| Acrylic blend, worsted weight | Keeps the mesh soft and stretchy with good drape at the 5.0 mm hook called for, and machine-washes easily, which suits a piece made for a child. |
| Bamboo or linen blend, sport weight | Lightens the finished shrug and adds extra drape and movement to the net, but the smaller strand means sizing up the hook slightly or adding rows to reach the same 39-inch wrist-to-wrist span. |
Colorways
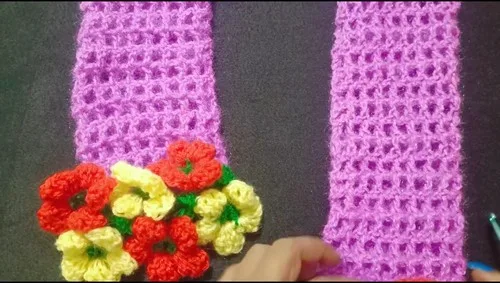
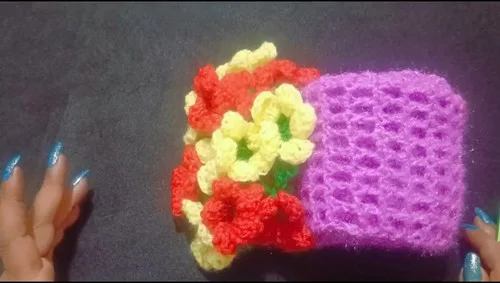
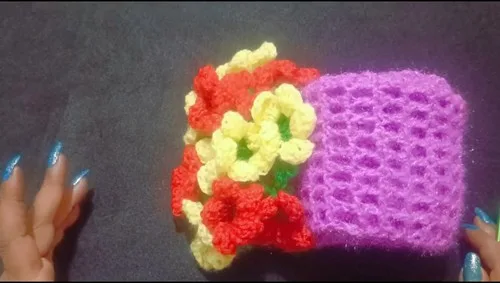
- Single Color Net Work all 65 rows of the mesh in one color so the diamond holes read as one continuous, even net from cuff to cuff, with any optional flower embellishments on the cuffs worked in a second color for contrast.
Washing and blocking
Check the yarn band for the fiber actually used before washing, since the open chain-1 spaces in this mesh will show stretching or shrinkage far more visibly than a solid fabric would.
Wash by hand or on a gentle cycle and lay the piece flat to dry rather than hanging it, since a wet fishnet mesh has little structure of its own and will pull long under its own weight if left hanging.
Fold the shrug along the same center-back line used in assembly for storage instead of hanging it on a hook, which keeps the diamond holes from stretching out of shape between wears.
When it does not look right
- The rectangle curls or ripples along
- This usually means the turning chain-4 at the start of a row is being worked too tight or too loose compared to the rest of the row; keep the turning chain at the same tension as the double crochets around it and block the piece flat once finished.
- The diamond holes come out different
- This happens when the skip-1 or chain-1 count drifts partway through a row; pause after each repeat to confirm one stitch is skipped and one chain is made before the next double crochet, keeping every space matched to the one before it.
- The finished piece falls short of one
- The mesh was stopped before reaching the full 65-row, 39-inch length given in the pattern; measure the rectangle flat and unstretched as rows are added rather than judging by row count alone if using a different yarn weight.
Close-ups
Questions people ask
How do you find the shoulder seam point when seaming the sides?
Measure the shoulder opening you want, for example 7 inches, up from the outer folded edge along each side and mark that point. Seam from the outer edge up to that mark and leave the rest of the side open for the armhole.
Can the starting chain be longer or shorter than 35 stitches?
Yes, the 35-chain start is sized to run from the shoulder past the elbow to a chosen sleeve length, so it can be adjusted to fit a particular child's arm. Just keep the double crochet count in Round 1 matching whatever chain length is used.
Why does each row turn instead of joining like a typical round?
The piece needs to stay a flat, open rectangle so it can be folded in half and seamed afterward to form the shrug shape. Joining in the round at this stage would close the fabric into a tube instead of leaving it foldable.
How is the armhole actually formed if there is no shaping in the stitches?
The armhole is not stitched at all; it is simply the gap left unseamed below the shoulder mark when the side seams are sewn. Leaving that section open after seaming up to the 7-inch mark is what creates the opening for the arm.
New patterns, as they are filed
One short email when a batch lands, with the feel of each.