
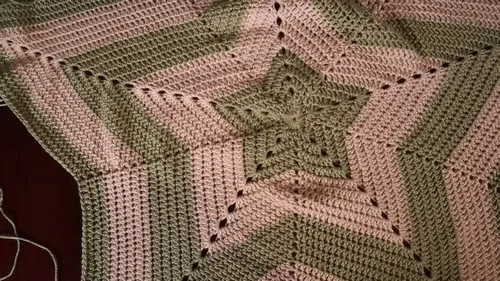
6 rounds · filed under drape · 2 of them
Blankets · added 15 Sep 2026
Star motif crochet baby blanket for beginners
Double crochet builds a raised eight-point star, thick and stretch-resistant, for a beginner baby blanket.
- Skill
- Intermediate
- Time
- 4-6 hours
- Yarn
- Worsted
- Rounds
- 3
About this pattern
Under the hand this blanket sits dense and a little firm, the double crochet stacking tight enough that light barely shows through the body of each point. The chain-3 spaces at the star tips soften that density, giving just enough give at the corners that the fabric doesn't feel like a board. Once a few rounds are on the hook, you can already feel the eight-point shape pressing outward against your fingers.
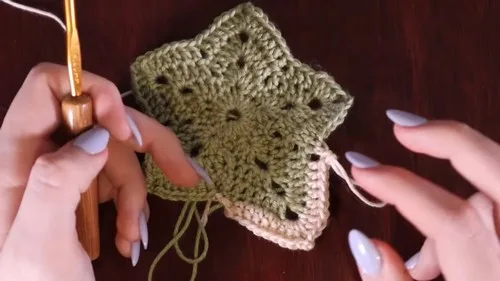
The piece grows from a tight magic circle into a flat, eight-pointed star that keeps its shape as it widens, round by round, into a full blanket. Once it reaches the size you want, stop adding rounds, weave in the tails, and it's ready to use as is or finished off with a border for a cleaner edge.
The swatch in numbers
- Rounds
- 3
- Level
- Intermediate
- Time
- 4-6 hours
- Yarn
- Worsted
The yarn and the hook
- Use any soft, non-bulky yarn
- Choose as many colors as you’d like (creator used green and off-white)
- Crochet hook size recommended for your yarn
- Yarn needle for weaving in ends
Stitches, spelled out
dc double crochetDrape; sc single crochetDense; ch chain; sl st slip stitch.
Tension and hand-feel
After Round 1, lay the closed circle flat and check that all 20 double crochets sit level with no stitch pulling tighter than the rest, since an uneven circle here will telegraph into a lopsided star as rounds build outward.
Main Pattern
Round 1: Magic Circle and Double Crochets
Forming the Star Points
Round 3 and Beyond: Expanding the Star
Color Changes
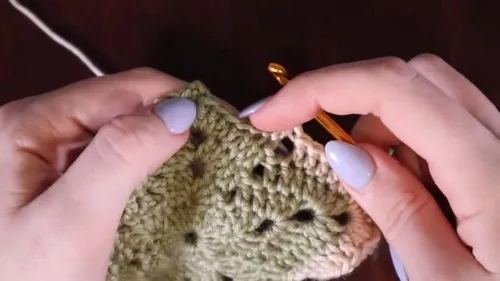
To change colors: begin a slip stitch as usual, yarn over with the new color to finish the slip stitch, pull both yarns tight to secure.
Suggested: change colors every 5 rounds.
How the texture is built
- The eight points of the star come from the eight increase clusters worked in Round 2 and repeated in every round after, each one a 3-dc, chain-3, 3-dc group that pushes the corner outward while the two double crochets between clusters keep the sides straight.
- Every round closes with a slip stitch back into the first stitch, which seats the last stitch against the first and keeps the round from twisting into a spiral as the star grows.
- Skipping two stitches on either side of each chain-3 corner in Round 3 and beyond removes the extra bulk that would otherwise build up under each point, letting the fabric lie flat instead of ruffling at the edges.
Putting the pieces together
If you swap the yarn
| Acrylic worsted weight | Keeps the stitch count and hook size as given, holds its shape well for a beginner's first blanket, and machine washes without much fuss. |
|---|---|
| Cotton DK weight | Produces a cooler, slightly heavier fabric with less stretch across the chain-3 corners, so size up the hook half a size to keep the points from drawing in tight. |
| Cotton-acrylic blend, sport weight | Makes a lighter, more drapey blanket with softer corners, though it will take more rounds to reach the same finished size, so plan on a smaller hook and a bit more patience. |
Colorways
- Two-tone star Work the Round 1 circle and Round 2 in off-white, then change to green at the start of Round 3 and hold that color through to the last round, so the star's center reads as one solid tone against the outer field.
- Banded rounds Change color every 5 rounds as suggested, alternating green and off-white so the finished blanket shows concentric bands radiating out from the center circle.
Washing and blocking
Wash on a gentle machine cycle or by hand in cool water if using an acrylic or cotton-blend yarn, since the dense double crochet body holds water longer than a loose stitch would.
Lay the blanket flat to dry rather than hanging it, so the weight of the wet yarn doesn't pull the star points out of shape.
Store folded rather than rolled, and reshape the corners by hand if they've flattened in storage, easing each chain-3 point back into its curve before use.
When it does not look right
- The star cups or bowls instead of lying flat
- Too few increases are landing at the corners, or the increases are drifting out of alignment round to round. Recount the 3-dc, chain-3, 3-dc clusters at each point and make sure each one stacks directly over the one from the previous round.
- The circle in Round 1 has a visible hole in the center
- The yarn tail wasn't pulled tight enough after the double crochets were worked into the magic circle. Snug the tail firmly before working the closing slip stitch, checking that the ring has fully cinched shut.
- The points look uneven, some sharper than others
- One or more corner clusters were worked into the wrong stitch or the wrong chain-3 space from the round below. Count out to the actual chain-3 space rather than estimating its position before placing the next cluster.
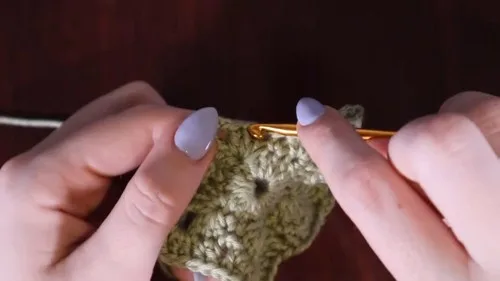
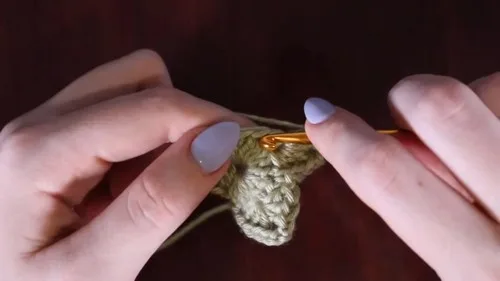
Close-ups
Questions people ask
How is the star shape formed if the blanket starts as a small circle?
Round 1 builds a flat circle of 20 double crochets, and Round 2 introduces eight corner clusters that push outward while the stitches between them stay flat. Each round after repeats that pattern, so the points sharpen and lengthen as the blanket grows outward.
Can the blanket be made larger or smaller than shown?
Yes, Round 3 and beyond simply repeats until the blanket reaches the size wanted, so stopping earlier makes a smaller piece and continuing longer makes a larger one. Just keep track of which round you're on to keep the color changes even if using the every-5-rounds suggestion.
Do the color changes need to happen exactly every 5 rounds?
No, that's only a suggestion, not a fixed rule, so colors can be changed at any round or left as a single color throughout. Changing colors partway through a round isn't recommended, since the slip-stitch join is where the new color picks up cleanly.
Is an edging necessary to finish the blanket?
No, the star pattern is complete and finished on its own once ends are woven in. A border is listed only as an optional step, useful mainly for squaring off the scalloped points of the outer round if a cleaner edge is wanted.
New patterns, as they are filed
One short email when a batch lands, with the feel of each.