
40 rounds · filed under dense · 30 of them
Amigurumi · added 3 Oct 2026
Amigurumi bat keychain worked in dense single crochet
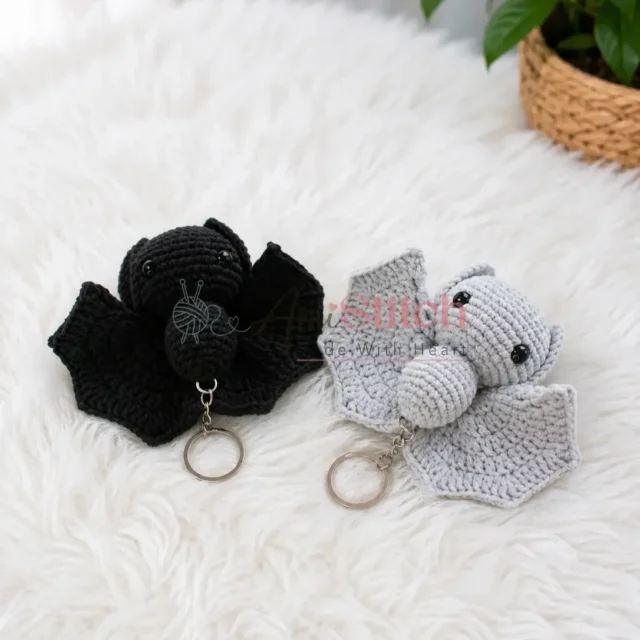
Single crochet builds a tight, firm fabric for this compact bat amigurumi keychain with pointed ears and flat seamed wings.
- Skill
- Intermediate
- Time
- 4-6 hours
- Hook
- 2 mm
- Yarn
- Sport/DK
- Rounds
- 35
About this pattern
Single crochet worked in a continuous spiral builds a tight, firm fabric that keeps fiberfill from peeking through the stitches. Every round of the head and body relies on this same stitch, so the surface stays smooth and dense rather than loose or lacy. Under your fingers the fabric feels compact and slightly stiff, holding its shape without sagging once stuffed. That firmness is what lets small details — the dome of the head, the taper of the body — read clearly instead of blurring into soft folds.
The finished shape is a small, rounded bat: a domed head joined to a narrower, tapered body, with two pointed ears angled outward and a pair of flat wings seamed to the sides. Everything scales to keychain size, compact enough to clip onto a zipper pull, bag strap, or keyring. Once assembled, attach a split ring or lobster clasp through a loop at the top of the head or back of the body, then let it dangle rather than sit — the stiff single crochet fabric keeps the small shape from collapsing in on itself while it hangs.
This pattern is written in US crochet terminology.
The Head, Body, and Ears are worked in a continuous spiral — do not join rounds or chain at the beginning of each round. Use a stitch marker to track the first stitch of each round. Stitch counts are given at the end of each round in parentheses: (##).
Gauge is not critical for this project; consistent, tight tension is more important to keep the stuffing from showing through.
Leave a long yarn tail at the end of each component — Head, Body, Ears, and Wings — so it is ready for sewing the pieces together.
The swatch in numbers
- Rounds
- 35
- Parts
- 4
- Level
- Intermediate
- Time
- 4-6 hours
- Hook
- 2 mm
- Yarn
- Sport/DK
The yarn and the hook
Yarn
- Sport or DK weight cotton-blend yarn (such as YarnArt Jeans, Gazzal Baby Cotton, or Gazzal Jeans) in your chosen color(s)
Hook
- US B-1 / 2 mm
Safety eyes
- 8 mm, 1 pair
Stuffing
- Polyester fiberfill
- Stitch marker
- Yarn needle / tapestry needle
- Scissors
Stitches, spelled out
BLO Back Loop OnlyRidge; ch Chain; dc Double CrochetDrape; dec Invisible Decrease (insert hook in front loop of next 2 sts, pull up a loop, yarn over and draw through all 3 loops); inc Increase (2 sc in same stitch); MR Magic RingDense; sc Single CrochetDense; sl st Slip Stitch; st / sts Stitch / Stitches; 3-in-1 Triple Increase (3 sc in the same stitch); 2-in-1 Double Increase (2 sc in the same stitch — same as inc).
Tension and hand-feel
After round 3 of the Head, check that the fabric still feels tight enough to hide the hook through the stitches, since this pattern does not set a fixed gauge.
If the stitches look loose or gappy at that point, drop to a smaller hook or tighten tension so the fiberfill will not show through once the piece is stuffed.
Head
Body
Ears (make 2)
Wings (make 2)
These rounds are worked as joined rounds. The ch-3 at the start of each round counts as the first dc.
How the texture is built
- Head rounds 1 through 5 add six stitches every round (6, 12, 18, 24, 30), the standard single-increase-per-stitch spiral that builds a smooth, even dome rather than a flat disc.
- Ears use a '3-in-1' stitch worked into single stitches across rounds 2 through 5 instead of a plain increase, clustering extra stitches at set points so the edge flares into points rather than spreading into a rounded curve.
- Wings are seamed along a flat edge during assembly rather than stuffed and closed like the Head and Body, so that section of the fabric stays thin and foldable instead of rounded.
Putting the pieces together
If you swap the yarn
| Worsted weight acrylic | Produces a larger finished bat and a slightly squishier fabric; size up to a hook in the US E-4/3.5mm range to keep the stitches from gapping. |
|---|---|
| Fingering weight cotton | Shrinks the whole piece down and sharpens stitch definition on the Ears and Wings, but requires tighter tension and a smaller hook to keep fiberfill from showing through. |
| Sport weight acrylic | Keeps the size close to the original but gives a softer, less structured drape, so the Ears and Wings sit a little flatter instead of holding a crisp edge. |
Colorways
- Classic Night Bat Head and Body in charcoal gray, Ears and Wings in black, so the darker pieces frame the lighter center and the pointed details stay visible against it.
- Two-Tone Contrast Head and Ears in one color, Body and Wings in a second contrasting color, splitting the bat into a clear top half and bottom half.
Washing and blocking
Hand wash in cool water and avoid wringing, since twisting a cotton-blend amigurumi can shift or clump the fiberfill inside.
Lay the bat flat to dry and reshape the Ears and Wings with your fingers while still damp, pressing the seamed edges flat.
Store away from direct sunlight and away from damp spaces to keep the cotton-blend yarn from fading or taking on a musty smell.
When it does not look right
- The head looks lumpy or uneven instead of a smooth dome.
- Stuffing was likely added in large clumps or stitches were worked at uneven tension; add fiberfill gradually in small pinches as you close the final rounds, working through tight, consistent single crochet. Don't overstuff — you want a gently firm oval, not a tight sphere; check the shape from all angles and stop before it becomes round, since a slightly flattened profile reads more naturally as a bat's head.
- The ears flop forward instead of
- The 3-in-1 stitches were worked too loosely, softening the points; work the Ears at a slightly tighter gauge and add a small pinch of stuffing at the base before seaming them to the Head. Make sure all three stitches of each 3-in-1 are worked into the exact same stitch — pull each one snug before moving on, or the tip can drift to one side.
- The wings pucker or curl instead of
- The seam along the flat edge was pulled too tight when attaching; whipstitch the Wings to the Body with a looser tension and smooth the seamed edge flat before weaving in the yarn tail. When seaming the Wing itself, fold it flat so the center of the magic ring aligns evenly, then whipstitch along the outer edge for a clean, dramatic silhouette.
- Stuffing peeks through between the stitches.
- Cotton-blend yarns have less stretch than pure acrylic, which actually works in your favor here — keep your tension tight throughout the whole piece so the firm fabric hides the stuffing and keeps the bat's shape crisp. If you can see the fiberfill between stitches, go down half a hook size.
- The decrease rounds on the Head look
- The decrease was likely worked through both loops instead of the invisible method; insert your hook through the front loops only of the next two stitches, pull up a loop, then yarn over and draw through all three loops. This keeps the decrease nearly invisible from the outside — especially noticeable on a small project where every stitch shows.
Questions people ask
Can I use a different yarn weight for this bat keychain?
You can, but keep in mind that the finished size will change. A fingering weight yarn with a 1.5 mm hook will produce a miniature bat perfect for earrings or stitch markers. A worsted weight yarn will create a much larger plush toy rather than a keychain. The pattern proportions stay the same regardless of weight — only the scale changes.
How do I attach a keychain ring to the finished bat?
The simplest method is to thread a split ring or lobster clasp through a small loop of yarn added at the very top of the Head before you close the final round. Alternatively, you can use a jewelry jump ring and attach it through a stitch at the crown of the Head after assembly. Both methods are secure with cotton-blend yarn.
My ears are not holding their pointed shape — what am I doing wrong?
The pointed shape in the ears comes from the 3-in-1 increases placed consistently at the same tip stitch in each round. If the tip is drifting, check that you are working all three stitches into the exact same stitch each time rather than spreading them across neighboring stitches. Since the ears are not stuffed, they rely entirely on stitch placement for their shape.
Is this pattern suitable for a complete beginner?
This pattern is a great second or third amigurumi project. If you are comfortable with the magic ring, single crochet, increases, and decreases, you have everything you need. The wings introduce joined rounds with double crochet, which adds one small new skill — but the rounds are short and the instructions are straightforward. A true first-time crocheter may want to practice those basics on a simple ball first.
New patterns, as they are filed
One short email when a batch lands, with the feel of each.