

52 rounds · filed under dense · 40 of them
Amigurumi · added 22 Oct 2026
Mint green highland cow amigurumi worked in single crochet rounds
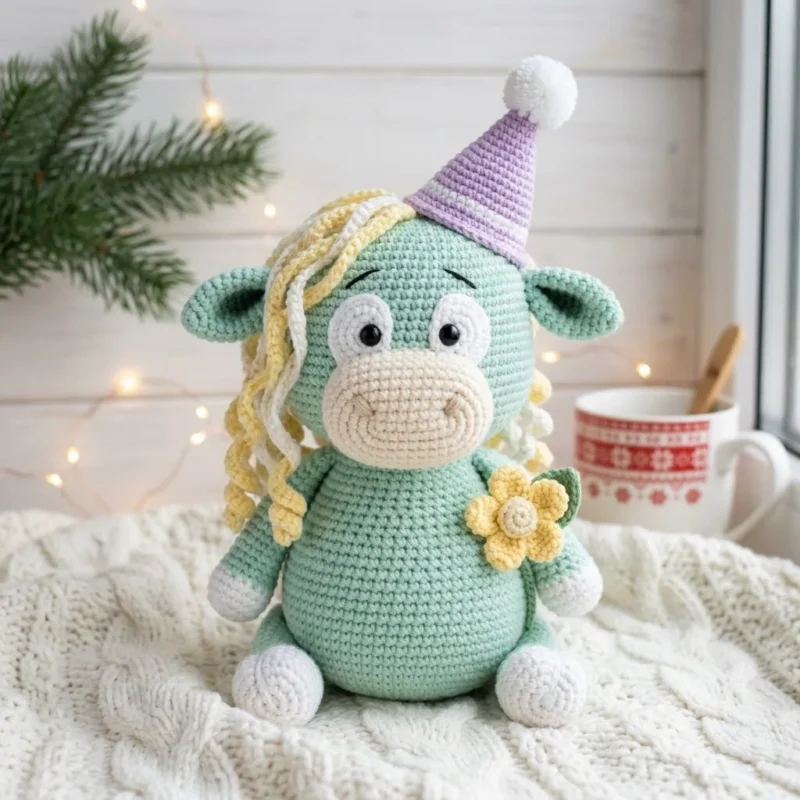
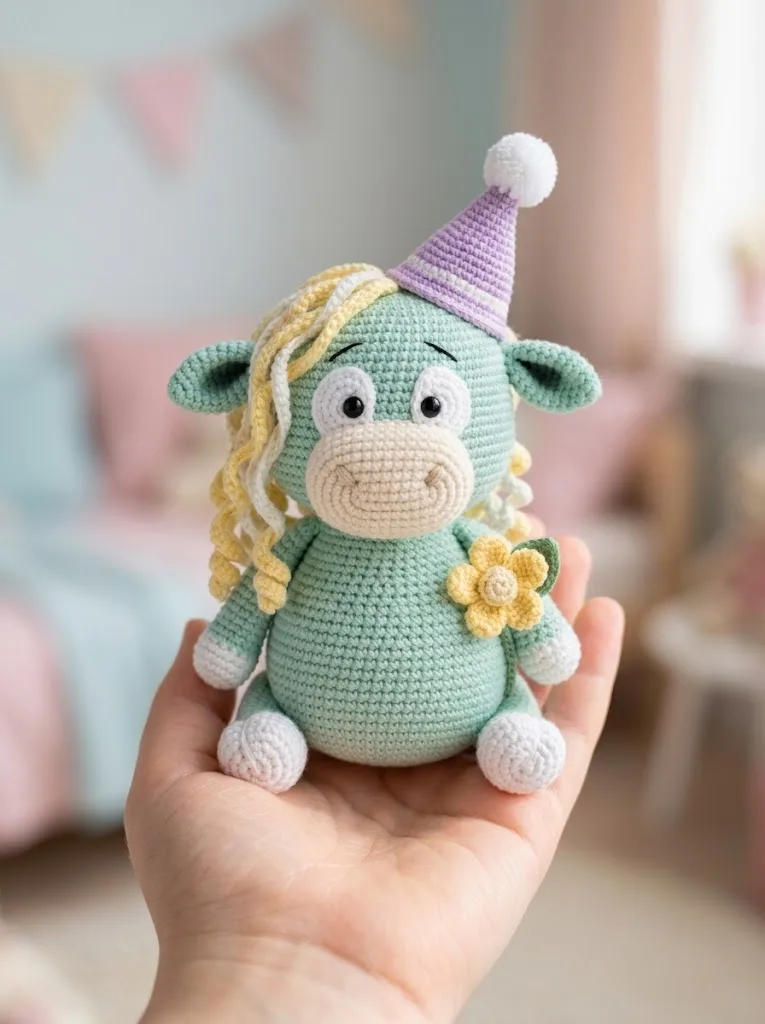
Single crochet rounds build a dense, poseable mint green highland cow amigurumi with cream muzzle and lavender party hat.
- Skill
- Intermediate
- Time
- 4-6 hours
- Hook
- 3.0 mm
- Yarn
- Worsted
- Rounds
- 44
About this pattern
Worked almost entirely in single crochet, the fabric here comes out tight and close, each stitch locking into the next with barely a gap between them. With a 3.0mm or 3.25mm hook pulling mint green yarn into continuous spiral rounds, the surface firms up into something closer to a dense knit than an open, airy crochet — exactly what you want when fiberfill is pressing against it from the inside and you need no show-through.
The body builds from rounded parts: a 13-round head that swells out from a magic ring to its widest point before narrowing again, short stubby legs with a flat-chained sole underneath, and arms that taper into a narrower tube partway up. Once the pieces are stuffed and joined, the shape settles into a seated posture — set her upright on a shelf, tuck her into a gift basket, or prop her beside another plush so the cream muzzle and lavender hat catch the light.
The swatch in numbers
- Rounds
- 44
- Parts
- 7
- Level
- Intermediate
- Time
- 4-6 hours
- Hook
- 3.0 mm
- Yarn
- Worsted
The yarn and the hook
Mint green
- approximately 150 yards (main body, head, arms, legs)
Cream or beige
- approximately 30 yards (muzzle, inner ears, feet bottoms)
- Lavender or light purple: approximately 25 yards (party hat)
Yellow
- approximately 20 yards (hair strands, flower center)
White
- approximately 15 yards (eye whites, pom pom, hair highlights)
Green
- small amount (flower leaves)
Hook
- 3.0mm or 3.25mm crochet hook (size E or D)
Other Supplies
- 10mm black safety eyes (1 pair)
- Polyester fiberfill stuffing
- Yarn needle for sewing
- Stitch marker
- Scissors
- Pink embroidery floss or yarn for muzzle smile (optional)
Stitches, spelled out
Magic ring (MR) An adjustable starting loop that pulls completely closed. You wrap yarn around your fingers, insert your hook, pull up a loop, then chain one to secure it. Work your first round stitches into this ring, then pull the tail tight to close the center hole.Dense; Chain (ch) The foundation stitch. Yarn over, pull through the loop on your hook. For example, ch 6 means make 6 chain stitches in a row.; Single crochet (sc) Insert hook into stitch, yarn over and pull up a loop (2 loops on hook), yarn over and pull through both loops. This is your bread and butter stitch for amigurumi.Dense; Increase (inc) Work 2 single crochet stitches into the same stitch. This adds one stitch to your total count.; Invisible decrease (invdec) Insert hook through the front loops only of the next 2 stitches, yarn over, pull through both front loops, yarn over, pull through both loops on hook. This creates a tidier decrease than the standard method.Dense; Slip stitch (sl st) Insert hook, yarn over, pull through stitch and loop on hook in one motion. Used for joining and finishing.; Fasten off (FO) Cut yarn leaving a tail, pull through final loop, tighten to secure..
Tension and hand-feel
After round 4 of the head, count stitches around the opening; it should read 24, and the circle should sit flat in your palm without cupping up at the edges or buckling outward.
If the stitch count is right but the circle feels loose or floppy, drop to a smaller hook — the fabric needs to stay firm enough to hold fiberfill without stretching thin.
Head (Mint Green)
Arms (Make 2, Mint Green)
Legs (Make 2)
Foot sole (cream):
Ears (Make 2)
Outer ear (mint green):
Inner ear (cream):
Work rounds 1 to 3 only. FO leaving tail. Sew inner ear centered on outer ear. Flatten ear and sew to sides of head.
Party Hat (Lavender)
Flower Embellishment
Flower center (yellow):
FO leaving tail.
Leaves (green): Ch 8. Starting in 2nd ch from hook: sl st, sc, hdc, dc, hdc, sc, sl st. FO.
Make 2 leaves. Attach flower and leaves to body front.
Hair Curls
This is the fun part that gives your highland cow her signature look.
Cut 40 to 50 strands of yellow and white yarn, each about 14 inches long. Using your hook, pull each strand through a stitch along the top front of the head, then fold in half.
To create curls, dampen the strands slightly and wrap around a pencil or straw. Let dry completely, then release. Alternatively, braid sections loosely for wavy texture.
Arrange curls to cascade around the face and over the party hat band area.
How the texture is built
- The head's increases are front-loaded: rounds 2 through 4 take the stitch count from 6 to 12 to 18 to 24, one increase round after another, which rounds the crown quickly before three even rounds (5-7) let the fabric run straight for a short neck-to-face transition.
- The foot sole starts flat, worked back and forth along both sides of a 5-chain before the piece turns into rounds; round 4 then shifts to back loops only, which raises a visible ridge that separates the cream sole from the mint green foot above it and marks exactly where the color change happens.
- the arms, the single increase round (6 to 12) comes early, followed almost immediately by an invdec round that drops the count to 8 — so the bulk of the arm's length is worked at that narrower 8-stitch width, leaving a thin tube that stays bendable even after the lower portion is stuffed.
Putting the pieces together
If you swap the yarn
| Cotton, worsted weight | Stitches hold their shape with almost no give, so the finished fabric stays firm without extra stuffing pressure, though the yarn is harder on the hands over 13-round pieces like the head and hat — keep the same 3.0mm to 3.25mm hook. |
|---|---|
| Acrylic blend, sport or DK weight | The fabric drapes slightly softer and the finished head and body come out smaller than the yardage amounts suggest, so size down to roughly a 2.75mm hook to keep stitches tight enough that fiberfill doesn't peek through. |
| Chenille or velvet-style yarn, worsted weight | Individual stitches blur into a plush, fuzzy surface rather than showing crisp single crochet texture, the finished pieces run bulkier, and a larger hook (around 3.5mm to 4mm) with lighter stuffing keeps the softer yarn from distorting the round shapes. |
Colorways
- Mint and Lavender Mint green covers the head, arms, and legs; cream takes the muzzle, inner ears, and the foot soles worked in rounds 1-3 before the back-loop color change; lavender fills all 13 rounds of the party hat; pale yellow forms the hair strands and flower center; white sits in the eye whites, pom pom, and hair highlights; a small amount of green finishes the flower leaves.
- Dusty Rose and Gold Swap mint green for a dusty rose on the head, arms, and legs, keep cream on the muzzle, inner ears, and foot soles exactly as written, and replace the lavender hat yarn with a golden mustard instead — the hair, eye whites, pom pom, and leaf stay in their original colors since those smaller pieces carry the least color weight.
Washing and blocking
Spot clean with a damp cloth and mild soap rather than submerging the piece, since safety eyes and glued-in parts can loosen if soaked.
Reshape rounded parts like the head and hat by hand while slightly damp, smoothing the surface with your fingers before it air dries flat on a towel.
Store away from direct sunlight and heat sources so the mint green and lavender yarn keep their color and the fiberfill inside doesn't clump or shift.
When it does not look right
- The party hat leans or collapses instead of standing at an angle.
- Loose tension through the even rounds lets the cone fabric go soft; work those rounds tighter or drop to a smaller hook so the lavender fabric holds its own weight.
- The foot soles pucker at the ends instead of lying flat.
- The first and last stitches worked into the starting 5-chain are usually pulled too tight; ease up on tension at both ends of round 1 so the chain foundation can open out fully.
- The arms feel stiff and will not bend into a pose.
- Stuffing has been packed into the upper tube above the round 6 decrease, where the pattern calls for little or no fill; remove excess fiberfill from that narrower 8-stitch section and keep stuffing concentrated at the base only.
Close-ups
Questions people ask
Why is the foot sole worked in a different color and a different direction from the rest of the leg?
The sole starts as a flat piece worked back and forth along a short chain before joining into rounds, which is a different construction than the spiral rounds used everywhere else. The back-loop-only round at round 4 raises a seam that separates the cream sole cleanly from the mint green leg above it.
The hair curls section lists 0 rounds — is that a mistake?
No, the hair curls are not worked in rounds the way the head or legs are; they are shaped separately from lengths of yarn and then secured onto the head afterward. Treat them as a finishing element rather than a piece with its own stitch count.
How much fiberfill is actually needed for the whole project?
The materials list names fiberfill but doesn't give a yardage or weight, so judge by feel rather than by a fixed amount. Add it in small amounts as each piece is worked, checking firmness with your fingers before closing each part.
Does the party hat need a different hook than the body?
No, the hat is worked in the same lavender yarn weight as the rest of the project and uses the same 3.0mm or 3.25mm hook named in the materials list. Keeping the hook consistent matters here since the hat needs to match the density of the head it sits on.
New patterns, as they are filed
One short email when a batch lands, with the feel of each.