
42 rounds · filed under dense · 36 of them
Amigurumi · added 15 Oct 2026
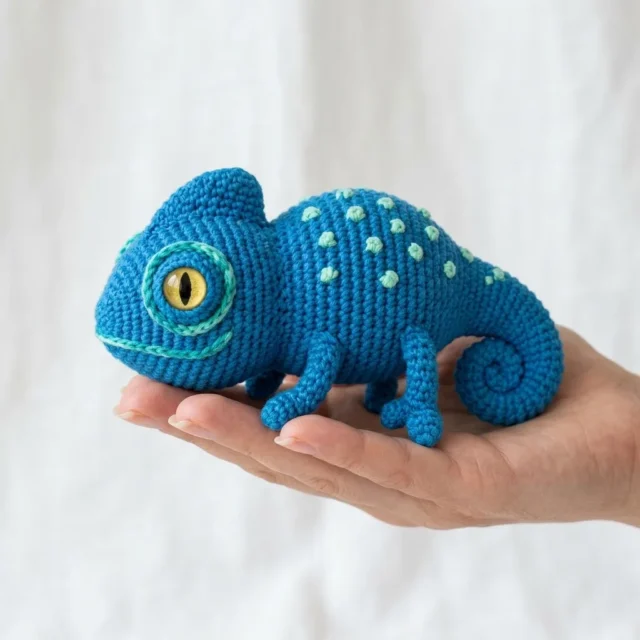
A single crochet chameleon amigurumi you can pose
Single crochet builds a dense, firm fabric for this poseable chameleon amigurumi with wire legs and embroidered spots.
- Skill
- Intermediate
- Time
- 4-6 hours
- Hook
- 3.5 mm
- Yarn
- Worsted
- Rounds
- 40
About this pattern
Single crochet worked in continuous rounds pulls this chameleon's body into a dense, closed fabric with no gaps for stuffing to peek through. Starting from a magic ring at round 1, each stitch sits tight against its neighbor, so by the time the plain rounds arrive, the surface feels firm under the fingers, closer to a tight-woven sock than anything lacy. That density is what lets the later surface-embroidery spots sit raised and visible instead of sinking into loose loops.
The shape builds outward from the body: a nose-to-back torso, a flat head crest ridge, four tube legs, a tapering tail, and two small eye rings. Each piece stays separate until assembly, so you can stuff the body firmly while leaving the legs softer and ready to bend around the floral wire. Pin pieces in place before sewing, since the crest and tail only read as a chameleon once their curves and angles land where you intend.
The swatch in numbers
- Rounds
- 40
- Parts
- 5
- Level
- Intermediate
- Time
- 4-6 hours
- Hook
- 3.5 mm
- Yarn
- Worsted
The yarn and the hook
Yarn
- Main color (MC): Approximately 50 grams of worsted weight yarn in ocean blue or teal
- Contrast color 1 (CC1): Small amount of light mint green for spots and eye ring
- Contrast color 2 (CC2): Small amount of yellow for eye center
- Contrast color 3 (CC3): Small amount of black for pupil
Hook
- 3.5mm crochet hook (US size E/4)
- For amigurumi, you want to go down a hook size or two from what the yarn label recommends. This creates a tighter fabric so the stuffing does not show through.
Notions
- Stitch marker (a contrasting piece of yarn works fine)
- Tapestry needle for sewing and weaving
- Polyester fiberfill stuffing
- One pair of 12mm safety eyes in yellow or gold with vertical slit pupils (dragon or cat eyes)
- Scissors
- Pins for placement
Optional
- Fabric glue for securing eye pieces
- Wire for poseable legs (16 gauge floral wire works well)
Stitches, spelled out
Magic Ring (MR) An adjustable starting loop that closes completely. You wrap yarn around your finger, insert your hook, pull up a loop, chain one, then work your stitches into the ring. Pull the tail to close the center hole.Dense; Chain (ch) The foundation stitch. Yarn over, pull through the loop on your hook.; Single Crochet (sc) Insert hook into stitch, yarn over and pull up a loop (2 loops on hook), yarn over and pull through both loops. This is your main stitch for the entire project.Dense; Increase (inc) Work 2 single crochet stitches into the same stitch. This adds one stitch to your count.; Invisible Decrease (dec) Insert hook through the front loops only of the next 2 stitches, yarn over and pull through both front loops (2 loops on hook), yarn over and pull through both loops. This creates a neater decrease than the standard method.Dense; Slip Stitch (sl st) Insert hook, yarn over, pull through stitch and loop on hook in one motion. Used for joining and finishing.; Fasten Off (FO) Cut yarn, pull tail through final loop, tighten.; Stitch (st/sts) Individual stitch or stitches..
Tension and hand-feel
After round 2, check that the 12 stitches lie flat as a closed disc with the center hole pulled snug, not gapping open.
If the fabric feels loose or the stitches show space between them, move down a hook size so the finished piece stays dense enough that the stuffing will not show through.
Body
The body is worked from the nose toward the back. You will stuff as you go once the opening gets small.
Head Crest
That distinctive ridge on top of the chameleon’s head is worked flat and sewn on.
Legs (Make 4)
All four legs are identical. They are simple tubes stuffed lightly.
Curly Tail
The tail is my favorite part. It naturally wants to curl as you work it.
Eye Rings (Make 2)
These rings frame the safety eyes beautifully.
How the texture is built
- The body's opening rounds increase by six stitches every round (6, 12, 18, 24), the standard sphere increase rate that spreads stitches evenly so the nose end curves instead of cupping flat.
- The head crest is worked in rows, not rounds, turning after each one and skipping the first and last stitch to shave two stitches per row (9 to 7 to 5 to 3); that symmetric taper on both edges shapes the pointed ridge, and working it flat is what lets it lie against the head to be sewn on rather than wrap around anything.
Putting the pieces together
If you swap the yarn
| Acrylic worsted weight | Fabric turns softer and springier under the hand with less stitch definition than cotton; stuffing may show through more readily, so keep the 3.5mm hook or drop to 3.25mm to keep the single crochet tight. |
|---|---|
| Wool-blend worsted weight | Adds loft and a slight halo to the surface, which softens the sharp edges of the head crest and spots; expect more squish once stuffed, so check the eye opening still sits snug against the extra give. |
| DK-weight cotton blend | Produces a smaller, lighter finished chameleon with crisper stitch definition; go down to a 3.0mm hook to keep the fabric dense and plan for less stuffing volume in each part. |
Colorways
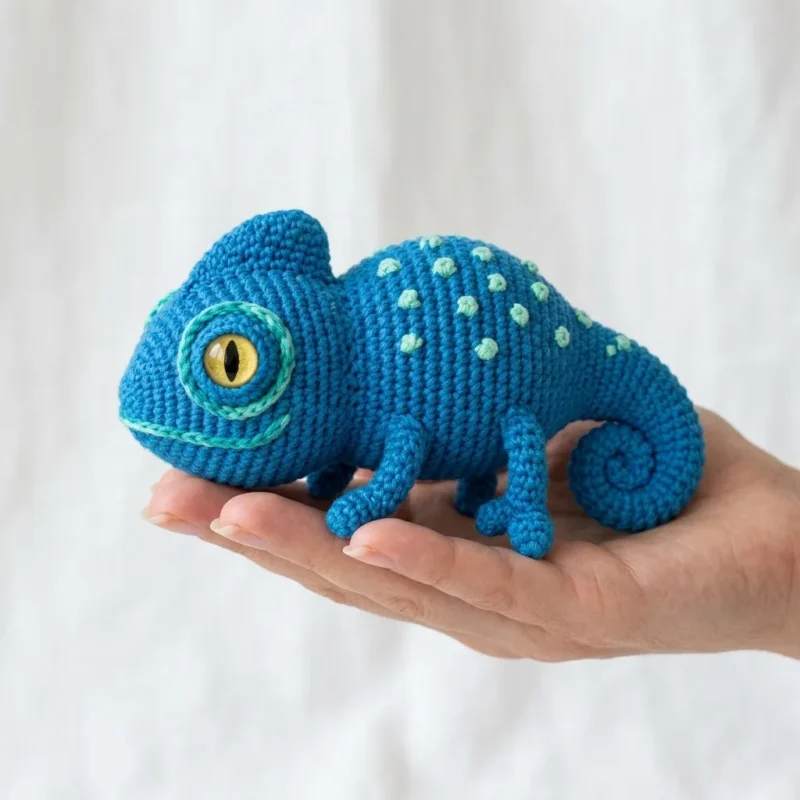
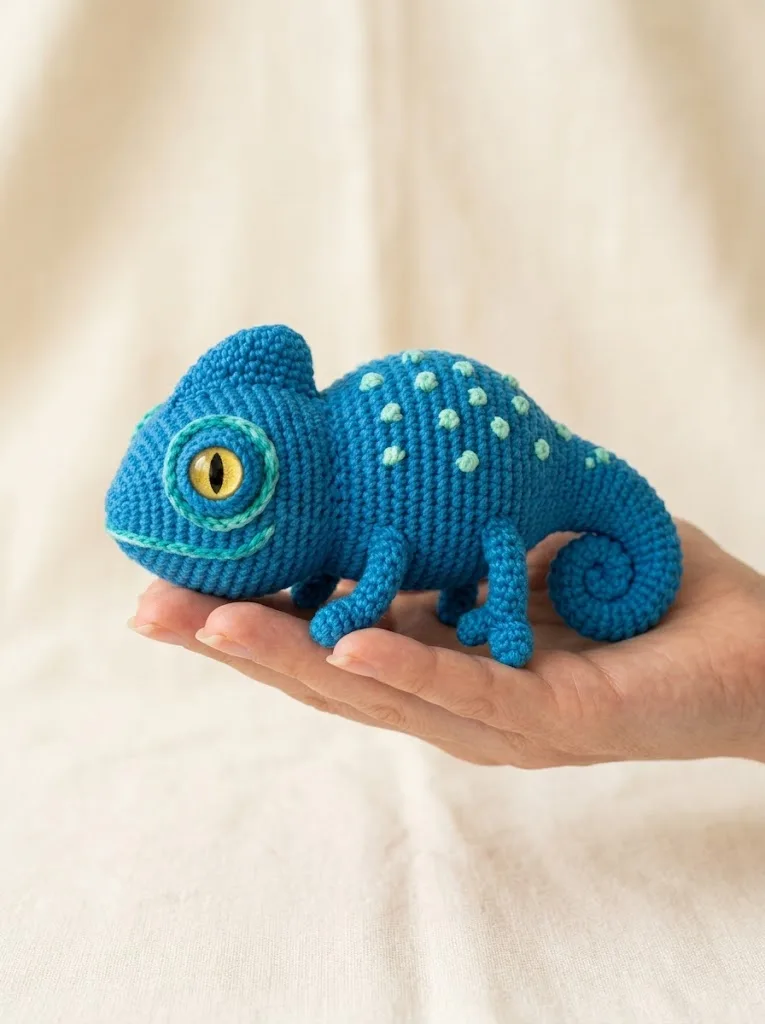
- Ocean Depths MC teal covers the body, head crest, legs, and tail throughout; CC1 mint fills the embroidered spots on the body and both eye rings; CC2 yellow sits at the eye centers; CC3 black marks the pupils only.
- Mint-Tipped MC ocean blue covers the body and legs; CC1 mint takes over the head crest and the final rounds of the curly tail, in addition to its usual spots and eye rings; CC2 yellow and CC3 black stay at the eye centers and pupils as usual.
Washing and blocking
Hand wash the finished piece in cool water; cotton blend fibers hold their shape better than they tumble, so skip the washing machine to keep the firm single crochet fabric from loosening.
Lay flat to dry away from direct heat; cotton holds moisture longer than acrylic, and the fiberfill inside dries slower than the surface, so give it extra time before handling the legs or tail.
Reshape the tail curl and leg wire by hand once dry, and store the chameleon upright or on its side rather than packed tight, so the stuffed body keeps its rounded shape instead of flattening against other items.
When it does not look right
- The eye area puckers once the safety eyes are inserted.
- The stuffing behind the eye position is too soft to support the washer; pack extra fiberfill directly behind the eye opening before pushing the post through, then secure the backing with a small dab of fabric glue.
- The head crest curls sideways instead of standing up straight.
- The decrease rows at the edges were not worked evenly, or the piece was sewn on without pinning first; pin the crest along its center line before stitching so the taper sits symmetrically.
- The legs will not hold a bent pose.
- No wire was inserted, or the floral wire used was thinner than 16 gauge; thread the wire through the leg before stuffing so it has something firm to grip against.
Close-ups
Questions people ask
Do the legs need wire to work, or is it only for posing?
The wire is only there to let you bend and hold a pose; the legs are complete, stuffed tubes without it. Skip it if a chameleon that sits in one fixed position works for you.
How much contrast color yarn is actually needed for the spots and eyes?
Each contrast color is listed as a small amount, since CC1 mint only covers the spots and eye rings, CC2 yellow fills the eye centers, and CC3 black marks just the pupils. A single small skein or leftover scraps of each will cover the whole project.
Can the curly tail be left straight instead of curled?
Yes, the curl comes from how the finished tail is shaped and set rather than from the stitch pattern itself. Leave it uncurled and it will still taper the same way through its 8 rounds.
Why go down a hook size from what the yarn label suggests?
A smaller hook, such as the 3.5mm used here, tightens the single crochet fabric so the fiberfill stays hidden instead of poking through gaps. This matters more on amigurumi than on wearables, where a looser gauge would be fine.
New patterns, as they are filed
One short email when a batch lands, with the feel of each.