

42 rounds · filed under dense · 15 of them
Amigurumi · added 16 Sep 2026
Amigurumi cockatiel plush crochet pattern with wings and tail
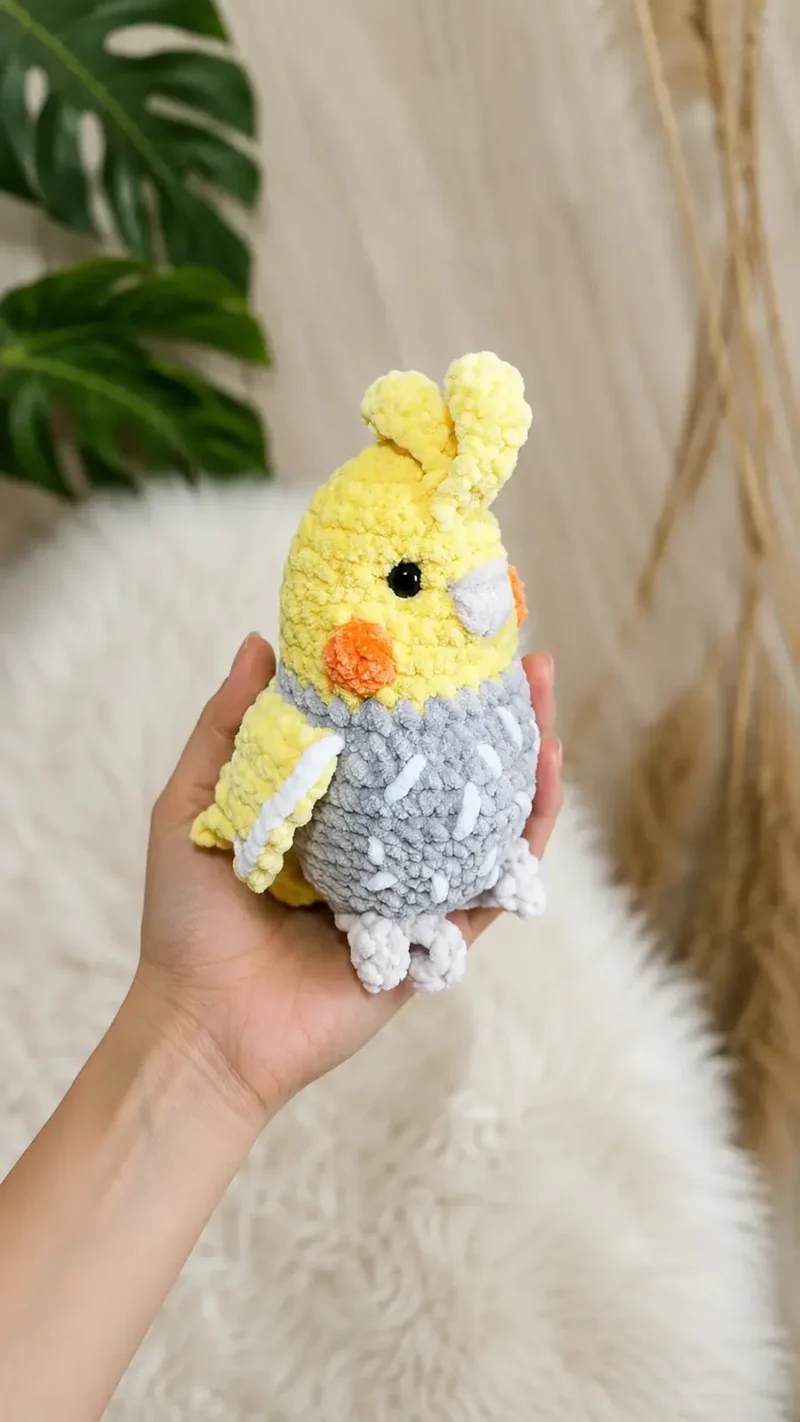
Single crochet builds a dense, poseable body for this amigurumi cockatiel plush with flat-worked wings and a fanned tail.
- Skill
- Intermediate
- Time
- 4-6 hours
- Hook
- 4 mm
- Yarn
- Worsted
- Rounds
- 42
About this pattern
Worked in single crochet through continuous spirals, this cockatiel body comes out tight and dense under the fingers, with almost no gap between stitches for stuffing to peek through. That closeness is what lets the head and body hold a firm, round shape once filled rather than sagging into a lump. The gray and yellow color blocks sit flush against each other with no ridge, since the color change happens on the last pull-through rather than at the start of a round.
The finished bird is compact and front-heavy, with a rounded head and body carrying a fanned tail and two flat wings that stand slightly proud of the surface. Set it upright on a shelf so the tail props it at a slight backward lean, or tuck it into a child's hands where the firm stuffing keeps its shape through handling rather than flattening out.
This is a completely no-sew design: the claws, tail feathers, and wings are crocheted as their own small pieces and then joined directly into the head and body rounds with a single connecting stitch, rather than being seamed on afterward with a needle.
The swatch in numbers
- Rounds
- 42
- Parts
- 5
- Level
- Intermediate
- Time
- 4-6 hours
- Hook
- 4 mm
- Yarn
- Worsted
The yarn and the hook
- 3 colors of yarn
- 4mm hook
- stuffing
- Safety eyes 8mm
- sewing needle for the beak
Stitches, spelled out
R Row; Rnd Round; ch chain; hdc half double crochetDense; dc double crochetDrape; st stitch; inc increase; dec decrease; slst slip stitch; F/O fasten off; BO bobble stitch (4 loops on hook)Squish.
Tension and hand-feel
The original pattern does not specify a gauge or finished size, so use round 6 of the head and body as your own reference point: lay the piece flat and check that it measures the same across in every direction, since a lopsided circle here means tension is loosening or tightening as you go.
If the fabric feels loose enough to show stuffing through the gaps, drop to a hook a half size smaller and rework the round rather than pushing on with slack stitches.
Claws x2
Tail feathers x1
ch1 and turn after every R
Wings x2
ch1 and turn after every R
F/0
Head & Body
Start with yellow
Body continued
Change to gray
F/O and close the hole. Embroider the beak between the eyes.
How the texture is built
- The claws are built as a single chain-and-loop piece with two toes chained off the center 3sc before slip-stitching back, then joined to the body with a single connecting stitch through that loop, so the whole foot hangs off one anchor point rather than being sewn at multiple spots.
- Both the tail feathers and the wings turn at the end of every row instead of spiraling continuously, which keeps them flat and gives them a front and back face rather than the rounded tube shape used for the head and body.
- The wing increases land on alternating rows and swap sides (round 2 increases at the end, round 4 increases after a skipped stitch at the start), which curves the wing edge instead of growing it as a straight-sided flap.
If you swap the yarn
| Cotton, worsted weight | Produces a firmer, less stretchy fabric that holds the stuffed shape with less give, and pairs well with the same 4mm hook, though stitches may sit slightly stiffer to work through. |
|---|---|
| Acrylic, DK weight | Makes a smaller, lighter finished bird with a softer drape on the wings and tail; drop to a 3.5mm hook to keep the fabric from turning gappy. |
| Wool blend, worsted weight | Adds a bit more loft and cushion to the stuffed body, though the fabric will felt slightly if machine washed, so hand washing suits it better than the plain acrylic original. |
Colorways
- Classic cockatiel Gray on the head and body rounds, yellow carried onto the crest and cheek patches, with the tail feathers and wings worked in the third color for contrast against the gray body.
- Soft pastel Pale gray for the body and head rounds, a muted cream in place of yellow on the face, and a dusty rose swapped in for the tail feathers and claws.
Washing and blocking
Hand wash the finished bird in cool water to protect the safety eye washers and any glued elements at the beak, since machine agitation can work them loose over time.
Reshape the wings and tail feathers by hand while still damp, smoothing the rows flat so they dry with their intended curve rather than curling inward.
Store the plush stuffed and upright rather than pressed flat in a bin, so the dense single crochet body does not develop a permanent crease.
When it does not look right
- The wings come out different sizes from each other
- Tension drifted between the two pieces since each is worked flat and separately; count stitches at the end of every row against the pattern's row counts before moving on to the next row.
- The head looks lumpy or the eyes sit crooked
- Stuffing was packed in after the eye washers were placed, shifting them out of alignment; snap the washers firmly in place first, then stuff evenly around them before closing round 25.
Close-ups


Questions people ask
Can I use velvet or blanket yarn for this pattern?
Yes, you can use different types of yarn. Just remember to choose a larger hook size that matches your bulkier yarn to keep the stitches nice and tight.
What does the BO abbreviation mean?
The BO stands for a bobble stitch with four loops on your hook. This stitch is used to create the adorable pink cheeks on the sides of the bird's head.
Is this bird project completely no-sew?
Yes, this design is built so that the wings, claws, and tail feathers are crocheted directly into the body pieces as you work up the rounds.
Where exactly should I place the safety eyes?
The safety eyes should be placed carefully between rounds 6 and 7, making sure to leave exactly 6 stitches of space between them.
How do I finish the beak at the end?
You will use a sewing needle and a small piece of contrast yarn to embroider a simple triangle shape right between the eyes after the body is finished.
New patterns, as they are filed
One short email when a batch lands, with the feel of each.