
75 rounds · filed under dense · 63 of them
Amigurumi · added 30 Sep 2026
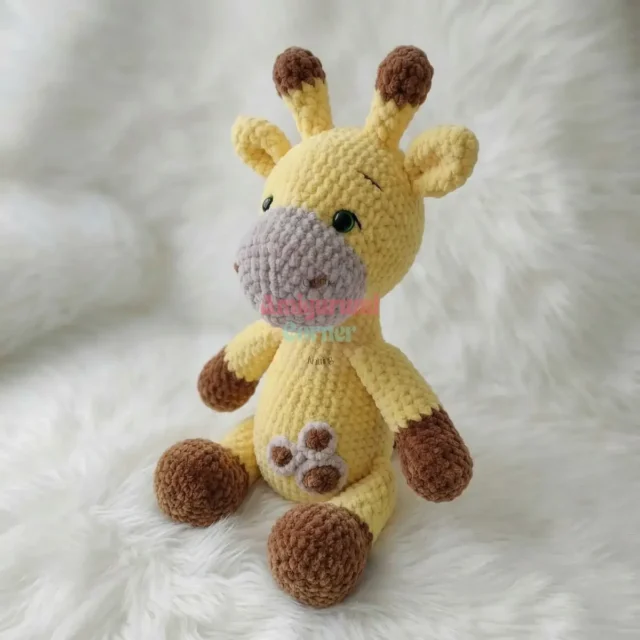
Amigurumi giraffe crochet pattern with sculpted head and horns
Single crochet builds a dense, plush giraffe body with sculpted face and mounted head for stability.
- Skill
- Intermediate
- Time
- 4-6 hours
- Hook
- 4.0 mm
- Yarn
- Bulky
- Rounds
- 69
About this pattern
Single crochet worked in continuous spirals with Himalaya Dolphin Baby produces a tight, dense fabric with almost no gaps between stitches, so the stuffing stays put and the surface reads smooth rather than nubby under your fingers. The plush bulky yarn adds loft on top of that density, giving the finished pieces a soft, slightly springy hand that holds its shape without going stiff.
The shape comes together from separate cones and tubes: rounded limb and head pieces built from a magic ring outward, plus flatter ear and horn pieces layered on top. Work each piece to full firmness before joining, since the legs and arms get crocheted directly into the body at specific rounds rather than sewn on afterward, and the fabric needs to hold that structural weight.
The swatch in numbers
- Rounds
- 69
- Parts
- 6
- Level
- Intermediate
- Time
- 4-6 hours
- Hook
- 4.0 mm
- Yarn
- Bulky
The yarn and the hook
Yarn
- Himalaya Dolphin Baby (bulky/plush):
- Yellow #80313 — just over half a skein
- Brown #80337 — less than half a skein
- Gray #80342 — just under half a skein
Hooks
- 4.0 mm (US G/6) and 3.0 mm (US C/2)
Safety eyes
- 12 mm sparkle safety eyes
- White cotton thread (or color-matching thread) for face sculpting and head attachment
- Black embroidery thread for eyelashes and eyebrows
- Long metal tapestry needle
- Plastic yarn needle
- Scissors
- Stitch marker
- Sewing needles
- 2 knitting needles (for head mounting)
- Polyfill stuffing
- this …
Stitches, spelled out
ch chain; st stitch; sl st slip stitch; sc single crochetDense; inc increase; dec decrease; mr magic ringDense; blo back loops onlyRidge; rnd round; rnds rounds.
Tension and hand-feel
After Round 3 on any piece, lay the small circle flat and check that it measures close to what your yarn label suggests for a bulky weight worked at a tight gauge, since the pattern relies on dense fabric rather than a stated stitch count per inch.
If the circle cups upward instead of lying flat, your stitches are too tight for the increase rate and you should size up the hook; if it ruffles at the edge, drop down a hook size before continuing.
Lower Legs — Make 2
With Brown yarn:
Upper Arms — Make 2
With Brown yarn:
Head
With Gray yarn:
Note: Attach safety eyes between Rnds 12–13, centered on the head with 10 stitches between the eyes.
Ossicones (Horns) — Make 2
With Brown yarn:
Note: Rnd 4 is not listed in the original pattern — this appears to be a numbering gap. Rnd 5 follows directly from Rnd 3 as written.
Leave a long yarn tail. Sew horns onto the head 3 rounds above the eyebrows , with 4 stitches between them.
Ears — Make 2
Tail — Worked As an I-Cord (In-Progress)
Construction note: With 1 loop on hook, insert hook under the front loop only of the next 3 stitches without working them. Remove hook, turn work, insert hook back through the first and last loops together and sc to join. Work 2 sc across. Remove hook. Continue working 3 sc per row, removing hook and turning at the end of each row. Work 6–7 rows total in Yellow. Fasten off with sl st across the final row.
With Brown yarn , attach 5 fringe tassels approximately ¾ in (2 cm) long at the tail tip.
Resume body in Yellow yarn: Continue Rnd 13: 9 sc to end of round (48)
How the texture is built
- Every piece opens with the same 6-12-18 increase sequence (Rnd 1: 6 sc in mr, Rnd 2: inc in each st around, Rnd 3: (1 sc, 1 inc) x6), spacing increases evenly around the ring so the base grows into a flat, non-puckered disc before the sides begin.
- The legs and arms are joined directly into the body at Round 13 and Round 27 rather than sewn on after stuffing, which means the body fabric has to carry the seam load at those exact rounds and needs firm stuffing there to keep the join from sagging.
- The tail is worked as an i-cord instead of a standard increasing tube, producing a narrow, rope-like column of fabric with no flat base, suited to a part that needs to hang rather than stand.
Putting the pieces together
If you swap the yarn
| Acrylic bulky weight | Holds its shape with less loft than the plush yarn, stitches stay crisper and more defined, and the 4.0 mm hook still produces a dense fabric, though the surface feels less velvety against the hand. |
|---|---|
| Cotton worsted weight | Drops the loft entirely for a firmer, less plush fabric with visible stitch definition; size down to a hook closer to 3.5 mm to keep the tight gauge the amigurumi needs, and expect the finished pieces to feel heavier and less squeezable. |
| Chenille or velvet-style bulky | Gives a similarly soft hand to the plush yarn but with less stitch definition, so increases and rounds blend together visually; stuffing shows through less, which helps hide any unevenness in the sculpting. |
Colorways
- Classic contrast Yellow for the legs, arms, body, and head base; brown for the spots sewn on afterward with cotton thread; gray reserved for the horns and hoof tips.
- Muted tonal Gray as the dominant color across the head and body, yellow limited to the lower legs and ears, brown kept to the horns and a scattering of spots for contrast without a strong color break.
Washing and blocking
Hand wash the finished giraffe in cool water, since the plush bulky yarn can felt or flatten if agitated or exposed to hot water and a machine cycle.
Lay flat to dry away from direct heat, reshaping the limbs and head gently while damp so the dense single crochet fabric dries in its stuffed shape rather than a compressed one.
Store upright or unpacked rather than crushed under other items, since the plush pile can mat down permanently if the fabric stays flattened for long periods.
When it does not look right
- The head wobbles or leans after mounting
- The knitting needles used to mount the head crosswise through the neck opening may not be centered evenly, or the neck stuffing is too soft to hold them steady; re-center the needles and pack the neck area more firmly before securing.
- The horns or ears sit crooked or too close together
- Placement is measured in rounds and stitches from the eyebrows and from each other, so a miscount during attachment throws off the spacing; recount the rounds above the eyebrows and the stitches between pieces before sewing with the long yarn tails.
- The legs or arms pull away from the body at the seam
- These pieces are joined directly into the body fabric at Round 13 and Round 27, and thin stuffing at the join point lets the seam flex under weight; add extra stuffing at those exact rounds before closing the join.
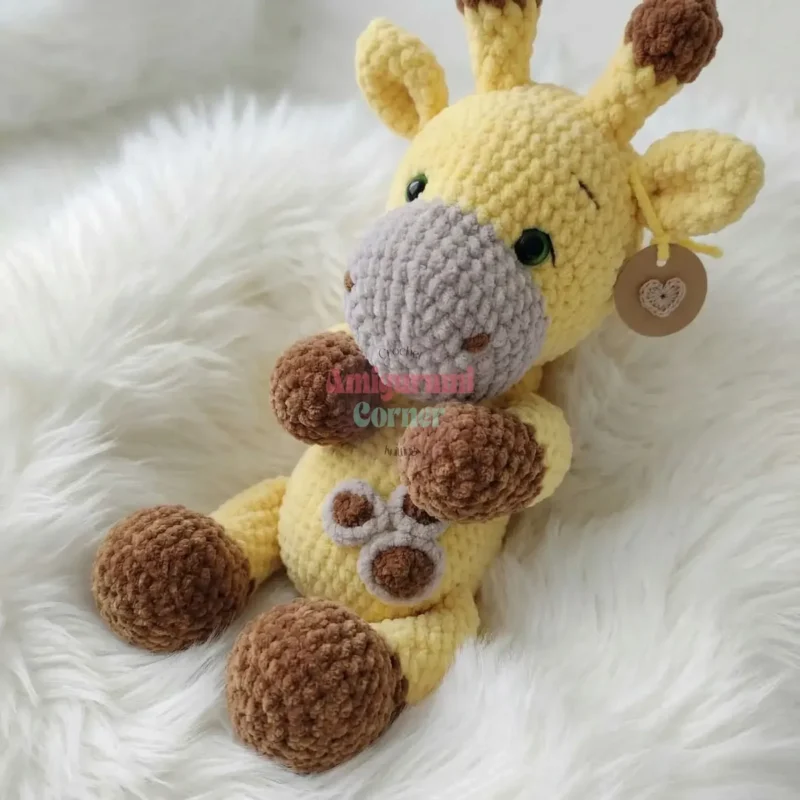
Close-ups

Questions people ask
Why does the head get mounted with knitting needles instead of just sewn on?
Inserting the knitting needles crosswise through the neck opening gives the joint a rigid internal support before the yarn tension takes over, which keeps the dense but still flexible fabric from sagging under the weight of the stuffed head. It is a construction step, not a decorative one.
Do the spots need to be crocheted separately?
No, the spots are sewn onto the finished body and head afterward using cotton thread rather than worked as crocheted pieces. This keeps the base fabric of the body a single smooth color until the spots go on.
Why work in continuous spirals instead of joined rounds?
Continuous spirals avoid the seam line a joined round would leave, keeping the single crochet fabric smooth and gap-free around the whole piece. A stitch marker is needed to track the round start since there is no join stitch to mark it visually.
How firm should the stuffing be, especially in the neck?
The neck needs notably firmer stuffing than the rest of the body since it has to support the weight of the head once mounted with the knitting needles. Underfilled neck fabric will flex or dip under that load, so pack it more densely than the arms or legs.
New patterns, as they are filed
One short email when a batch lands, with the feel of each.