
60 rounds · filed under dense · 52 of them
Amigurumi · added 3 Oct 2026
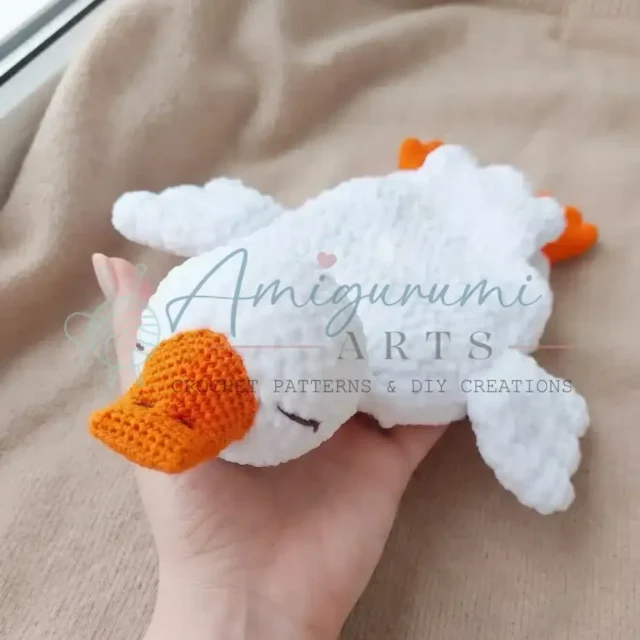
Amigurumi goose with a hidden pocket, worked in single crochet
Single crochet builds the dense, stuffable fabric of this amigurumi goose, complete with a hidden pocket pouch.
- Skill
- Intermediate
- Time
- 4-6 hours
- Hook
- 3.25 mm
- Yarn
- DK
- Rounds
- 56
About this pattern
Single crochet carries almost every part of this goose — feet, tail, wings' base sections, neck, and head — and it packs the loops tight enough that stuffing never pushes through. Worked in a continuous spiral, the fabric has no seam line running up the back of the head or down the feet, just an unbroken close grid that holds its shape between your fingers. Where the wings shift into half double and double crochet, the fabric opens up, the loops stand taller and looser, giving that one section more spring and a visible ridge where the stitch height changes.
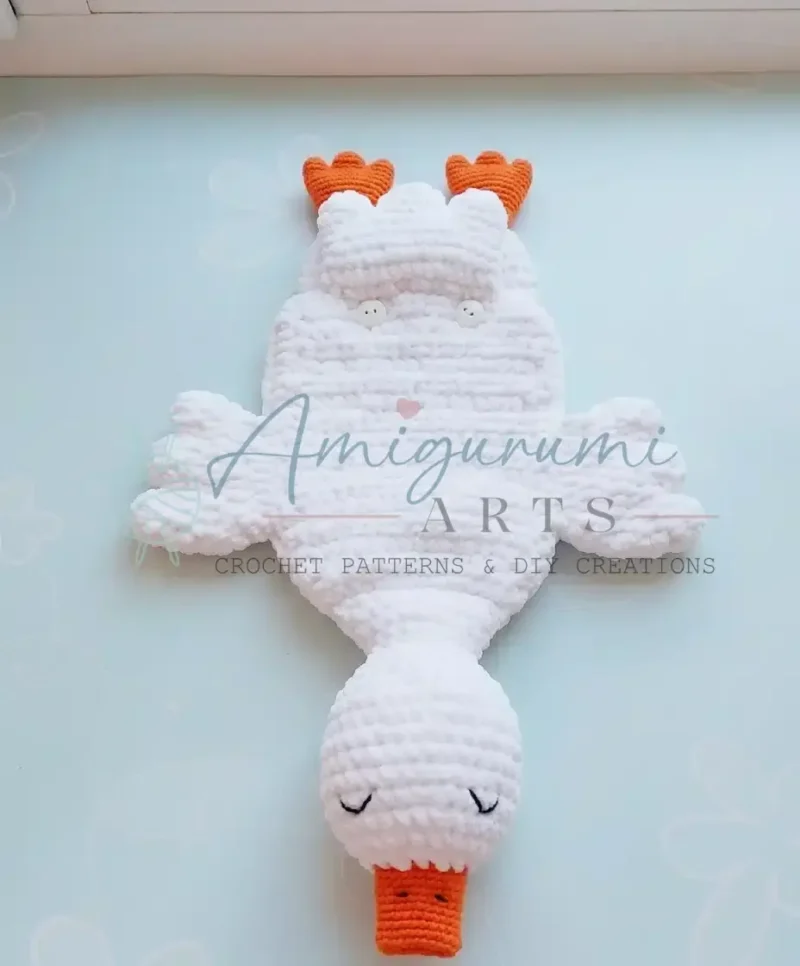
The body builds as two flat panels — a front worked over seven rounds and a smaller back of just two — joined edge to edge with slip stitch, leaving a gap for the pocket. The rest assembles as rounded, stuffed sections: egg-shaped feet built from three joined toes, a layered tail, and a head that tapers up from the neck. Stuff the spiral parts firmly before closing them, then sew everything to the joined body panels, leaving the pocket opening clear for a zipper or a pair of buttons.
The swatch in numbers
- Rounds
- 56
- Parts
- 6
- Level
- Intermediate
- Time
- 4-6 hours
- Hook
- 3.25 mm
- Yarn
- DK
The yarn and the hook
- Yarn (main): WOLANS BUNNY BABY — white, approximately 1.5 skeins (DK / Light Worsted weight; soft, fluffy fiber recommended)
- Yarn (accent): GAZZAL BABY COTTON — orange (for feet and beak) and brown (for eye embroidery); small amounts of each (Sport / DK weight)
- Hook (main): US D-3 / 3.25 mm or US E-4 / 3.5 mm — for main body pieces
- Hook (detail): US B-1 / 2.0 mm — for feet and beak
- Closure: One small zipper for the pocket opening, OR 2 small buttons
Stuffing
- Polyfill fiberfill (hollowfiber, or any soft stuffing of your choice)
- Yarn needle / tapestry needle — for sewing parts and embroidering details
- Stitch markers
- Scissors
Stitches, spelled out
ch Chain; dc Double CrochetDrape; dec Invisible Decrease (insert hook in front loop of next 2 sts, pull up loop, yarn over, pull through all 3 loops); hdc Half Double CrochetDense; inc Increase (2 sc in the same stitch); MR Magic RingDense; sc Single CrochetDense; sl st Slip Stitch; SM Stitch Marker.
Tension and hand-feel
After Round 2 of any spiral piece, lay the circle flat and check that it sits without buckling or cupping in the middle — the stitches should look like they belong on a flat plane, not a bowl.
If it cups, your tension is too tight and the next rounds will draw in; if it ruffles at the edge, go down a hook size until the disc lies flat before moving on.
Feet
Make 2Use GAZZAL BABY COTTON (orange) and US B-1 / 2.0 mm hook.
Stuff lightly as you work.
Crochet three toes for each foot, then join them together.
Set aside. Make the second foot the same way. Both feet will be crocheted directly into the body.
Tail
Use WOLANS BUNNY BABY (white). Do not stuff.
Crochet three sections and join them, just like the feet.
Set aside. The tail will be crocheted directly into the back body panel.
Wings
Make 2Use WOLANS BUNNY BABY (white). Do not stuff.
Crochet three small sections, then join them.
Make the second wing the same way.
Body — Front Panel
Use WOLANS BUNNY BABY (white). Work flat in turned rows.
Turning chains at the start of each row do not count as stitches.
Decreases are worked in hdc.
Neck and Head
Continue from the body join without cutting yarn, working in a continuous spiral.
If you'd like a longer neck, repeat Round 5 two or three more times before continuing.
Body — Back Panel
Work Rows 1–16 exactly as the Front Panel.
How the texture is built
- The feet and tail both build from three separate spiral sections — one middle piece and two side pieces — joined into a single working round rather than shaped with increases alone; this is what gives the splayed, multi-toe silhouette instead of a plain cone.
- The wing's joining round combines three sections into 27 stitches, then Round 2 swaps a run of single crochet for half double and double crochet along the top edge, raising that portion of the fabric to create a curved, feathered profile rather than a flat oval.
- The body is worked as two unequal flat panels — seven rounds for the front, two for the back — joined by slip stitch with a deliberate gap left in the seam; the shallow back panel exists only to close the pocket, not to carry its own shaping.
Putting the pieces together
If you swap the yarn
| cotton DK | Stitches firm up and show more definition, drape drops to almost none, stuffing stays fully hidden, and the same D-3/3.25 mm or E-4/3.5 mm hook still suits the body. |
|---|---|
| acrylic worsted | The toy grows slightly larger at the same stitch count, the surface loses the soft halo of the baby yarn, and a hook one size up keeps the fabric from stiffening. |
| fuzzy chenille-style baby yarn | The nap thickens and hides stitch detail almost completely, the finished piece needs a touch more stuffing to hold its shape through the looser loops, and sizing up the main hook keeps the fabric from becoming too dense to shape. |
Colorways
- Classic goose White for the full body, feet, tail, wings, and head; orange for the feet soles and beak; brown for the embroidered eyes.
- Monochrome goose White for the body, tail, wings, and head as given; a pale gray in place of orange for the feet and beak; a darker gray in place of brown for the eyes.
Washing and blocking
Hand wash in cool water and avoid wringing the soft main yarn, since twisting can flatten the fluffy nap permanently.
Reshape the feet, wings, and head by hand while still damp, then dry flat so the stuffing settles evenly instead of sagging to one side.
Store away from direct sunlight to keep the white main yarn from yellowing, and keep the pocket closure fastened so the opening doesn't stretch out of shape in storage.
When it does not look right
- A wing lies flat instead of curving along its top edge
- The half double and double crochet stitches in Round 2 of the joining section were worked as plain single crochet; recount the 27 stitches from the joining round and place the taller stitches exactly where the pattern marks them.
- The three toes on a foot splay unevenly
- The side toes were joined to the middle toe at uneven points in the round; space the join evenly around the middle toe's 12 stitches before continuing to stuff and close.
- The pocket opening puckers along one edge
- The two-round back panel is being stretched to match the seven-round front panel without easing; slip stitch the seam a little looser along the back panel edge so neither panel pulls tight.
Close-ups

Questions people ask
Why does the front panel have seven rounds but the back panel only two?
The front panel carries the body's main shaping, while the shallow back panel exists mainly to close the pocket opening. Joining the two by slip stitch, with a gap left unworked, is what forms the pocket access.
Can the zipper or buttons be left out of the pocket opening?
Yes, the opening will still work as a pocket without either closure. Without one, though, the gap stays open and small items can slip back out.
Do the wings need any wire or stiffener to hold their curve?
No, the half double and double crochet round in the wing construction raises the fabric enough on its own to hold a curved profile. Stuffing is not used in the wings, so the stitch height alone carries the shape.
New patterns, as they are filed
One short email when a batch lands, with the feel of each.