
104 rounds · filed under dense · 93 of them
Amigurumi · added 1 Oct 2026
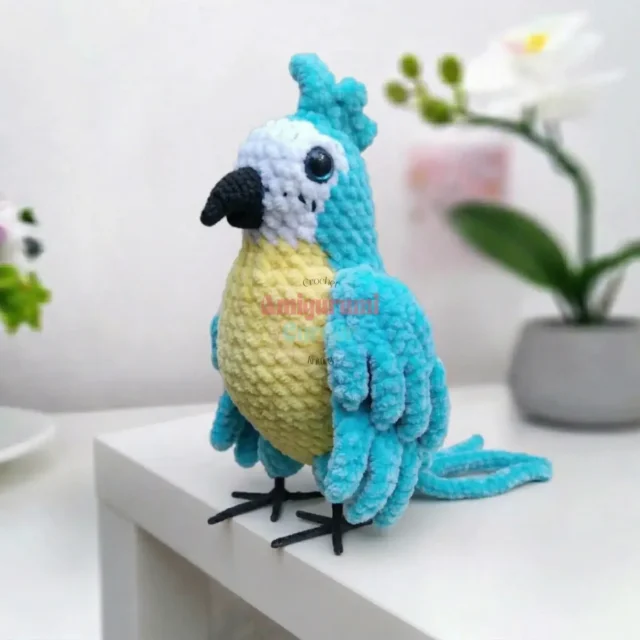
Amigurumi parrot pattern with color-block shaping
Single crochet worked in a tight spiral builds a dense, stuffing-proof shell for this color-blocked amigurumi parrot pattern.
- Skill
- Intermediate
- Time
- 6-9 hours
- Hook
- 2.5 mm
- Yarn
- Worsted
- Rounds
- 98
About this pattern
Every part of this parrot comes from single crochet worked tight — the pattern calls for a 2.5 mm hook specifically to keep the spiral dense enough that fiberfill never peeks through. Under your fingers the head and body feel firm and slightly stiff rather than soft or stretchy, the fabric closing in on itself round by round with no gaps between stitches. That tightness is what lets the shape hold its own without sagging once stuffed.
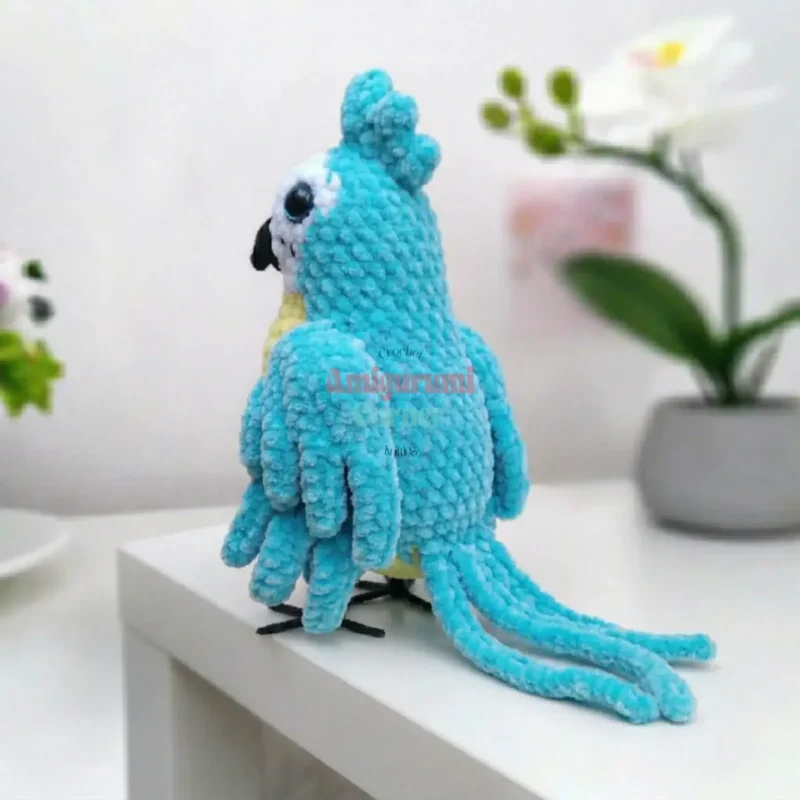
The head and body form one continuous rounded shape worked in a single spiral, while the beak, wings, tail, and crest are separate small panels made the same tight way and sewn on afterward. Wings and tail each come in two layered panels joined along one edge, so they sit slightly offset like real overlapping feathers rather than lying as a single flat shape. Wire goes into the feet before crocheting, giving the finished bird a pose that stands rather than one that only sits.
The swatch in numbers
- Rounds
- 98
- Parts
- 8
- Level
- Intermediate
- Time
- 6-9 hours
- Hook
- 2.5 mm
- Yarn
- Worsted
The yarn and the hook
Yarn
- Light worsted / DK weight (approx. 200 g total)
- Blue yarn (main color — head and body sections)
- White yarn (face and body accent)
- Yellow yarn (chest and belly)
- Additional color for beak (gray or dark yellow)
Hook
- 2.5 mm (recommended for tight amigurumi tension)
Safety eyes
- 2 × 8–10 mm black safety eyes
Polyfill stuffing
- Medium amount
- Floral wire / steel wire: 0.9–1 mm diameter, approx. 30–40 cm
- Electrical tape (insulating tape): For securing wire ends
Tapestry needle
- Large eye for sewing parts together
- Straight pins / skewers: For positioning parts before sewing
- Scissors
- Black embroidery thread: For face feather detail
Stitches, spelled out
ch Chain; sl st Slip Stitch; sc Single CrochetDense; inc Increase (2 sc in same stitch); dec Decrease (invisible decrease: insert hook through front loops of next 2 stitches); mr Magic RingDense; CC Color Change; ( ) Repeat the stitches inside brackets the number of times indicated; [ ] Total stitch count at end of round.
Tension and hand-feel
After round 2 of the head, count stitches — the pattern expects 12 at this point, and if the count runs higher or lower than that, the spiral is likely too loose or too tight to hold its shape.
Head & Body (Solid Color Version)
Work in continuous spiral. Stuff as you go.
Before crocheting, form a wire armature for each foot: bend 0.9–1 mm floral wire into a foot shape with toes (approx. 5 cm tall, 5 cm toe-to-toe span). Wrap each individual toe with yarn or thread and secure with tape.
Head & Body (Color-Change Version)
Blue = B, White = W, Yellow = Y. Work in continuous spiral. Stuff as you go.
Beak — Upper Beak
Work in continuous spiral.
Wings — Wing Panel 1 (Make 2)
Worked in flat rows. Turn work after each row.
Row 1: ch 19
Wings — Wing Panel 2 (Make 2)
Row 1: ch 15
Tail — Tail Panel 1
Row 1: ch 27
Tail — Tail Panel 2
Row 1: ch 30
Crest
Row 1: ch 6
How the texture is built
- The head and body start from 6 sc in a magic ring while the beak starts from only 4, giving the beak a narrower, more pointed taper than the rounded body it attaches to.
- Wings and tail are each built as two separate panels — 9 rounds per wing panel, 5 rounds per tail panel — rather than one shaped piece, because sewing two layers together along a single edge is what lets them overlap for the layered feather effect; a single piece worked alone could not do that.
Putting the pieces together
If you swap the yarn
| Acrylic, worsted/DK weight | Closest match to the pattern as written — holds the 2.5 mm hook size, keeps the same dense, stuffing-proof fabric, and needs no adjustment to stitch tension for the wire-reinforced feet. |
|---|---|
| Cotton, DK weight | Produces a stiffer, less stretchy fabric with crisper color-change edges, but the lack of give makes it harder to ease stuffing evenly around the wire feet armature; sizing up to a 3 mm hook can loosen the stitches enough to compensate. |
| Wool-blend, worsted weight | Adds drape and a soft halo that blurs the sharp line between color blocks on the Color-Change head, so a tighter tension or a 2 mm hook helps keep the shaping as dense as the pattern intends. |
Colorways
- Classic macaw Blue carries the head and body as the main color through most of the Color-Change Version rounds, white sits as the face patch introduced around round 3–4, yellow fills the chest and belly in the later body rounds, the crest goes in white to stand out against the blue head, and both wing panels and both tail panels stay blue to match the body.
- Sun conure Yellow becomes the main color across the head and body rounds instead of blue, white is kept to the same small face patch, blue is moved out to the wing panels and tail panels only, the crest goes in blue to contrast the yellow head, and the beak works in dark yellow to blend with the body rather than standing apart.
Washing and blocking
Hand wash in cool water only, and avoid prolonged soaking — the floral wire armature inside the feet can shift or corrode if left wet too long.
Lay the parrot flat to dry away from direct heat; the electrical tape sealing the wire ends can loosen if left near a radiator or dryer.
Reshape the stuffed head and body while still slightly damp, then store the piece standing on its wired feet rather than on its side so the yarn-wrapped toes keep their bend.
When it does not look right
- The parrot tips over instead of standing on its feet.
- The wire armature wasn't wrapped tightly enough around each toe before crocheting; re-wrap every toe section individually with yarn and tape, then work the foot stitches snugly around the wire so it can't shift inside.
- The wing or tail panels pucker instead of lying flat once sewn together.
- Sewing the joining edge too tightly pulls the two layers inward; pin both panels flat with straight pins first, then sew with even, unhurried stitches rather than pulling the thread taut the whole way across.
Close-ups

Questions people ask
Should the solid-color or color-change head and body be used?
Only one version is needed, not both — the solid version runs 30 rounds in a single color, while the color-change version runs 26 rounds with blue, white, and yellow sections worked in. The color-change version takes more attention to track where each color starts within a round, but it isn't a longer piece.
Why is the beak crocheted separately instead of continuing straight from the head?
The beak is its own 9-round panel starting from 4 sc in a magic ring, giving it a tighter, more pointed cone than the head's rounder shaping allows. Working it apart also lets it hold its own distinct color before being sewn onto the face.
Is the electrical tape on the wire ends necessary?
Yes — the taped ends keep the cut wire tips from poking through the yarn wrap and the crocheted foot stitches once the armature is covered. Skipping it risks a sharp point working its way to the surface over time.
How much should the head be stuffed before moving into the body?
The materials list calls for a medium amount of fiberfill, and the instructions say to stuff as you go — fill the head lightly first rather than packing it solid, then keep adding small amounts as each new section of the spiral closes in.
New patterns, as they are filed
One short email when a batch lands, with the feel of each.