
15 rounds · filed under dense · 6 of them
Amigurumi · added 30 Sep 2026
Plush bee keychain: a small amigurumi charm pattern
Continuous single crochet spirals in plush yarn build a dense, huggable bee keychain charm with tiny bobble limbs.
- Skill
- Beginner
- Time
- 2-4 hours
- Hook
- 3.75 mm
- Yarn
- Worsted
- Rounds
- 9
About this pattern
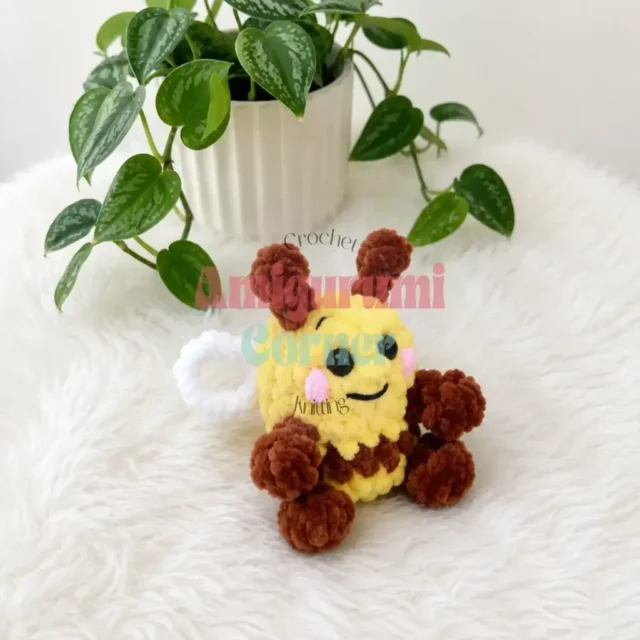
Worked in continuous single crochet spiral, the plush or velvet yarn packs each round close enough that no fiberfill shows through, giving the finished bee a dense, slightly springy feel under the fingers. The nap of the yarn softens the ridge lines typical of sc, so the surface reads smooth and huggable rather than ropey. Brown bobble stitches for the legs and arms add small raised bumps against that flat field, giving your hand something to catch on as you turn the piece over.
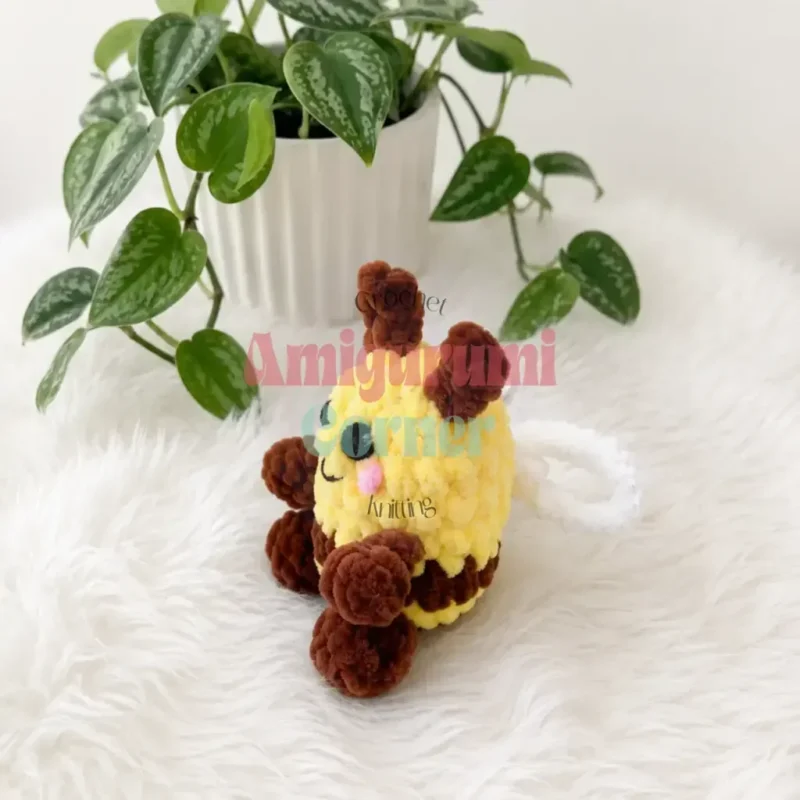
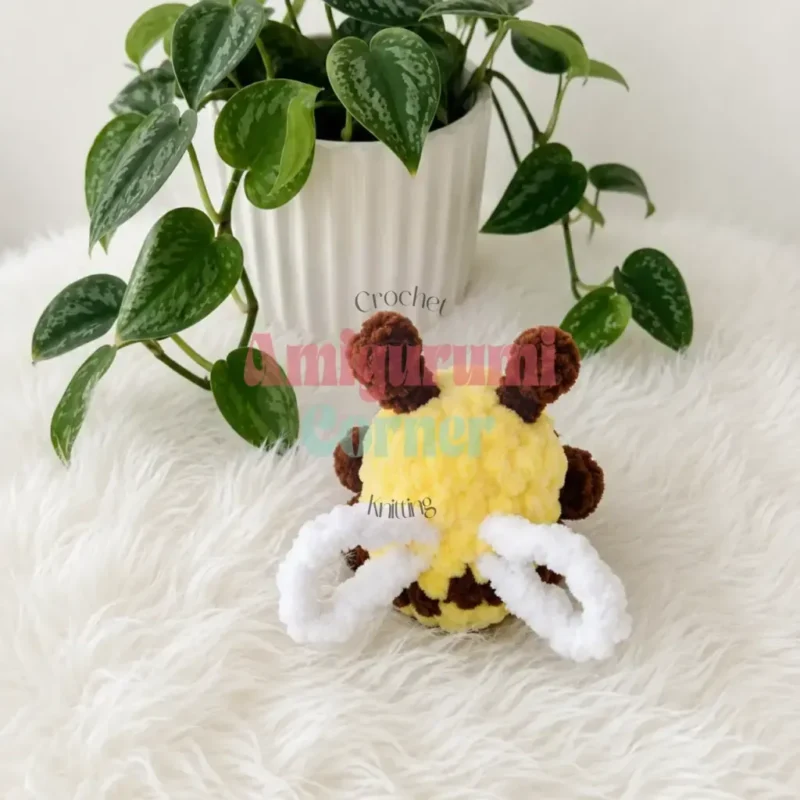
The result is a round, compact head-and-body in one piece, small enough to clip onto a bag or keyring rather than sit on a shelf. Antennae curl up from the crown, wing loops sit flat against the back, and four brown bobble limbs poke out from the sides, giving the shape enough detail to read as a bee at a glance. Once stuffed firmly and closed, thread a keyring or clasp through the top stitches and it is ready to carry.
The swatch in numbers
- Rounds
- 9
- Parts
- 3
- Level
- Beginner
- Time
- 2-4 hours
- Hook
- 3.75 mm
- Yarn
- Worsted
The yarn and the hook
- Plush/velvet yarn, approximately 100g/120m, in yellow, brown, and white
Crochet hook
- US size E-4 (3.75 mm) — or sized to match your yarn weight and gauge
Safety eyes
- 8mm, 1 pair
- Fiberfill stuffing
- Stitch marker
- Yarn needle (tapestry needle)
- Scissors
- Yellow embroidery thread or yarn scrap (for the nose)
- Pink embroidery thread or blush pastel (for cheeks, optional)
Stitches, spelled out
ch Chain; dc Double CrochetDrape; dec Decrease (invisible decrease); inc Increase (2 sc in same stitch); mr Magic RingDense; Rnd Round; sc Single CrochetDense; sl st Slip Stitch; st(s) Stitch(es).
Tension and hand-feel
Gauge is not critical for this project; just make sure your stitches are tight enough that stuffing doesn’t peek through.
Body-Head
Work in continuous spiral rounds in yellow. Switch to brown only where noted for legs and arms, then switch back to yellow. Insert safety eyes between Rnd 7 and Rnd 8. Stuff firmly as you go. This pattern is written in US crochet terminology, and the stitch count is given at the end of each round in parentheses, like this: (12).
Antennae (make 2)
Join brown yarn at the top of the head, on one side. Ch 4, then starting in the 2nd ch from the hook, work back along the chain in sl st (3 sl st total), finishing with a sl st into the base stitch to anchor.
Repeat the same construction on the opposite side of the head to create the second antenna.
Wings (make 2)
Join white yarn at the back of the body during Rnd 5. Chain to your desired length (this sample uses ch 12), then join with a sl st into the next round to form a loop shape.
Repeat the same construction on the opposite side of the body to create the second wing.
How the texture is built
- Rnd 2 does double duty: it increases the body-head from 8 to 16 stitches while also anchoring the two brown leg bobbles at symmetrical points within that same round, so the widening base and the limb placement happen together.
- The legs and arms are not separate pieces — each is a short chain-and-bobble built directly into the working round and closed with a slip stitch back into its own base stitch, which skips any later seaming or stuffing for four small limbs.
- Antennae and wings are worked flat, as chains rather than joined rounds, because they are thin linear appendages with no volume to stuff; the wing loops close with a single slip stitch into Rnd 5 of the body, which is the only place they attach.
Putting the pieces together
If you swap the yarn
| Worsted-weight yarn | Plush yarn is generally bulky to super-bulky in thickness; substituting a thinner worsted-weight yarn will shrink the finished bee considerably and will also change how plump her bobble legs and arms appear, so size your hook accordingly and expect a smaller final charm. |
|---|
Colorways
- Classic Honeybee Yellow carries the Body-Head through all 9 rounds, brown covers the leg and arm bobbles worked into Rnd 2 and Rnd 5 along with both antennae, and white is used for the two wing loops.
Washing and blocking
Hand wash in cold water and avoid wringing, since twisting crushes the pile on plush and velvet yarn.
Reshape the body, antennae, and wings while still damp, then lay flat to dry rather than using a tumble dryer, which flattens the nap.
Store away from rough fabrics or friction so the velvet surface stays fluffed, and keep it out of direct sun to prevent the yellow and brown from fading.
When it does not look right
- Fiberfill peeks through the stitches on the body-head
- Gauge is not critical for this project, but your stitches do need to be tight enough that stuffing doesn’t peek through; drop to a smaller hook and firm up tension, especially through the increase rounds near the start.
- The two leg or arm bobbles sit unevenly
- The bobble stitches weren’t pulled snug before you continued the round, leaving extra slack in the brown yarn; pull the working loop tight after completing each bobble and securing it with the slip stitch into the base stitch, then gently reshape the bobbles with your fingers once the round is finished.
- The wings twist or don't lie flat against the back
- The two chain loops weren’t joined with a sl st at exactly the same point relative to where you started; keep both chains the same length and slip stitch each one into the same spot on Rnd 5, since small inconsistencies here are the most visible asymmetry on the whole project.
Close-ups
Questions people ask
What size finished bee keychain does this pattern make
This pattern creates a small charm-sized bee, roughly the size of a golf ball once stuffed, due to the compact 10-round body and the use of bulky plush yarn. The exact size will vary slightly depending on your hook size and tension. It’s designed to be small enough to hang comfortably from a keyring, zipper, or bag strap.
Can I make this bee without safety eyes
Yes, you can substitute embroidered eyes using black yarn or thread if you prefer not to use safety eyes, or if the keychain is intended for a young child. Simply embroider two small circles or French knots in the same position described for the safety eyes, between Rounds 7 and 8. This keeps the design just as expressive without the plastic hardware.
Why does my bee look lumpy around the legs and arms
Lumpiness around the legs and arms usually happens when the bobble stitches aren’t pulled snug before you continue the round, leaving extra slack in the brown yarn. Make sure to pull your working loop tight after completing each bobble and securing it with the slip stitch into the base stitch. Gently reshaping the bobbles with your fingers after finishing the round also helps them sit smoothly against the body.
What hook size should I use with plush yarn
A US E-4 (3.75 mm) hook works well with most standard plush yarn, but the right size ultimately depends on how tightly you crochet. Test a small swatch first to make sure your stitches are tight enough to prevent stuffing from showing through, while still being easy to work. Sizing up or down by half a millimeter is common depending on individual tension.
New patterns, as they are filed
One short email when a batch lands, with the feel of each.