
12 rounds · filed under dense · 7 of them
Bags · added 26 Sep 2026
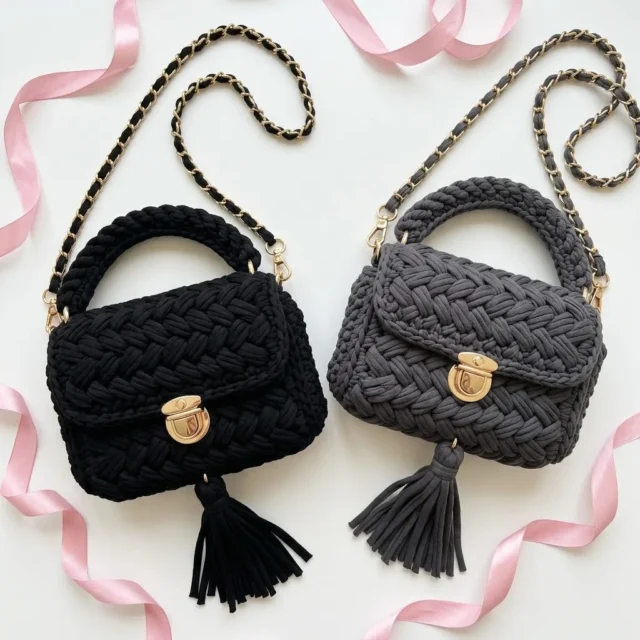
Basket weave crossbody bag in t-shirt yarn
Front post and back post double crochet build a raised basket weave for a sturdy black crossbody bag with side panels.
- Skill
- Intermediate
- Time
- 4-6 hours
- Hook
- 7 mm
- Yarn
- Super Bulky
- Rounds
- 12
About this pattern
Run a hand across the front panel and you feel raised ridges alternating with sunken ones, a real woven texture rather than a flat surface. That comes from working front post and back post double crochet in blocks of three, so the fabric physically pushes forward and back like interlaced strips. T-shirt yarn gives the ridges enough body to hold their shape without going stiff, so the panel stays flexible in hand but firm enough to keep the bag's shape once it's worn.
The body comes together from a woven front panel, a flat sc base, and two sc side panels, all joined into one boxy crossbody shape. Once assembled and fitted with D-rings and lobster clasps for the strap, this is a bag meant for daily carry over the shoulder, holding its structure thanks to the dense t-shirt yarn rather than any stiffener.
Intermediate. If you can work basic stitches confidently and have made at least one or two projects in the round, you can handle this pattern. The basket weave technique is walked through step by step, and attaching hardware like the D-rings and clasp is explained in detail even if you have never done it before.
The swatch in numbers
- Rounds
- 12
- Parts
- 8
- Level
- Intermediate
- Time
- 4-6 hours
- Hook
- 7 mm
- Yarn
- Super Bulky
The yarn and the hook
- Yarn
- T-shirt yarn (also called trapillo or ribbon yarn), approximately 250-300 yards total
- Suggested colors: Black, charcoal gray, cream, or any solid neutral
Weight
- Super bulky, typically 5-7mm thickness
Yarn note
- T-shirt yarn has a soft, slightly stretchy quality that creates beautiful definition in textured stitches. Popular brands include Hoooked Zpagetti, Lily Sugar’n Cream T-Shirt Yarn, and Bobilon. You can also cut your own from old cotton t-shirts if you are feeling resourceful.
- Hook
- 10mm or 12mm crochet hook (depending on your yarn thickness and personal tension)
- Always do a quick swatch to check your gauge
- Notions and Hardware
- Push lock clasp (also called a tongue lock or tucktuck clasp), gold tone
- 2 D-rings , 1 inch size, gold tone
- 2 swivel lobster clasps , gold tone
- Chain strap with leather woven detail, approximately 45-50 inches, or a plain chain strap
- Tapestry needle with large eye
- Stitch markers
- Scissors
- Hardware tip: Search for "purse hardware kit" online. Many sellers offer matching sets that include everything you need.
- Gauge
- 10 stitches and 8 rows = 4 inches (10 cm) in basket weave stitch using 10mm hook and t-shirt yarn.
- Gauge matters here because you want your bag to be structured and hold its shape. If your stitches are too loose, the bag will be floppy. Too tight, and it will be stiff and smaller than intended.
Stitches, spelled out
ch chain; sl st slip stitch; sc single crochetDense; dc double crochetDrape; FPdc front post double crochetRidge; BPdc back post double crochetRidge; st stitch; sts stitches; sk skip; rep repeat.
Tension and hand-feel
After the first few rows of the basket weave section, lay the swatch flat and measure a 4 inch span across the stitches, checking it matches 10 stitches and 8 rows.
Front and Back Panels (Make 2)
Foundation Row Ch 21.
Bottom Panel
Foundation Row Ch 21.
Side Panels (Make 2)
Foundation Row Ch 9.
Flap
Foundation Row Ch 21.
Top Handle
Foundation Row Ch 31.
Tassel
Cut 20-25 strands of t-shirt yarn, each approximately 8 inches long. Fold in half and tie a separate piece of yarn tightly around the fold, about half an inch down from the top. This creates the tassel head. Trim ends evenly.
Assembly Instructions
Take your time with assembly. This is where your bag comes together, and neat seaming makes all the difference.
Step 1: Join the Bottom and Sides Using your tapestry needle and a length of yarn, whip stitch or slip stitch one side panel to each short edge of the bottom panel. You should now have a U-shaped piece.
Step 2: Attach Front and Back Panels Position one basket weave panel against the front edges of your U-shape. Whip stitch along the bottom and both sides. Repeat for the back panel. Tip: Place stitch markers at each corner to keep everything aligned.
Step 3: Attach the Flap Position the straight edge of your flap along the top back edge of the bag, on the inside. Whip stitch securely. The flap should fold forward over the front of the bag.
Step 4: Attach the Handle Sew each end of your top handle to the inside of the bag, positioned at the side seams. Reinforce with extra stitches because this handle takes daily wear.
Step 5: Add D-Rings Before closing your side seams completely, slip a D-ring onto a small loop of yarn or attach it by crocheting a small tab (ch 8, sl st to form loop, sc around loop, attach to bag). Position one D-ring on each side of the bag near the top edge.
Step 6: Install Push Lock Clasp The push lock clasp typically has two parts: the decorative front piece and the back plate with prongs. Mark center front of your flap and center front of your bag body. Push prongs through the crochet fabric and bend flat on the inside. Test the closure before finalizing. Nervous about hardware? Practice on a scrap piece first; t-shirt yarn is forgiving and the prongs slide through easily.
Step 7: Attach Chain Strap Clip your lobster clasps onto the D-rings. Your strap is now removable and adjustable.
Step 8: Add Tassel Thread a small loop of yarn through the base of your tassel and attach it to the D-ring.
Finished Dimensions
Width Approximately 8 inches (20 cm)
Height Approximately 6 inches (15 cm), not including handle
Depth Approximately 3 inches (7.5 cm)
Your finished size may vary slightly depending on your tension and the specific t-shirt yarn brand you use.
How the texture is built
- The front panel starts at 19 dc across and holds that count through rows worked in the alternating FPdc/BPdc pattern, so the basket weave texture builds on a fixed stitch base with no width changes.
- The decrease rows drop the panel from 17 to 15 to 13 stitches two at a time at each end, tapering the top corners gradually rather than in one sharp cut.
- The base and side panels are worked flat in straight rows of single crochet rather than joined in rounds, which keeps those pieces dense and stable to serve as the bag's structural floor and sides once seamed to the front panel.
If you swap the yarn
| Cotton, worsted weight | Produces a much smaller, lighter bag at this stitch count; move down to a 5-6mm hook and expect the basket weave ridges to sit closer together with less depth. |
|---|---|
| Acrylic, super bulky weight | Keeps the scale close to the original with a 10-12mm hook, but the fabric will feel springier and less substantial than the t-shirt yarn's cotton weight. |
| Cotton-blend chunky ribbon yarn | Gives similar flat, ribbon-like structure to t-shirt yarn with slightly less stretch, so basket weave posts stand up a bit stiffer and the panel holds its shape with less give. |
Colorways
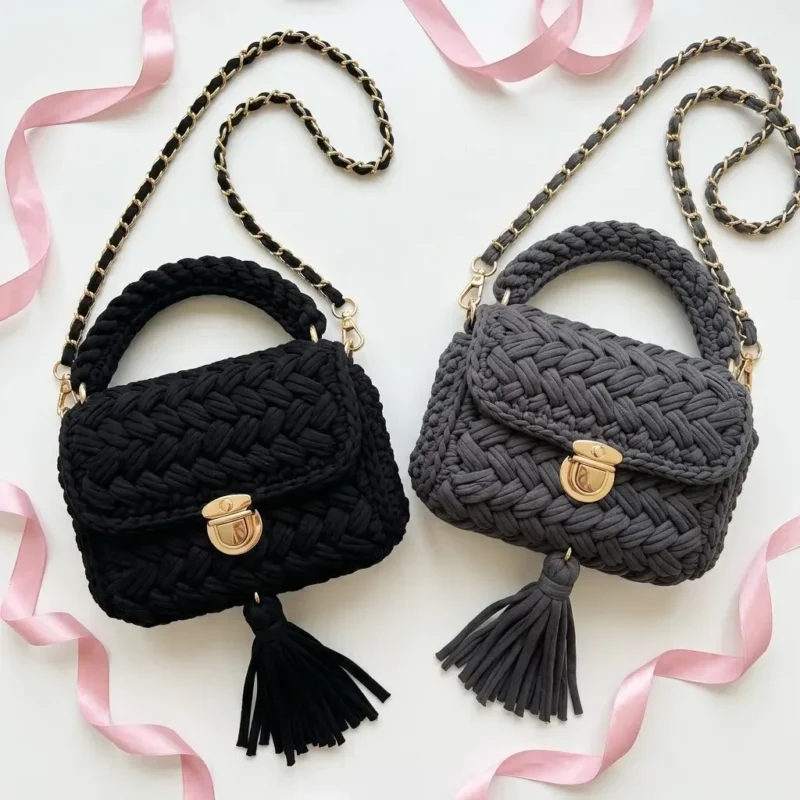
- Solid black Work the front panel, base, and both side panels entirely in black t-shirt yarn, keeping the basket weave texture as the only visual interest against the matte cotton surface.
Washing and blocking
Hand wash the finished bag in cool water since t-shirt yarn is cotton-based and can lose shape if agitated in a machine.
Reshape the front panel and side panels while damp, pressing the basket weave ridges back into place before they dry, since cotton holds whatever shape it's set in.
Lay flat to dry away from direct heat, and store stuffed lightly with tissue so the boxy shape from the base and side panels doesn't collapse in storage.
When it does not look right
- The basket weave texture looks flat instead of raised
- Front post and back post stitches need to wrap fully around the post of the stitch below, not just into the top loops; check that each FPdc and BPdc is worked around the stitch itself.
- The front panel's top corners look jagged instead of sloped
- The decrease rows should work 2 stitches together evenly at both ends of the row; skipping or misplacing a decrease breaks the gradual taper from 17 to 13 stitches.
- The side panels are wider or narrower than the base
- Since the side panels and base are worked flat in separate straight pieces, a missed or added stitch in early rows carries through every row after it; count stitches at the end of each row against the pattern's stated count.
Close-ups

Questions people ask
Can this bag be made without cutting your own t-shirt yarn?
Yes, commercial t-shirt yarn brands work directly with this pattern's gauge. Cutting your own from old t-shirts is an option but takes extra prep time before you start the first row.
Why does the pattern call for both a 10mm and a 12mm hook?
T-shirt yarn thickness varies between brands and hand-cut batches, so the hook size is meant to be chosen after swatching, not fixed in advance. Whichever size hits the 10 stitches and 8 rows gauge over 4 inches is the right one to use throughout.
What are the D-rings and lobster clasps used for?
They attach the crossbody strap to the bag body, letting the strap detach or adjust rather than being sewn permanently in place. Gold tone hardware in 1 inch size is specified to match the finished proportions of the bag.
Will the basket weave stitch stretch out of shape with use?
T-shirt yarn has some give, but working the front post and back post stitches snugly keeps the ridges defined rather than loose. If the fabric feels slack after swatching, dropping to a smaller hook firms it up before starting the panel.
New patterns, as they are filed
One short email when a batch lands, with the feel of each.