
46 rounds · filed under dense · 8 of them
Amigurumi · added 26 Sep 2026
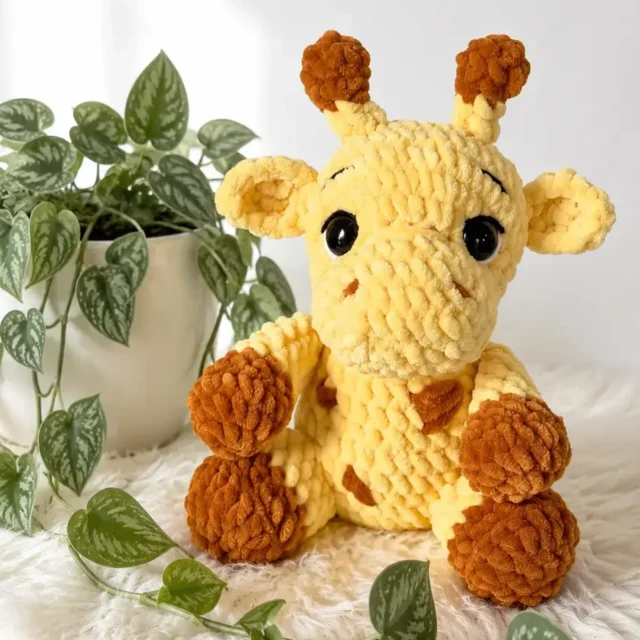
Chenille giraffe amigurumi with shaped face and ossicones
Single crochet in chenille builds a velvety, dense giraffe amigurumi with a shaped muzzle and safety-eye face.
- Skill
- Intermediate
- Time
- 4-6 hours
- Hook
- 3.5 mm
- Yarn
- Worsted
- Rounds
- 41
About this pattern
Chenille turns single crochet into something soft-edged and plush, the fabric closing in on itself so the stitch definition all but disappears under the pile. That density is what gives Ginny her huggable weight in the hand, but it also means you're working almost by feel rather than by sight, tracking stitches through touch since chenille hides its own structure so well.
The head builds from a flat chain foundation that folds and seams into a muzzle shape before rounds pick up for the rounded skull, and the body works as a single continuous tube shaped by increases from a magic ring. Stuff the body as you go, keep the arms light, and let the head, arms, legs, and ossicones join onto that central form once each piece holds its shape on its own.
The swatch in numbers
- Rounds
- 41
- Parts
- 9
- Level
- Intermediate
- Time
- 4-6 hours
- Hook
- 3.5 mm
- Yarn
- Worsted
The yarn and the hook
- Chenille yarn (or any yarn of your choice)
- 3.5mm hook (or any hook fitting your yarn)
- Fiber filling
- Black and white cotton yarn
- Needle for sewing
- Scissors
- Stitch marker
- Safety eyes (18mm recommended)
Stitches, spelled out
MR magic ringDense; CH chain; SC single crochetDense; SLST Slip-stitch; HDC Half double crochetDense; HDC INC half double crochet increaseDense; DC double crochetDrape; DC INC double crochet increaseDrape; INC increase; DEC invisible decrease; FO fasten off; FLO Front loop onlyRidge; BLO Back loop onlyRidge; [X,y]: Work the instructions in the same stitch used on ears; (XY) total number of stitches at the end of the round.
Tension and hand-feel
After the first few rounds of the head or body, lay the piece flat and check that the stitches sit snug against each other with no visible gaps between them, since chenille's texture makes loose tension hard to spot until stuffing goes in.
If the fabric feels floppy or the stitches slide apart under light pressure, drop to a smaller hook so the single crochet stays tight enough to hold fiber filling without stitches gapping open later.
Head
In Main Color Chain 7. Start from 2nd ch from the hook.
The increases should be in the center. Depending on your tension you can adjust it by adding or removing sc before the increases.
Insert the safety eyes between round 6-7 with 5inc in between. Stuff the muzzle firmly and the head as you go.
Body
In Main Color Stuff as you go.
FO and leave a tail to sew the head.
Arms x 2
Start with Contrast Color
-Stuff the hoof-
Legs x 2
In Contrast Color
-Color change to Main Color-
Ossicones x 2
In Contrast Color
-Color change to Main Color-
Do not stuff. FO and leave a long tail to sew.
Ears x 2
In Main Color
Tail
Attach the yarn on the centre of the back between R4 and R5 and chain 5. Then sc back in to the chain and slst where you have attached the yarn.
Face Shaping
For the face shaping: Insert the needle in point 1, come out through point 2, insert the needle in point 3 and come out through point 4. Then insert the needle through point 5 and come out through point 6 – one stitch to the side of point 1. Pull the tail until you reach your desired result and fasten off.
For the muzzle shaping: Insert the needle through point A, come out through point B, insert the needle in point C and come out through point D – one stitch to the side of point A. Pull the tail until you reach your desired result and fasten off.
Details
For the spots: Cut a piece of yarn in contrast color (50cm/20inch) and make some spots on the back and on the belly of the giraffe.
Cut a piece of yarn (about 20cm/8inch long) in contrast color and fold it in three. Pull a loop up in the last stitch of the tail and pull the loose ends through that loop, then pull tight. With a scissors trim the ends. I recommend you to burn it lightly with a lighter, so the ends don’t shed.
For the eyes details: Cut a tail of the white cotton yarn and embroider the sclera. Then cut a tail of the black cotton yarn and embroider the eyelid/eyelashes and eyebrows.
How the texture is built
- The head starts from a flat chain of 7 rather than a magic ring, so the muzzle forms as a flat oval before the fold-and-slip-stitch seam turns it three-dimensional, which is why that section needs firm stuffing underneath to hold the shape once closed.
- The body's increases follow a steady doubling pattern from round to round (8, 16, 24, 32), spacing new stitches evenly around the circumference so the tube widens without any single point of tension or visible seam line.
- Assembly places the ossicones between rounds 10 and 11 of the head and the arms between rounds 10 and 13 of the body, meaning the upper sections of both head and body carry all the joins, while the lower rounds stay smooth and unbroken by seams.
Putting the pieces together
If you swap the yarn
| Cotton, worsted weight | Produces a firmer, less plush fabric with crisp stitch definition, so stitches are easier to count but the finished giraffe loses the velvety hand feel; stays on the same 3.5mm hook. |
|---|---|
| Acrylic velvet or velour, worsted weight | Keeps a similar soft nap and hides stitches the way chenille does, drapes slightly stiffer, and takes stuffing well without adding much weight to the finished piece. |
| Wool-blend, DK weight | Makes a smaller, denser giraffe with more drape and stretch in the fabric; size down to a hook around 3mm and expect to use less fiber filling since the fabric itself pulls in tighter. |
Colorways
- Classic savanna Main color chenille for the head, body, arms, and legs; contrast color for the ossicone tips and the start of each arm; black and white cotton reserved for the face embroidery only.
- Tonal neutral One shade of chenille throughout the head, body, arms, legs, and ossicones, with contrast limited to the cotton yarn eye and lash details so the giraffe reads as a single soft block of color.
Washing and blocking
Hand wash chenille pieces in cool water and avoid wringing, since twisting the pile can flatten or mat the fibers permanently.
Lay flat to dry on a towel rather than hanging, so the stuffed body and legs keep their round shape instead of stretching under their own weight.
Store away from rough fabrics or friction, and reshape the ossicones and ears by gently smoothing the pile with your fingers if they get pressed flat in storage.
When it does not look right
- The stitches are impossible to see or
- Chenille's texture naturally obscures stitch definition, so slow down and use a stitch marker from round one plus strong, direct light to track the round start by feel and position rather than sight.
- The muzzle looks lumpy or won't hold
- The flat chain foundation needs firm stuffing before the fold-and-seam step, so add more fiber filling and pack it into the corners before closing with the slip stitches.
- The arms sit stiffly or push the body
- Overstuffed arms fight against the softer chenille fabric during assembly; remove some filling so the arms stay soft enough to curve naturally against the body at the R10-R13 join.
Close-ups

Questions people ask
Is this pattern suitable for beginners?
It's best for someone who already knows basic amigurumi stitches, including magic rings, increases, decreases, and working in continuous rounds. The face shaping and color changes add a little extra complexity, but the steps are clearly explained.
What does "ossicones" mean?
Ossicones are the horn-like bumps on top of a giraffe's head. In the pattern, they're small separate pieces you crochet and sew on after completing the head.
Can I use regular acrylic yarn instead of chenille?
Yes, absolutely. The finished size and texture will be a bit different, but the pattern will still work. Just use a hook size that matches your yarn weight.
How big does the finished giraffe come out?
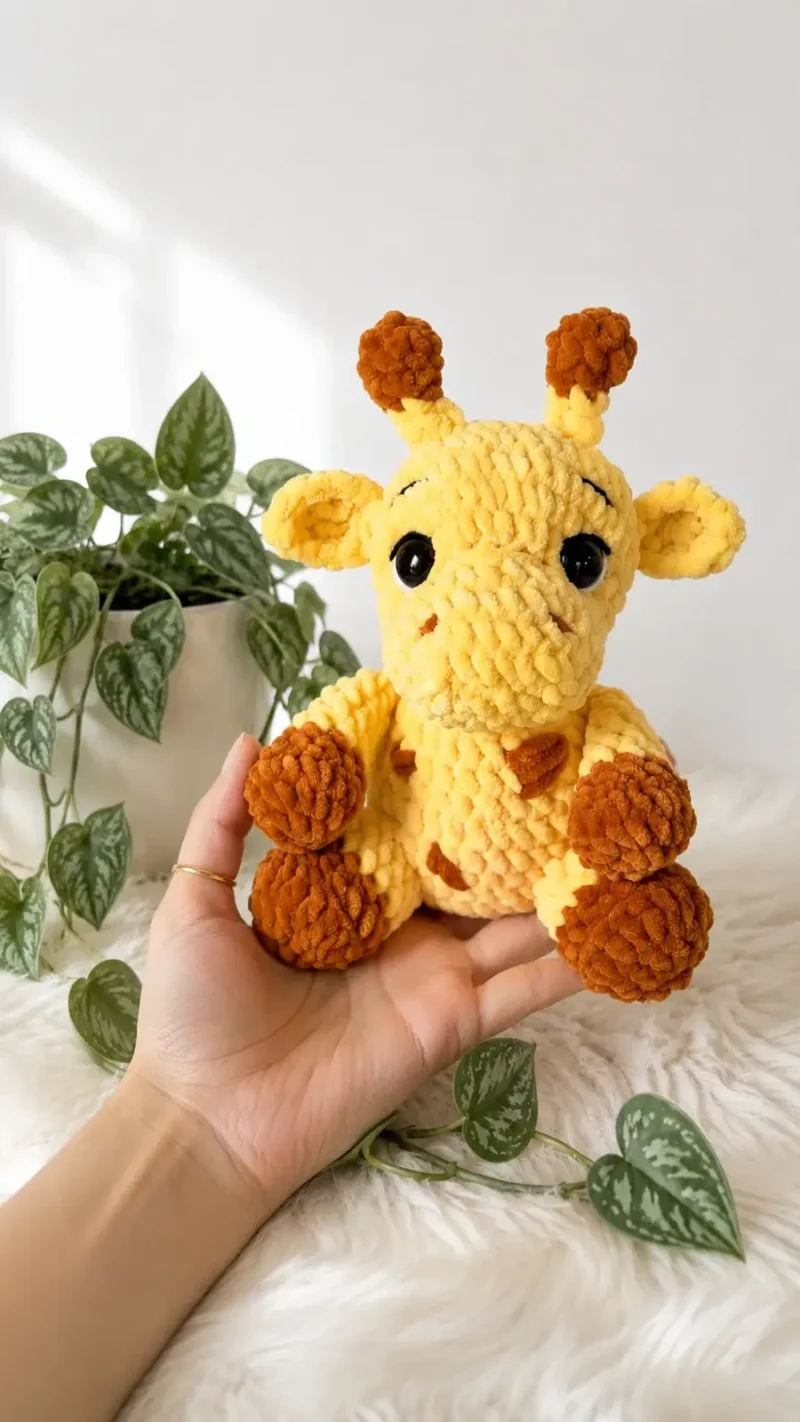
The finished size will depend on your yarn and hook, but with chenille yarn and a 3.5mm hook you can expect a nice, soft, palm-sized to small toy-sized plush.
Can I sell finished giraffes made from this pattern?
Yes, finished products made using this pattern may be sold. Just be sure to credit the original pattern designer when you list or share your work.
New patterns, as they are filed
One short email when a batch lands, with the feel of each.