
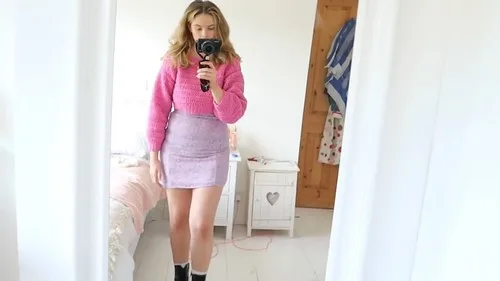
33 rounds · filed under ridge · 10 of them
Sweaters · added 4 Oct 2026
Chunky double crochet sweater with ribbed cuffs and hem
Double crochet builds a thick, springy fabric with ribbed single crochet trim for a cozy, adjustable-fit pullover sweater.
- Skill
- Intermediate
- Time
- 4-6 hours
- Hook
- 6 mm
- Yarn
- Chunky
- Rounds
- 20
About this pattern
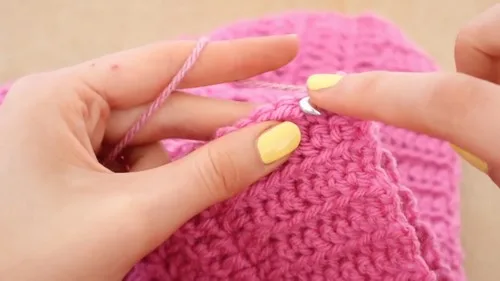
Under your hand this sweater sits heavy and dense, the kind of fabric that holds its shape without folding over itself. Double crochet is doing the work here, stacking tall and close so the body panels come out thick and a little stiff, almost board-like straight off the hook before seaming softens it. The ribbed single crochet sections at cuff and hem behave differently entirely, compressing into a stretchy band that grips the wrist and waist while the main panels stay open and roomy.
The shape comes together as four flat rectangles: two body panels and two sleeves, each built bottom-up with a ribbed starting edge before the main stitch takes over. Lay the panels out before seaming and you will see the ribbing pull in while the dc sections sit wide and flat, so expect a boxy torso with fitted cuffs and hem. Measurements can be adjusted to suit a fitted, cropped style or a relaxed, everyday length, and once the side seams, shoulders, and sleeve joins are slip stitched, the whole thing drapes with weight rather than cling.
The swatch in numbers
- Rounds
- 20
- Parts
- 2
- Level
- Intermediate
- Time
- 4-6 hours
- Hook
- 6 mm
- Yarn
- Chunky
The yarn and the hook
- 6 mm hook
- Chunky acrylic yarn, about 4 to 5 balls
- Tape measure
- Scissors
- Stitch marker
- Darning needle
Stitches, spelled out
ch chain; sc single crochetDense; dc double crochetDrape; sl st slip stitch.
Tension and hand-feel
After finishing the ribbing on either the sleeve or body panel, lay it flat and check that it measures close to 2 inches before the stitch count was set, then confirm the main double crochet section reaches close to 44 stitches across on the sleeve without the fabric bowing or cupping.
Sleeves
Make 2Main Body Panel (Front and Back)
Make 2How the texture is built
- Each sleeve gains its width only once, in the first main-section row after ribbing, where a single crochet turning stitch doubles at each end to add the first and second increase before settling into straight double crochet for the remaining rounds.
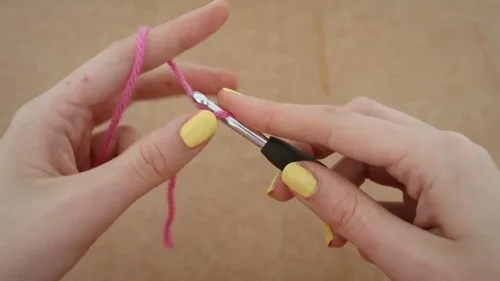
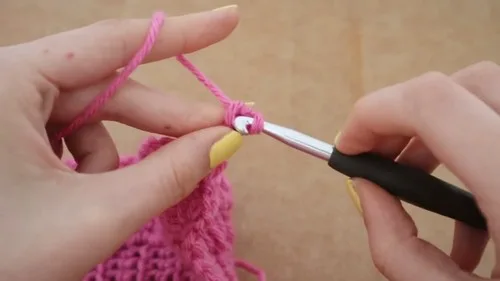
- Both the sleeve and body panels start with rows of single crochet worked into the front loop only, a ribbing technique that only works flat and row-by-row rather than in the round, which is why the pattern turns at the end of every ribbing row.
- The main body panels are worked without any increases after the ribbing, so the dc section stays a constant width for all remaining rows, meaning the shaping in this garment comes entirely from the ribbing width and the sleeve increase, not from the body.
Putting the pieces together
If you swap the yarn
| Chunky wool blend | Adds loft and a slight halo to the dc panels, keeps the same hook size, but the ribbing will cling more and felt slightly with washing. |
|---|---|
| Worsted-weight acrylic, held double | Approximates the same chunky thickness with more stitch definition in the dc rows, pair with a 6 mm hook, and expect a firmer, less airy ribbing. |
| Chunky cotton blend | Drops the drape lower and heavier on the body panels, drains the stretch out of the ribbed cuffs, so size up the hook slightly to keep the fabric from going stiff. |
Colorways
- Contrast sleeve block Keep the two body panels in pink throughout, then work both sleeves entirely in a contrasting neutral, so the dense double crochet torso and the increase-shaped sleeves sit in two distinct colors side by side.
Washing and blocking
Hand wash the acrylic yarn in cool water, since machine agitation can felt the ribbed sections where stitches sit close together.
Lay the sweater flat to dry rather than hanging it, so the weight of the wet chunky dc panels does not stretch the shoulders or sleeve length.
Fold rather than hang in storage, since a dense chunky acrylic fabric like this will hold a hanger's shoulder bumps over time.
When it does not look right
- The sleeve flares oddly at one end
- The width increase happens in a single row through the doubled turning stitch and the last-stitch increase; work that row exactly once rather than repeating it across multiple rows.
- The side seam puckers or the armhole sits in the wrong spot
- The armhole placement depends on a marker set from sleeve width measured before joining; remeasure and remark before slip stitching rather than guessing the seam line by eye.
Close-ups
Questions people ask
Why does the ribbing use front loop only instead of both loops?
Working into the front loop only leaves a ridge of back loops exposed, which is what makes the cuff and hem compress and stretch instead of sitting flat like the main double crochet panels. Skipping this step would give you a ribbing that looks the same as the body.
Can the sleeve and body panels be worked in the round instead of flat?
Not with this construction, since the ribbing rows turn at the end of every row to keep the front-loop pattern consistent on both sides. Working in the round would hide the texture the front-loop stitch is meant to create.
How much yarn should you have on hand before starting?
Plan on 4 to 5 balls of chunky acrylic to cover both body panels and both sleeves with enough left for seaming. Buying one extra ball covers tension differences between knitters working slightly looser or tighter.
Does the fabric feel stretchy all over or just at the edges?
Only the ribbed cuff and hem sections stretch, since front-loop single crochet is built to compress and give. The double crochet body of the sleeves and panels stays dense and holds its width without give.
New patterns, as they are filed
One short email when a batch lands, with the feel of each.