
10 rounds · filed under dense · 3 of them
Bags · added 15 Sep 2026
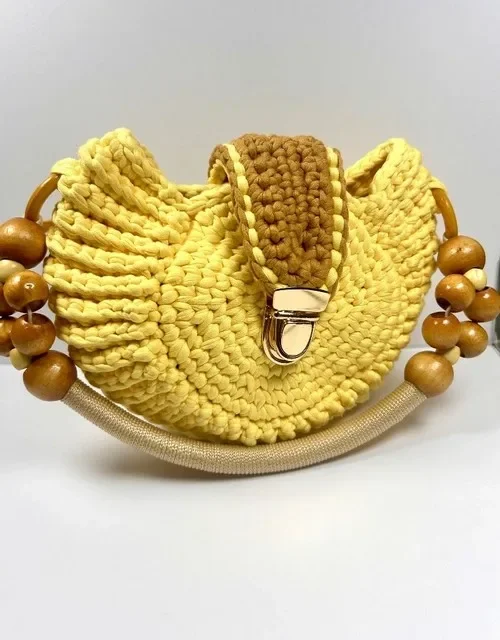
Chunky t-shirt yarn crochet bag with lid and handle
Single crochet in bulky t-shirt yarn builds a thick, pillowy bag body with a flat woven lid and sewn-on handle.
- Skill
- Intermediate
- Time
- 4-6 hours
- Hook
- 6 mm
- Yarn
- Super Bulky
- Rounds
- 7
About this pattern
Single crochet worked round after round in t-shirt yarn packs the stitches close, so the fabric comes off the hook thick and pillowy, closer to a woven mat than a typical crocheted piece. The ropes of jersey fill the 6mm hook completely, leaving no gaps between stitches, which gives the walls of the bag real body without any lining or stuffing behind them. Every stitch reads as a visible braid on the surface, so the texture stays chunky and tactile rather than smooth.
The main piece builds outward from a small center ring into a wide flat base, then continues up into the rounded sides of a bag. A separate flat panel forms the lid, worked back and forth in rows rather than in the round, and a handle gets sewn on at marked points along the top edge. Once the lid is stitched in place with nylon thread, the piece is ready to carry, holding its shape from the density of the t-shirt yarn alone.
The swatch in numbers
- Rounds
- 7
- Parts
- 3
- Level
- Intermediate
- Time
- 4-6 hours
- Hook
- 6 mm
- Yarn
- Super Bulky
The yarn and the hook
- T-shirt yarn (black, brown, and yellow)
- 6mm crochet hook
- Scissors
- Yarn needle
- Bag handle (metal or acrylic recommended)
- Nylon thread (for sewing the lid)
Stitches, spelled out
sc single crochetDense.
Tension and hand-feel
After round 2, count the stitches around the ring; doubling the starting 6 stitches should give 12, and the circle should sit flat on a table without the edges curling up or fluting outward.
Top Of The Handle
Bottom Of The Handle
Crocheting the Lid Creating the Lid (Brown Yarn)
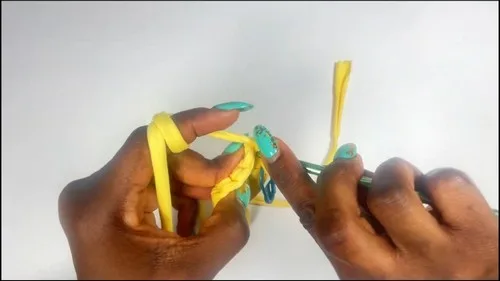
Make a slip knot and chain 20.
Turn and single crochet along the back loops of the chain.
In the last stitch, work 3 single crochets.
Place a stitch marker in the center of the 3 stitches.
Continue single crocheting down the opposite side of the chain.
Shaping the Lid Chain 1 and turn your work.
Single crochet in each stitch.
When you reach the stitch marker, remove it and work 3 single crochets in that stitch.
Replace the marker in the new center stitch.
Continue rows by repeating the increase at the marker stitch.
Repeat until desired lid shape and size is reached.
Finishing the Lid (Yellow Yarn)
Fasten off brown yarn.
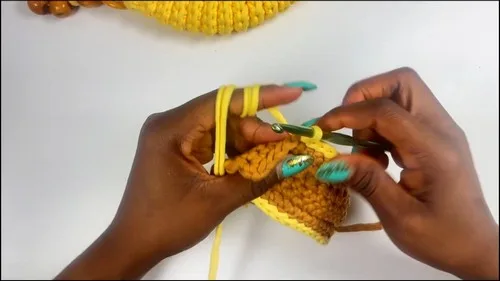
Join yellow yarn at the last stitch with a chain 1.
Slip stitch around the entire edge of the lid for a neat finish.
Fasten off and weave in all yarn tails.
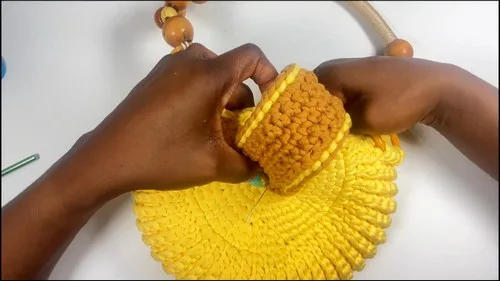
Attaching the Lid to the Bag Placing the Lid Center the lid at the back opening of the bag.
Align the midpoint of the lid with the bag’s top back edge.
Use a clasp or clip to hold it in place.
Sewing the Lid Use invisible nylon thread and a needle.
Sew along the top back edge of the bag to attach the lid securely.
Ensure stitches are tight and hidden.
Main Pattern
Use a needle and yarn to close the hole in the center.
Repeat to make the second circle.
Assembling the Bag Sides Preparing for Joining Place both circles with the wrong sides facing each other.
Use stitch markers to mark the same 10 stitches on each circle to line up the bag sides.
Joining the Sides Remove a stitch marker and attach yarn at that stitch.
Chain 14 to form the base panel.
Attach the chain to the corresponding stitch on the second circle with a slip stitch.
Chain 1, then: Make 2 slip stitches in the next 2 stitches.
Make 10 single crochets in the next 10 stitches.
Make 2 slip stitches in the next 2 stitches.
Slip stitch into the next braid on the circle, chain 1, and turn your work.
Working the Side Panel Skip the first stitch, then: Work 2 slip stitches in back loops.
Work 10 single crochets in back loops.
Work 2 slip stitches in back loops.
Slip stitch to the next braid on the circle, chain 1, and turn.
Repeat this pattern across until you reach the stitch marker on the other side.
Slip stitch all around the bag mouth to finish.
Fasten off and hide the yarn.
Attaching the Handle Handle Placement Align the handle at the top center of the bag opening.
Make sure the yarn is inside the bag before starting.
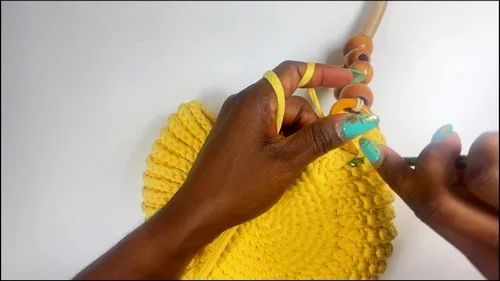
Sewing the Handle Insert hook under the handle and through the bag.
Pull up a loop and work a slip stitch.
How the texture is built
- Round 2 doubles every stitch (2 sc in each stitch around), which doubles the stitch count evenly across the whole ring; round 3 shifts to an alternating increase (1 sc, 2 sc in next stitch), spacing the increases further apart so the growing circle keeps lying flat instead of ruffling.
- The lid is worked flat in rows from a starting chain of 20, rather than in the round like the bag body, which produces a rectangular panel sized to sit across the bag opening instead of a tube.
- Each round closes with a slip stitch back to the first stitch, marking a clear round boundary in the otherwise dense t-shirt-yarn fabric and keeping the increases stacked in the same position from round to round rather than spiraling.
Putting the pieces together
If you swap the yarn
| Cotton, super bulky (recycled jersey alternative) | Keeps the same thick, matte hand as t-shirt yarn and works at the same 6mm hook size, but a factory-spun cotton will be more uniform in thickness than hand-cut jersey strips, giving rounds that stack more evenly. |
|---|---|
| Acrylic or acrylic-blend, chunky weight | Produces a lighter, springier fabric than t-shirt yarn, so the bag body will need a smaller hook to keep the same dense stitch count, and the finished piece will hold less structure on its own without stuffing or interfacing. |
| Wool or wool-blend, bulky weight | Adds drape and a softer surface compared to the flat ribbon feel of t-shirt yarn, works well on a slightly smaller hook, and lets the fabric block into shape with steam if the base or lid needs reshaping. |
Colorways
- Solid Body, Contrast Lid Work the entire Main Pattern bag body in black, the flat lid in brown, and the handle attachment rounds in yellow so the lid reads as a distinct block against the body.
- Two-Tone Body Work the first rounds of the Main Pattern in brown and carry black through the remaining rounds, then finish the lid and handle wraps in yellow for a banded look up the sides of the bag.
Washing and blocking
Hand wash in cool water and avoid wringing, since twisting the jersey strips can distort the tight single crochet stitches and loosen the base.
Lay the bag flat on a towel to dry rather than hanging it, so the weight of the wet t-shirt yarn does not stretch the sides or pull the base out of round.
Store the bag stuffed loosely with tissue or a folded towel to hold its shape between uses, and keep it away from direct heat, which can cause the jersey fibers to stiffen.
When it does not look right
- The base cups or bowls instead of lying flat.
- The increase count fell behind schedule in rounds 2 or 3; recount stitches after each round against the doubling pattern and add missed increases before moving on.
- The bag walls feel loose or floppy rather than firm.
- The 6mm hook is running large for the tension of the t-shirt yarn strip being used; drop to a smaller hook so the stitches close up tighter against each other.
- The lid does not line up with the top edge of the bag.
- The row count on the flat lid panel does not match the circumference of the bag opening; check the lid against the opening before sewing and add or remove rows to fit.
Close-ups
Questions people ask
Can regular yarn be used instead of t-shirt yarn?
Yes, but drop the hook size to match the thinner strand, since the 6mm hook is sized for the thickness of t-shirt yarn. Expect a softer, less structured bag that likely needs a stiffener or lining to hold its shape the way t-shirt yarn does on its own.
Why does the starting ring begin with 5 single crochets instead of a standard 6-stitch magic ring?
The chain-1 start followed by 5 single crochets into the chain builds the same small closed ring, just reached through a different first stitch. Pulling the shorter tail to the back and working into it brings the count up to 6 braids before round 2 begins.
How is the handle attached to the bag?
The top and bottom of the handle each get a single round of slip stitches pulled up along the handle attachment area, with the yarn pulled inside the bag and knotted off. This is repeated for the second handle before the ends are woven in.
How does the lid get sewn onto the bag body?
Invisible nylon thread and a needle attach the lid along the top back edge of the bag, keeping the join hidden against the busy texture of the t-shirt yarn. Stitches are worked tight so the lid sits securely without gapping when the bag is carried.
New patterns, as they are filed
One short email when a batch lands, with the feel of each.