
15 rounds · filed under dense · 6 of them
Accessories · added 22 Oct 2026
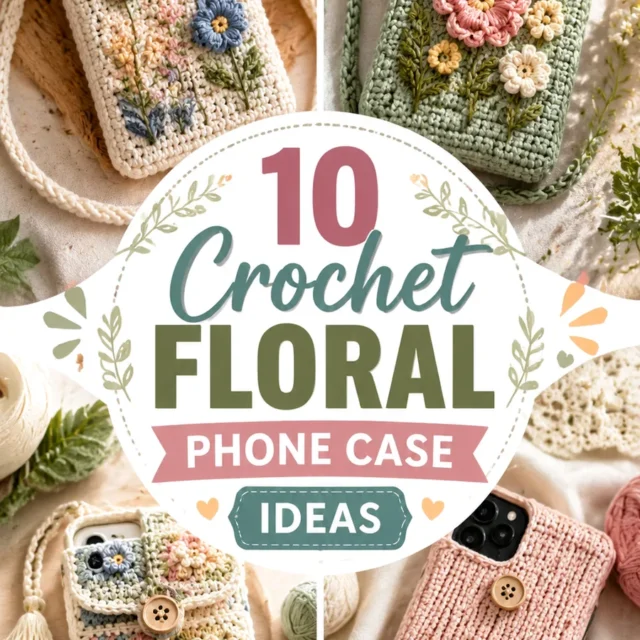
Crochet floral phone case with button flap and flowers
Single crochet and half double crochet build a dense, stable fabric for a floral button-flap phone pouch with optional strap.
- Skill
- Intermediate
- Time
- 4-6 hours
- Hook
- 4 mm
- Yarn
- Worsted
- Rounds
- 9
About this pattern
Run a thumb over the finished panel and you feel a tight, even grid with almost no give between stitches. That density comes from single crochet worked row after row with no increases, which packs the loops close and keeps the fabric from stretching out of shape once a phone sits inside it. The surface stays flat and slightly firm, closer to a woven cotton than a typical crocheted drape, which is exactly what keeps a phone from poking through the stitches.
What comes off the hook is a rectangle, doubled front and back, built to hold its shape rather than slouch. Once the sides and bottom are joined, you get a square-bottomed pocket deep enough for the phone, topped by a flap that folds down and closes with a button through a small chain space. Attach the flowers after the panels are seamed, not before, so you can shift their placement until the front looks balanced.
The swatch in numbers
- Rounds
- 9
- Parts
- 5
- Level
- Intermediate
- Time
- 4-6 hours
- Hook
- 4 mm
- Yarn
- Worsted
The yarn and the hook
- Worsted weight cotton yarn in main color, approximately 180 yards (165 meters)
- Small amounts of green, pink, yellow, cream, and blue yarn for flowers
- 4 mm (US G/6) crochet hook
- 1 wooden or decorative button
- Yarn needle
- Scissors
- Stitch marker for optional strap work
Stitches, spelled out
ch chain; sc single crochetDense; hdc half double crochetDense; sl st slip stitch; st stitch; rep repeat; dc double crochetDrape.
Tension and hand-feel
After the first few rows of the body panel, lay the piece flat and count the 18 stitches across the row to confirm the fabric hasn't narrowed or widened on its own.
If the rows feel loose and the stitches shift sideways under light pressure, drop to a smaller hook; if the fabric feels stiff and hard to work into, move up half a size before continuing.
Suggested gauge: approximately 18 single crochet stitches by 20 rows = 4 inches (10 cm). Finished size of the pouch is approximately 7 inches tall x 4 inches wide (18 x 10 cm).
Body Panels
Make 2 identical rectangles.
Flap
Attach yarn to the top edge of the back panel.
Crochet Flower Motifs
Make 5 to 7 flowers depending on your preferred decoration style.
Make a magic ring.
Special Stitch
Flower Petal Stitch: Work 1 sl st, 1 ch, 2 dc, 1 ch, 1 sl st into the same stitch space to create one rounded petal.
Optional Shoulder Strap
Attach yarn to one side corner.
Chain 90 stitches or create a length that feels comfortable.
Slip stitch back along the chain.
Attach the other end securely to the opposite side.
How the texture is built
- The body panel carries no increases or decreases across its 28 rows, which is why two identical flat rectangles are enough to build the whole pouch shape without shaping darts.
- The flap is picked up directly from the top edge of the back panel rather than crocheted separately, which means its 18-stitch width is locked to match the body without any extra seaming at that edge.
- The chain-3 gap in flap row 9, closed with 3 single crochet in row 10, forms the buttonhole; working it as a skipped-and-filled gap instead of a cut slit keeps that edge from fraying or stretching with repeated use.
Putting the pieces together
If you swap the yarn
| DK weight cotton | Produces a thinner, slightly more flexible fabric and a smaller overall pouch; pair it with a 3.5 mm hook to keep the same tight gauge the pattern relies on. |
|---|---|
| Worsted weight acrylic | Holds the same thickness and hook size as the cotton original but gives a smoother, less structured drape, and the surface takes on a slight sheen instead of cotton's matte finish. |
| Cotton-linen blend, worsted weight | Adds a crisper, less forgiving hand to the panels, so the finished pouch holds a sharper rectangular shape with less flexibility at the seams. |
Colorways
- Pastel Garden Cream yarn carries the body panels and flap, with pink and yellow forming the flower centers and petals and green reserved for any leaf or stem detail you add between the blooms.
- Cool Bloom Blue yarn covers the body panels and flap for a calmer background, while cream and pink alternate across the 5 to 7 flowers and yellow sits only at the flower centers for contrast.
Washing and blocking
Hand wash the finished pouch in cool water with mild soap, since the cotton body holds dye and shape better without machine agitation.
Lay the panels flat to dry and keep them away from direct heat, which can soften the dense single crochet fabric and round out its edges.
Reshape the flap and corners by hand while damp, smoothing the stitches flat before the cotton sets so the piece dries square rather than curled.
When it does not look right
- The flap sits narrower or wider than
- The flap's first row depends on picking up all 18 stitches across the back panel's top edge; recount that edge before starting row 1 so the flap width matches the pouch exactly.
- The button slips loose from the chain-3 space.
- The gap was likely chained too wide for the button's diameter; work a chain-2 space instead of chain-3, or choose a slightly larger button to match the original opening.
Questions people ask
Can the pouch be sized up for a larger phone?
Yes, add chains to the starting row in multiples of 2 to keep the rectangle shape intact, and work extra rows before starting the flap if the phone needs more length. Both changes stay within the same single crochet pattern used for the rest of the panel.
Why does this pattern call for a smaller 4 mm hook with worsted weight yarn?
A smaller hook than usual for this yarn weight tightens the single crochet and half double crochet stitches, which closes up the fabric and keeps the phone from showing through gaps. It also gives the flowers a cleaner edge to sit against.
How many flowers should be made before attaching them?
The pattern suggests 5 to 7 flowers, which gives enough to cluster across the front panel or spread them along one edge. Making a couple extra lets you test the arrangement before sewing anything down permanently.
Is the shoulder strap necessary to complete the case?
No, the strap is listed as optional and the pouch is fully functional without it. A stitch marker is useful if you do add the strap, since it helps track the row where the strap attaches to the body panel.
New patterns, as they are filed
One short email when a batch lands, with the feel of each.