
3 rounds · filed under drape · 3 of them
Accessories · added 7 Oct 2026
Tulip bobble bandana crochet pattern with boho edge
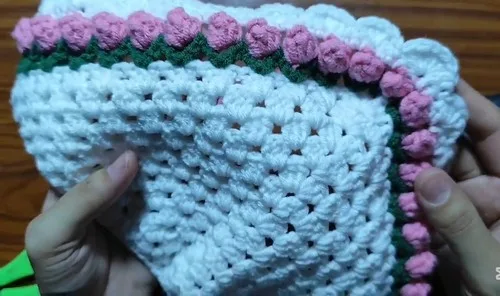
Bobble stitch tulips raise bumpy clusters across a triangular crochet bandana, smooth dc rows framing a soft, textured edge.
- Skill
- Intermediate
- Time
- 4-6 hours
- Hook
- 3 mm
- Yarn
- Worsted
- Rounds
- 3
About this pattern
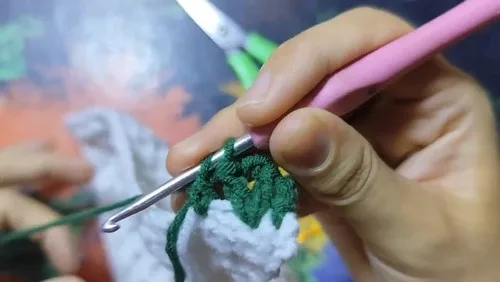
Under the hand this fabric reads in two textures at once. The body sits flat and smooth where double crochet rows build the base, then breaks into raised, rounded bumps wherever the 5 dc bobble stitch lands, giving the tulip shapes their lifted, almost padded feel against the otherwise plain surface.
The finished piece is a triangle, worked from a magic circle outward so the point stays tight and the two long edges spread into the bobble rows that read as tulip heads. Tie it at the nape as a bandana or let the two front points hang loose like a scarf knotted at the throat.
The swatch in numbers
- Rounds
- 3
- Parts
- 2
- Level
- Intermediate
- Time
- 4-6 hours
- Hook
- 3 mm
- Yarn
- Worsted
The yarn and the hook
- White yarn (for the base and border)
- Pink yarn (for tulip flowers)
- Green yarn (for leaves)
- 3mm crochet hook
- Yarn needle for weaving ends
- Scissors
Stitches, spelled out
ch chain; st stitch; sl st slip stitch; sc single crochetDense; dc double crochetDrape; bobble bobble stitchSquish.
Tension and hand-feel
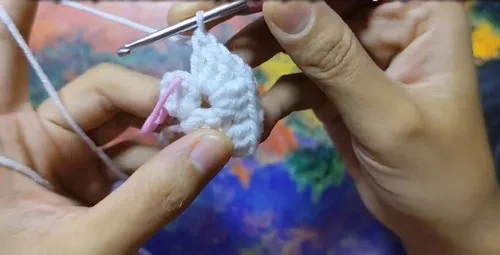
After the magic circle round, check that the 2 dc sit close enough together to close the center fully with no visible hole.
Chain (ch)
Double Crochet (dc)
Slip Stitch (sl st)
Single Crochet (sc)
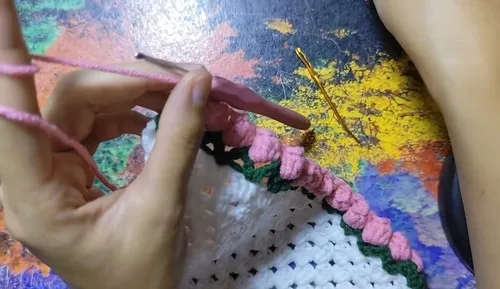
Bobble Stitch (5 dc bobble)
Bandana Base
In The Center V-Stitch
Continue bobble stitches on the opposite edge.
In the last stitch: 1 dc.
Ch 1 and fasten off.
How the texture is built
- Starting from a magic circle rather than a chain keeps the point of the triangle closed and prevents a gap from opening at the tip as the rows widen.
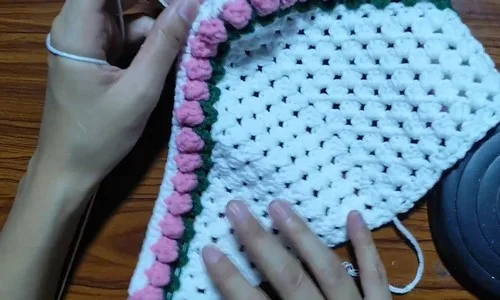
- The bobble stitches are worked along both edges of the piece rather than all in one pass, which is why the tulip shapes end up mirrored on either side of the center line instead of stacked on a single side.
- Placing a single dc into the last stitch before the final ch 1 and fasten off squares off the uneven top of the last bobble, so the edge closes level instead of ending on a raised cluster.
If you swap the yarn
| Mercerized cotton, worsted weight | Holds the bobble stitches crisp and defined with almost no stretch, giving the tulip clusters sharper edges; keep the 3mm hook or go up half a size if the cotton feels stiff. |
|---|---|
| Acrylic, DK weight | Produces a lighter, drapier bandana that lies softer around the neck, though the bobbles sit lower and less raised; drop to a 2.75mm hook to keep the fabric from going loose. |
| Wool-blend, worsted weight | Adds give and warmth, so the bobbles feel softer and slightly rounder underhand, and the triangle has more stretch at the edges; the 3mm hook still works but blocking becomes more important. |
Colorways
- Classic garden White carries the base rows and the outer border, pink fills every bobble stitch to form the tulip heads, and green marks the leaf sections between them.
- Soft contrast Swap the main fiber so pink works the base and border rows, white fills the bobble stitches as pale tulip heads, and green stays on the leaf rounds for a lighter overall look.
Washing and blocking
Hand-wash in cool water and avoid wringing, since twisting can pull the bobble clusters flat before they dry.
Lay flat on a towel to dry and press the bobble rows gently with your fingers so each cluster keeps its raised shape rather than drying flattened.
Store flat or loosely folded rather than hung, so the point of the triangle keeps its shape and the border doesn't stretch out of line.
When it does not look right
- The bobble stitches look flat instead of raised
- The 5 dc legs were likely not drawn up tightly before closing the bobble; pull the working loop snug on the last step of each bobble so the five stitches bunch instead of lying open.
- The border edge curls instead of lying flat
- The border rows were worked tighter than the body rows beneath them; loosen your tension slightly on the sc and dc border or block the piece flat while damp to train it open.
- The triangle looks lopsided, with one side shorter than the other
- The bobble stitches were not worked in equal counts on both edges; count the bobbles on each side before fastening off and add or remove one to match the opposite edge.
Close-ups
Questions people ask
Can this pattern be worn as a scarf instead of a bandana?
Yes, the triangular shape works equally well knotted at the nape as a head covering or crossed and tied at the front like a scarf. The two long edges with the tulip bobbles sit forward either way.
What hook size does this pattern call for?
The pattern uses a 3mm crochet hook throughout, for both the bobble sections and the smooth dc and sc rows. Keep the same hook across all three colors for an even fabric.
How do you keep the bobble texture from flattening after washing?
Dry the piece flat and reshape each bobble by gently pressing it upward with your fingers while still damp. Avoid hanging the piece wet, since the weight of the fabric pulls the raised stitches down flat.
Can the pink and green colors be swapped between the tulips and leaves?
Yes, the bobble stitches and the leaf sections are worked as separate color blocks, so any two colors can trade places without changing the stitch pattern. Keep the white for the base and border if you want the tulip shapes to stay the clearest visual element.
New patterns, as they are filed
One short email when a batch lands, with the feel of each.