
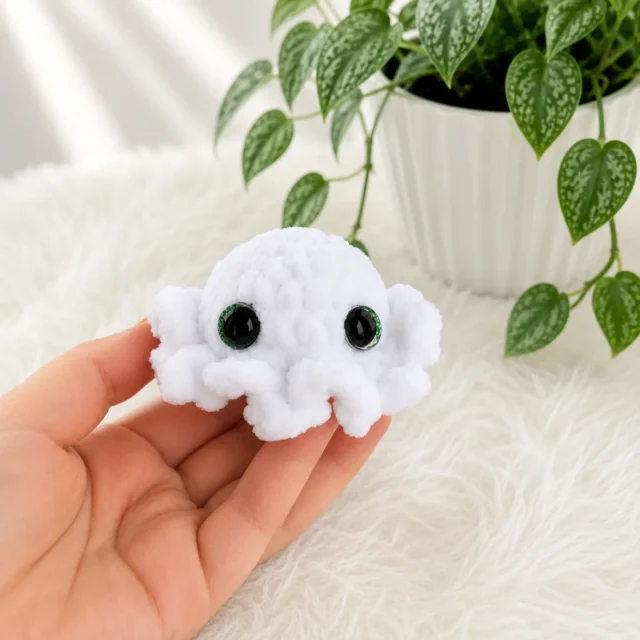
13 rounds · filed under dense · 5 of them
Amigurumi · added 15 Sep 2026
Crochet mini octopus keychain in single crochet
Single crochet worked tight in chenille yarn builds a dense, fuzzy little octopus body sized for a keychain.
- Skill
- Intermediate
- Time
- 4-6 hours
- Hook
- 4 mm
- Yarn
- Bulky
- Rounds
- 8
About this pattern
Chenille yarn worked in single crochet builds a surface that feels closer to short-pile velvet than ordinary yarn stitches. Each sc keeps the loops tight and low, so the plush fibers along the yarn's core stand up and hide the stitch definition entirely. Run a finger across the finished body and you get a soft, slightly fuzzy resistance with no gaps between stitches — the fabric reads as solid fabric, not as visible loops, which is exactly what a small stuffed piece this size needs to hold its shape without the fiberfill showing through.
The finished piece is small and rounded, about 3.1 by 1.8 inches, with a domed head and tentacles worked from the same continuous piece of fabric rather than assembled separately. That single-piece construction keeps the body dense and pinch-proof once stuffed, which matters for something that will get carried on a bag or keys and handled often. Once stuffed and closed, thread the clasp through the starting loop at the top before it closes fully, then let the body take a few gentle squeezes to settle the fiberfill evenly through the tentacles.
This is rated an easy skill level pattern written in US crochet terminology — if you can single crochet in the round and work a magic ring, you have everything you need. It works up in under an hour, and the tentacles form automatically from the front-loop chain sequence in Round 6, so there's no separate assembly required for that part.
The swatch in numbers
- Rounds
- 8
- Level
- Intermediate
- Time
- 4-6 hours
- Hook
- 4 mm
- Yarn
- Bulky
The yarn and the hook
Yarn
- Bulky chenille/plush yarn (CYCA #5 Bulky), approx. 10g — white or any color of your choice
Hook
- G-6 / 4mm
Safety eyes
- 12mm, quantity: 2
Stuffing
- Polyfill fiberfill
- Stitch marker: 1
- Tapestry needle
- Scissors
- Lighter (to lightly seal chenille yarn ends and prevent fraying)
Optional
- Lobster clasp or jump ring for keychain attachment
Finished size
- approximately 3.1 × 1.8 in (8 × 4.5 cm). Size will vary based on tension, hook size, and yarn lot.
Stitches, spelled out
BLO Back Loop OnlyRidge; ch Chain; dec Invisible Decrease (2 sc worked together); FLO Front Loop OnlyRidge; inc Increase (2 sc in same stitch); MR Magic RingDense; sc Single CrochetDense; sl st Slip Stitch; SM Stitch Marker; st(s) Stitch(es).
Body & Tentacles (worked as one piece)
All of Round 6 is worked into the front loops only of Round 5. This creates the tentacle fringe around the base of the body.
Return to the back loops of Round 5 that were left unworked in Rnd 6. The ch 1 does not count as a stitch.
How the texture is built
- Rounds 1 through 3 add six stitches each round (6, 12, 18), the standard flat-to-round increase pace that turns a magic ring into an evenly domed circle rather than a cone or a saucer.
- Rounds 4 and 5 hold steady at 18 stitches with no increases, which stops the dome shaping and starts building straight vertical wall — this is where the piece turns from a flat cap into a rounded body.
- Working in a continuous spiral with a stitch marker instead of joining each round removes the stair-step seam that a slip-stitch join would leave, which matters here because chenille's pile would otherwise trap and highlight that seam line rather than hiding it.
Putting the pieces together
If you swap the yarn
| Bulky-weight chenille or velvet yarn | If the original yarn isn't available to you, any bulky-weight chenille or velvet yarn works well as a substitute — the textured pile of chenille is what gives the tentacles their fluffy, dimensional look. |
|---|---|
| Smooth acrylic yarn | Avoid smooth acrylic for this pattern — without chenille's textured pile, the fringe comes out flat and far less appealing than the intended fluffy, dimensional tentacles. |
When it does not look right
- Cut yarn ends look frayed or wispy instead of sealed.
- Chenille strands separate easily when cut; hold the lighter flame briefly near the tip per the pattern notes to seal the fibers without scorching the yarn.
- The head comes out pointed at the top instead of rounded.
- The increases in rounds 1 through 3 need to land evenly spaced (6 new stitches each round); uneven placement pulls the dome into a cone, so recount and redo the increase rounds if the stitch total is off from 6, 12, 18.
- Fiberfill shows through the fabric in spots.
- Stitches are too loose for the chenille's bulk; work the sc rounds snugger, as the pattern notes state gauge is not critical but tight stitches are what keep the stuffing hidden. Keep tension tight throughout — if you can see daylight through your stitches while working, try dropping down half a hook size.
- The decrease leaves a visible bump on the surface.
- Standard decreases show more on plush yarn — the invisible decrease is non-negotiable here. Insert the hook through the front loop only of the first stitch, then the front loop only of the second stitch, yarn over and pull through both loops, then complete the stitch normally. The result is a smooth, even surface.
- The tentacles come out uneven or sparse on one side.
- Round 6 should produce exactly 18 tentacle loops — one for every stitch in the round. Place your stitch marker at the very first stitch of Round 5 before you begin Round 6 so you know exactly where to stop, and count loops as you go.
- The body feels drum-tight or the shape looks distorted.
- Don't overstuff. The finished octopus should be soft and slightly squishy, not drum-tight. Overstuffing distorts the shape and pushes against the safety eye backing from the inside, which can weaken the hold over time. Fill to about 70–75% firmness.
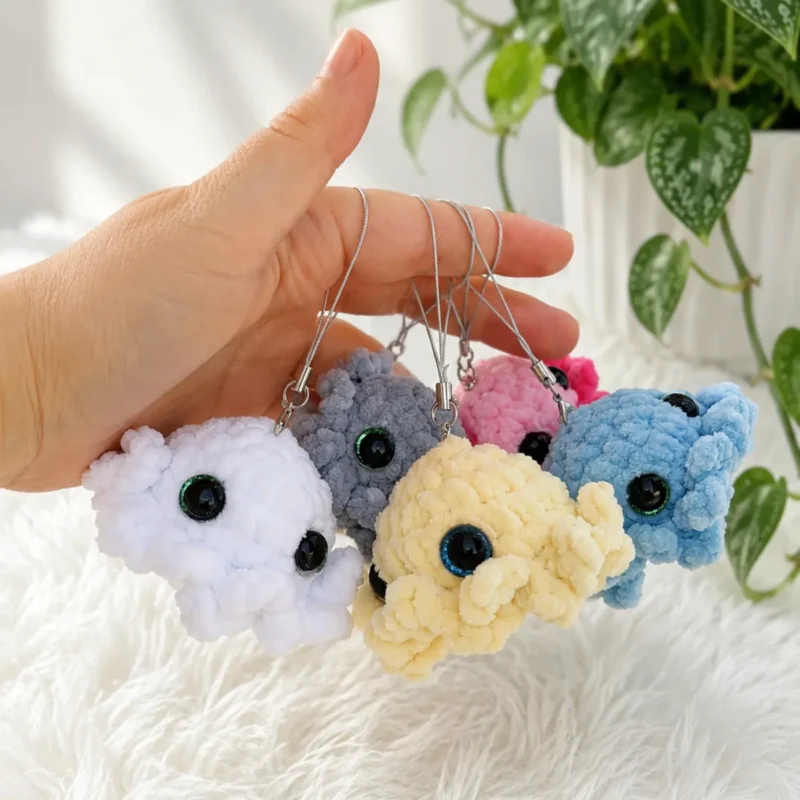
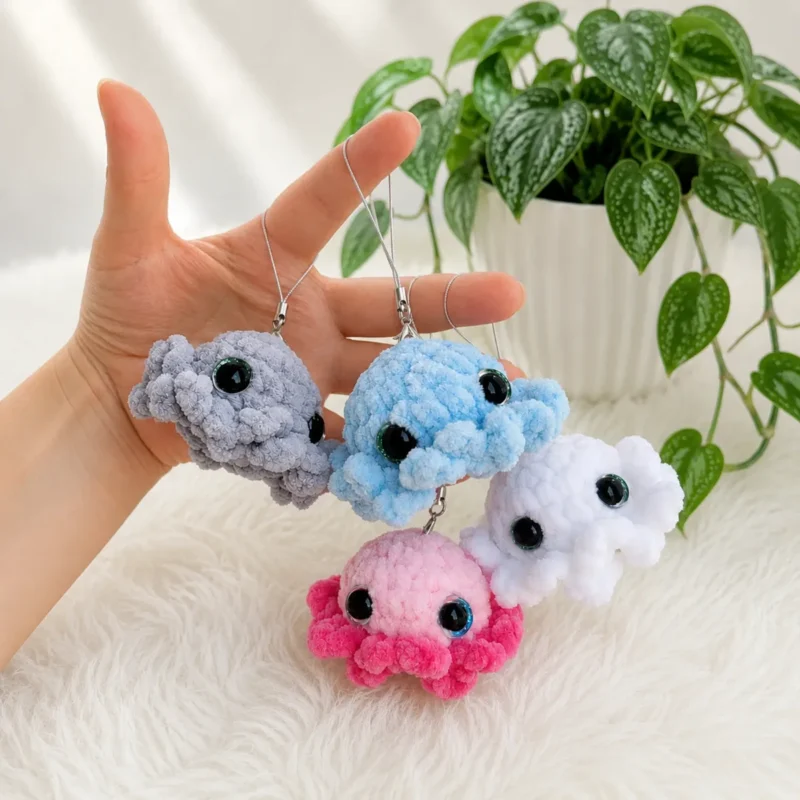
Close-ups
Questions people ask
Can I make this octopus without a magic ring?
Yes. Chain 2, then work 6 sc into the second chain from the hook as a substitute. The magic ring gives a tighter, neater center, but the chain-2 method works well with chenille yarn since the texture naturally hides any small gap at the top.
My tentacles look uneven — what went wrong?
The most common cause is losing track of the starting stitch in Round 6. Because you're working slip stitches into front loops only, it's easy to skip a stitch or double up without noticing. Place a stitch marker at the first stitch of Round 5 before you begin the tentacle round, and count your loops as you go. You should end with exactly 18 tentacle chains.
Is this pattern safe for young children?
The safety eyes require a minimum age recommendation — most manufacturers suggest 3 years and up due to the small backing piece. For babies or very young toddlers, embroider the eyes instead using black yarn or thread. The stuffing is polyfill fiberfill, which is non-toxic, but the toy should still be kept away from infants who mouth objects.
Can I sell finished octopus toys made from this pattern?
Yes, you may crochet and sell finished items made from this pattern. You may not resell, redistribute, or translate the written pattern itself. When sharing photos of your finished pieces on social media, credit the original pattern designer as required. Always verify the current terms directly with the pattern source before selling at scale.
New patterns, as they are filed
One short email when a batch lands, with the feel of each.