
52 rounds · filed under dense · 48 of them
Amigurumi · added 5 Oct 2026
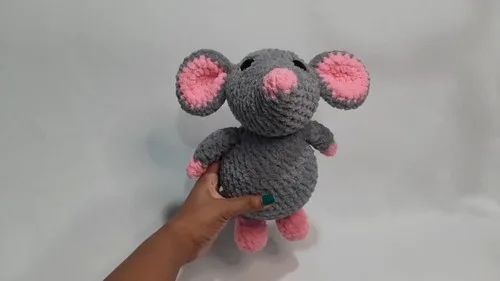
A crochet mouse amigurumi with big round eyes
Single crochet builds a dense, squishy fabric for this big-eyed mouse amigurumi.
- Skill
- Intermediate
- Time
- 4-6 hours
- Hook
- 7 mm
- Yarn
- Super Bulky
- Rounds
- 52
About this pattern
Worked entirely in single crochet with super bulky yarn on a 7mm hook, this mouse builds a dense, tight fabric with almost no gap between stitches. The firm single crochet grid holds its shape under the fingers rather than sagging, which matters once fiberfill goes in, since the stuffing stays put instead of poking through slack loops. Run a hand over the finished head or body and the surface feels taut and slightly ridged, more like a packed cushion than a soft sweater.
The head rounds out from a magic ring into a dome, then holds steady through its last rounds before meeting the body at the neck, where the seam runs around R13-15 of the head and R23 of the body. Stuff the neck firmly before closing that seam, position the head with a few stitch markers first, and sew around slowly so the join sits level rather than tilted. The result is a chunky, rounded shape built for two hands to wrap around, not a flat toy to prop on a shelf.
The swatch in numbers
- Rounds
- 52
- Parts
- 8
- Level
- Intermediate
- Time
- 4-6 hours
- Hook
- 7 mm
- Yarn
- Super Bulky
The yarn and the hook
- Super bulky yarn in two colors (Premier Basic Chanel in "Puta" and "Bubble Gum" suggested)
- 7mm crochet hook
- 25mm safety eyes
- Polyester fiberfill stuffing
- Yarn needle
- Scissors
- Stitch markers
Stitches, spelled out
ch chain; st stitch; sts stitches; sl st slip stitch; sc single crochetDense; inc increase; dec decrease; blo back loops onlyRidge.
Tension and hand-feel
After round 2 of the head (9 stitches), lay the piece flat and check that the circle sits even, with no single section flaring wider than the rest.
If the rounds cup upward or the stitches gap open enough to show fiberfill through, swap to a hook a half size smaller and retest before continuing to round 3.
Head
Ears (Make 2)
One in accent color, one in main color
Arms (Make 2)
Start with accent color
Legs (Make 2)
Start with accent color
Tail
Accent color
Body
Ears
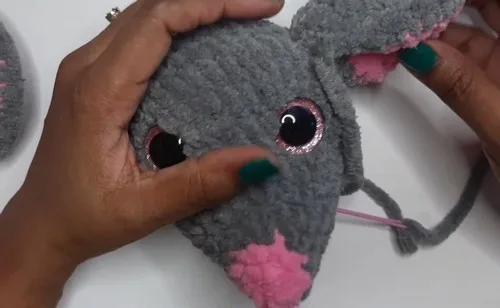
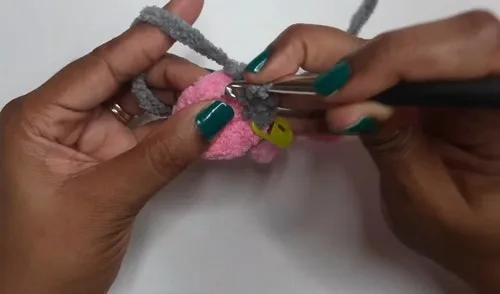
Sew between R11 and R12 of head, 3 sts behind eyes Fold ear and sew through 2 ear sts and 1 head st Knot tails inside head, weave in, trim
Tail
Attach at R10-11 on back of body Sew securely using same method as head
How the texture is built
- In the head, each increase round adds its stitches in evenly spaced sets of three (R2 through R5), so the dome widens in balanced thirds rather than ballooning on one side.
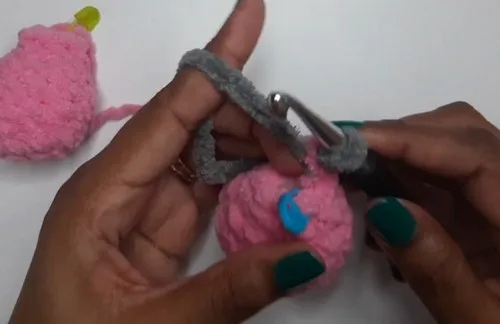
- The main-color ear is left with yarn uncut at R4 while the accent ear is fastened off, so one ear piece carries a working tail straight into the head instead of needing a separate length of yarn for sewing.
If you swap the yarn
| Worsted weight wool blend | produces a noticeably smaller mouse with a softer surface halo; drop to a 5-5.5mm hook and use less fiberfill, since each round comes out smaller in diameter. |
|---|---|
| Chunky weight acrylic | sits a step down from super bulky, giving more drape and a looser hand feel; a 6mm hook keeps stitches snug, but expect the finished head and body to run a size smaller than the 7mm original. |
| Cotton super bulky blend | firms up the fabric and sharpens stitch definition on every round, but cotton's lower loft lets gaps show more readily, so pack the stuffing a little fuller to keep the surface smooth. |
Colorways
- Two-Tone Classic Accent color covers R1-2 of the head, one full ear, and the opening rounds of each arm; main color takes over for R3-15 of the head, the body, legs, tail, the second ear, and the rest of the arms from R4 on.
- Reversed Contrast Swap which color is main and which is accent throughout, so the color that was the small nose tip and single ear becomes the dominant tone across the body, legs and tail, and the previously dominant color shrinks down to the ear and arm starts.
Washing and blocking
Hand wash in cool water and avoid wringing, since super bulky synthetic fibers hold water in their loft and can stretch out of shape under the weight of a wet piece.
Dry flat and away from direct heat, reshaping the head, ears and tail by hand while still damp so the rounds settle back into their original curve instead of drying flattened on one side.
Store the finished mouse stuffed and upright rather than pressed under other items, since squashing the dense single crochet fabric for long stretches can leave visible creases in the stitches.
When it does not look right
- The ears sit at uneven angles once attached to the head.
- The accent ear and main-color ear were likely finished at slightly different stitch counts; count stitches on both before joining and use stitch markers to center each one on the same row.
- The head wobbles or leans instead of sitting level on the body.
- The neck was not packed firmly enough before the R13-15 seam closed around it; add more fiberfill to the neck and re-check head position with pins before sewing the final stitches.
- The arm tips come out pointed rather than flat.
- The fold at R5-9 was not pinched evenly before single crocheting the 3-stitch edge shut; flatten the arm symmetrically first, then close the seam straight across.
Close-ups

Questions people ask
Why does the ear pattern leave yarn attached on only one piece?
The main-color ear is worked without cutting the yarn at R4 so that same tail can carry straight into sewing the ear to the head. The accent-color ear is fastened off because it does not need that extra length.
Does the tail need the same amount of stuffing as the body?
No, the tail is built over 8 rounds and is meant to stay soft and flexible rather than firm like the body. Stuff it lightly, similar to how the arms are handled, so it keeps some movement.
Can the mouse be made without safety eyes?
Embroidered or felt eyes can replace the 25mm safety eyes, but the pattern's big-eyed look depends on that larger hardware size. If skipping them, plan the eye placement before stuffing so the spacing still reads as proportional on the dome-shaped head.
Why are stitch markers listed in the materials?
They help track the increase rounds on the head (R2 through R5) and flag exactly where color changes land mid-round. They also come in handy later for lining up the head against R13-15 before sewing it to the body.
New patterns, as they are filed
One short email when a batch lands, with the feel of each.