
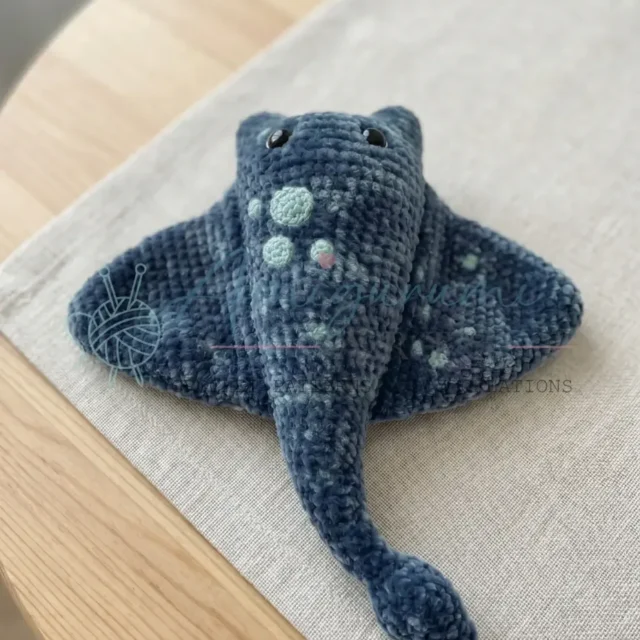
63 rounds · filed under dense · 52 of them
Amigurumi · added 27 Sep 2026
Crochet stingray amigurumi pattern for a plush ray
Single crochet in a tight spiral makes dense, plush fabric for this beginner stingray amigurumi with chenille and cotton details.
- Skill
- Beginner
- Time
- 4-6 hours
- Hook
- 16 mm
- Yarn
- Worsted
- Rounds
- 56
About this pattern
Single crochet worked in a continuous spiral builds a dense, tight fabric here, with no gaps for stuffing to show through. The gray chenille on the body underside adds a soft, brushed texture under the fingers, while the denim polyester yarn on top keeps the surface smoother and a touch firmer. Both worsted weights hold their shape once stuffed, giving the finished ray enough body to sit flat on a shelf rather than slump to one side.
The body starts as two identical flat discs, bridged by a length of chain to form the wide, flattened oval a stingray needs. Side fins, worked the same way with a color change partway through, attach at the edges to sit gray-side down, matching the underside. Once assembled, the decorative cotton circles sit on the crown of the head, adding a flatter, tighter texture against the plush body underneath.
This pattern is written in US crochet terminology, and every piece is worked in a continuous spiral — do not join rounds or chain up unless a step specifically tells you to. Gauge is not critical for this project; keeping your tension consistent round to round matters far more than hitting a specific stitch count.
The swatch in numbers
- Rounds
- 56
- Parts
- 3
- Level
- Beginner
- Time
- 4-6 hours
- Hook
- 16 mm
- Yarn
- Worsted
The yarn and the hook
- Main yarn (body underside): LEAMI Chenille Soft UNI — Gray (color 108), approx. 25 g; 100% polyester, 120 m / 100 g; worsted weight
- Main yarn (body top): Gründl Funny Uni — Denim (color 30), approx. 50 g; 100% polyester, 120 m / 100 g; worsted weight
- Accent yarn (decorative circles): Schachenmayr Catania — Denim (color 421); 100% cotton, 125 m / 50 g; sport weight
Safety eyes
- 16 mm diameter, qty 2
Embroidery floss
- white and black
- Fiberfill stuffing
- Stitch markers
- Yarn needle / tapestry needle
- Pins (for positioning pieces before sewing)
- Scissors
Hooks
- E-4 / 4.0 mm (main body), C-2 / 2.5 mm (cotton accent pieces)
Stitches, spelled out
ch Chain; dec Decrease (invisible decrease recommended); inc Increase (2 sc in same stitch); MR Magic RingDense; sc Single CrochetDense; sl st Slip Stitch; SM Stitch Marker; st / sts Stitch / Stitches.
Tension and hand-feel
Gauge is not critical for this project; consistent tension throughout is more important than hitting a specific gauge.
Keep your tension firm throughout the body — chenille yarn in particular can be loose and pillowy, and tighter stitches will prevent fiberfill from showing through and give the finished ray a cleaner silhouette.
Head & Body (Denim + Gray)
Begin with denim yarn. Make two identical circles first, then join them.
Side Fins — Make 2 (Denim + Gray)
Begin with denim yarn. Switch to gray for marked stitches as noted.
Decorative Head Circles (Denim / C-2 / 2.5 mm hook)
Work all pieces with denim Catania cotton and the C-2 / 2.5 mm hook.
How the texture is built
- Both Head & Body circles open with the same 6-to-12 increase (Rnd 1 to Rnd 2) before settling into even rounds, which sets a flat starting disc for both the top and underside layers before they are joined.
- The chain-6 bridge worked between the first and second circle spans the gap that turns two separate flat discs into one joined body, adding width and thickness before the piece continues in the spiral.
- Side fins follow the same 6-12-18 increase progression as the body but then split into gray for marked stitches and denim for the rest, carrying the body's two-tone split out to the edge of each fin.
Putting the pieces together
If you swap the yarn
| 100% cotton, worsted weight | Produces a firmer, less stretchy fabric with crisper stitch definition than the polyester originals; the body holds its flattened shape well but needs a touch more stuffing to fill the stiffer stitches, still on the E-4/4.0mm hook. |
|---|---|
| 100% acrylic, worsted weight | Keeps a similar light drape and softness to the Gründl Funny Uni denim, works at the same E-4/4.0mm hook, and stuffs up smooth with less bulk than chenille on the underside. |
| cotton or cotton-blend, DK weight | In place of the sport-weight Catania on the decorative head circles, DK weight needs a slightly larger hook than C-2/2.5mm and produces bigger circles, so plan to scale the head placement accordingly. |
Colorways
- Classic Denim Ray Denim yarn covers the top body circle and the fin sections worked in denim; gray chenille fills the underside circle and the marked fin stitches; denim Catania cotton forms all four decorative head circles.
- Two-Tone Reversed Swap the main colors so gray chenille becomes the top surface and denim covers the underside circle and fin base, with the fin's marked stitches reversed to match; work the decorative circles in a lighter cotton shade so they stand out against the darker top.
Washing and blocking
Hand wash both the chenille and denim polyester sections in cold water; chenille can fuzz or mat if machine washed with agitation.
Reshape the body and fins while still damp, pressing the flattened oval back into place, since polyester holds whatever shape it dries in.
Store away from direct heat or sunlight, which can flatten the chenille pile and dull the cotton accent circles over time; fluff the stuffing occasionally to keep the body from going flat.
When it does not look right
- The two body circles don't line up
- Uneven starting stitch counts or twisted circles cause the misalignment; mark the first stitch of each circle before joining and keep the chain-6 bridge snug but not pulled tight.
- The fin edges look bulky or lumpy where
- This comes from carrying the non-working yarn too tightly across the back of the stitches; carry it loosely inside the stitches and pull the new color through on the last yaw over of the stitch before the change.
- The decorative head circles pucker instead of lying flat
- Working the cotton too tightly on the small C-2/2.5mm hook pulls the center closed; loosen tension slightly or go up a fraction in hook size so each increase round has room to spread flat.
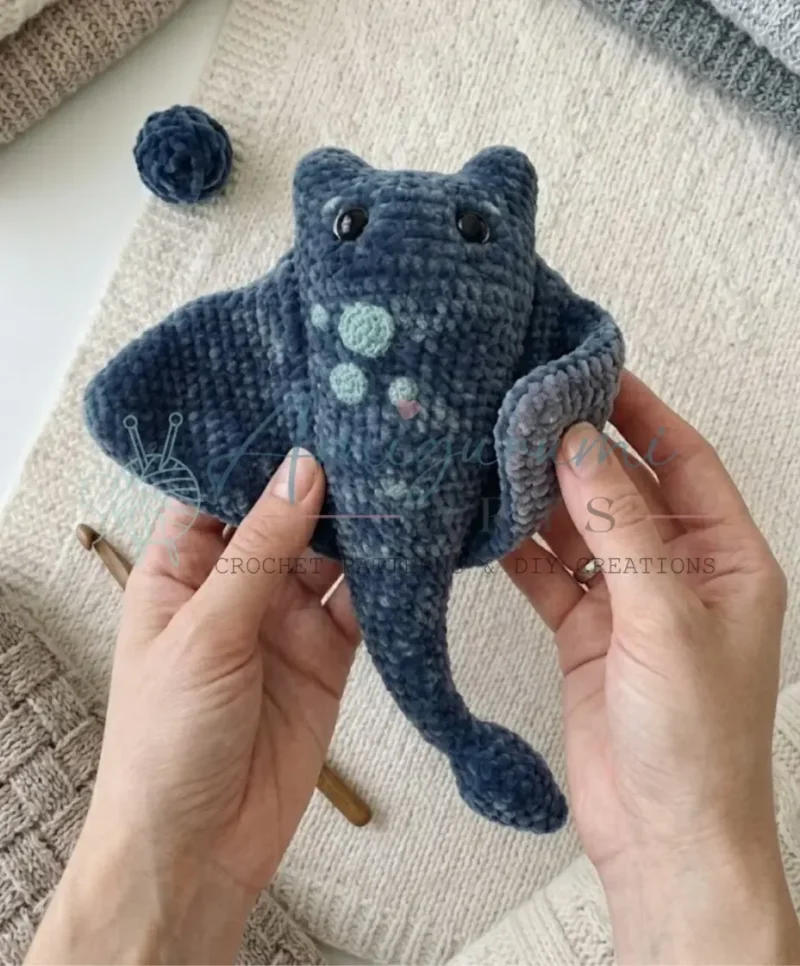
Close-ups

Questions people ask
Why are the head and body worked as two separate circles instead of one continuous piece?
Making mirror discs first, one in denim and one finished in gray, lets each side of the body carry its own color cleanly to the edge. Joining them with a chain-6 bridge afterward creates the flattened oval shape without a visible color-change seam running through the middle.
How much yarn does this pattern actually use?
The project calls for about 25 g of gray Chenille Soft UNI for the underside and about 50 g of denim Gründl Funny Uni for the top and fins. The Catania cotton for the decorative circles is used in small amounts, well under a full 50 g ball.
Do the side fins need to match the body's gray underside exactly?
The marked gray stitches on each fin are placed so the gray sections face down once sewn on, lining up visually with the body's underside rather than needing an exact yarn match. Following the assembly step of positioning each fin gray-side down is what keeps the color logic consistent.
New patterns, as they are filed
One short email when a batch lands, with the feel of each.