
11 rounds · filed under ridge · 2 of them
Baby Clothing · added 29 Sep 2026
Lengthwise half double crochet baby cardigan with slip-stitch cuffs
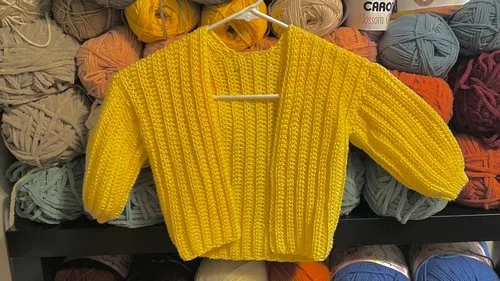
Half double crochet in the back loop makes a ridged, stretchy fabric for this lengthwise-worked baby cardigan with slip-stitch cuffs.
- Skill
- Beginner
- Time
- 4-6 hours
- Hook
- 5 mm
- Yarn
- Worsted
- Rounds
- 4
About this pattern
Half double crochet worked in the back loop only gives this cardigan a ridged surface, horizontal lines running across every row, with enough give widthwise to pull over a squirming arm without straining the yarn. Where each row's first and last stitch goes under both loops instead, the edges tighten and stay flat rather than rolling, so seams sit clean rather than puckered. At the cuff, slip stitch in the back loop replaces HDC for a stretch of rows, packing the stitches closer together so the wrist opening pulls in snug instead of flaring.
The body comes together from three flat panels, a back and two fronts, each worked sideways in rows rather than bottom-up in rounds, so the fabric's ridges run vertically down the body once seamed. Sleeves are worked the same way, shoulder to wrist, widening row by row until the panel matches the bicep circumference, then set into the armhole after the shoulder seams are joined. Once whip-stitched together inside out, the piece turns right-side out to a cardigan with a soft ridged texture and a snug, ribbed-look cuff at each wrist.
The swatch in numbers
- Rounds
- 4
- Parts
- 2
- Level
- Beginner
- Time
- 4-6 hours
- Hook
- 5 mm
- Yarn
- Worsted
The yarn and the hook
Yarn
- Worsted weight yarn (The video uses I Love This Cotton from Hobby Lobby).
Hook
- 5 mm hook.
Main Stitch
- Half Double Crochet in the Back Loop Only (HDC BLO).
Stitches, spelled out
st stitch; sl st slip stitch; hdc half double crochetDense; blo back loops onlyRidge.
Tension and hand-feel
After the first few rows of HDC BLO, lay the working panel flat and check that the ridges run straight and even, without the fabric pulling narrower on one side than the other.
If the panel isn't tracking toward the bicep circumference by the row you'd expect, adjust hook size up or down slightly and keep working rows until the width and the row count line up.
Main Pattern
Body Rows (Width)
The Back Panel will be the full width of the child's back.
The Front Panels will be half the width of the back panel (or until they meet at the center-front).
Repeat all steps to create a second identical Front Panel .
Crochet the Sleeves (with Cuff)
The sleeve is also worked in the length (shoulder to wrist), but incorporates slip stitches for the cuff.
Chain: Chain the number of stitches that corresponds to your measured sleeve length plus one for the turning chain (The video example uses 35 chains + 1 ).
Part 2
Tip: Keep slip stitches loose so the next row is easy to work.
Switch back to HDC in the BLO for the remaining stitches of the row.
Repeat: Repeat Row 2 until the width of the sleeve matches your child's bicep circumference .
Repeat all steps to create a second identical Sleeve .
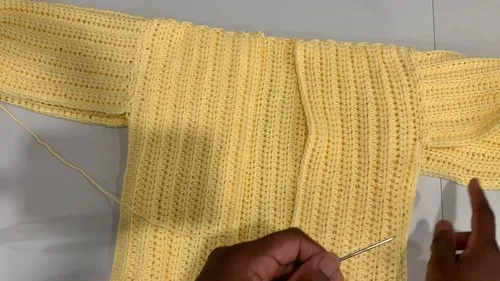
Assembly and Finishing The entire joining process is worked with the pieces inside out .
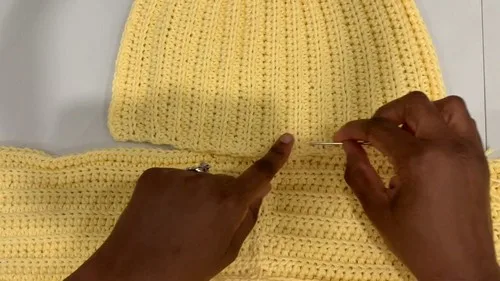
Line Up Panels: Lay the two front panels on top of the back panel, ensuring they line up at the sides and the top (shoulders).
Join Shoulders: Use a darning needle and the Whip Stitch (or Mattress Stitch) to sew the shoulder seams, joining the front panels to the back panel.
Attach Sleeves: Use the Whip Stitch and darning needle to attach the sleeves to the armhole openings of the main body of the cardigan.
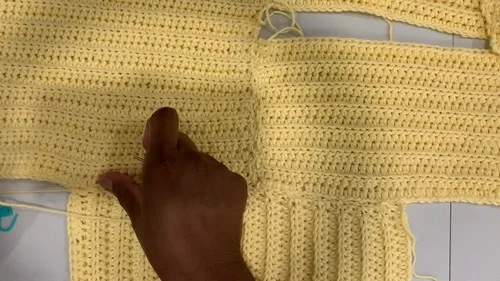
Join Side Seams: Starting from the bottom of the cardigan, use the Whip Stitch to close the side seam, continuing up to close the bottom seam of the sleeve in one continuous line.
Repeat for the other side.
Turn Out: Once all pieces are joined, turn the cardigan right side out .
How the texture is built
- Every panel is built by repeating a single width-row, so the piece grows sideways rather than upward, which is why the sleeve keeps repeating Row 2 until its width simply matches the bicep circumference rather than a set row count.
- The first and last stitch of each row is worked under both loops instead of BLO, anchoring the edge stitches so the panel sides stay firm and don't curl before they're seamed.
Putting the pieces together
If you swap the yarn
| DK weight cotton | Produces a smaller, lighter cardigan with a softer drape than the worsted original; drop to a 4 mm hook and expect to add extra rows to reach the same bicep circumference. |
|---|---|
| Worsted weight acrylic blend | Keeps the same 5 mm hook and row count as written, but adds more stretch and recovery at the cuff, and machine-washing becomes less fussy than with cotton. |
| Bulky weight cotton-acrylic blend | Works up faster with fewer rows needed to hit the same measurements, but the fabric turns noticeably thicker and stiffer; size up to a 6 mm or larger hook to keep the HDC BLO ridges from tightening. |
Colorways
- Split body Work the back panel in one color and both front panels in a second color, then work the sleeves, including the cuff, in a third accent color so each set piece reads as its own block once seamed.
Washing and blocking
Hand wash or use a gentle machine cycle in cool water, since the cotton yarn holds more water weight than a synthetic and rough agitation can felt the HDC BLO ridges.
Dry the cardigan flat rather than on a hanger; wet cotton stretches under its own weight, and hanging it can pull the shoulder seams and sleeve length out of shape.
Reshape the cuffs and body edges while still damp, smoothing the ridge lines flat, then store folded rather than hung so the fabric keeps its width and doesn't sag over time.
When it does not look right
- The panel edges curl instead of lying flat for seaming.
- The first or last stitch of a row was worked into the back loop only instead of under both loops; check that edge stitches are worked through both loops as the pattern specifies.
- The sleeve panel comes out narrower or wider than the bicep circumference.
- Row 2 was repeated without checking progress against the arm measurement; measure the panel's width every few rows while repeating and stop as soon as it matches.
Close-ups
Questions people ask
Why is the sleeve worked from shoulder to wrist instead of top-down in rounds?
Working in rows lets the chain start double as the cuff edge, so the slip-stitch cuff can be built directly into the last 5 to 6 chains without a separate cuff piece. It also makes the width easy to check against the bicep circumference as the rows build.
Can the three body panels be worked as one continuous piece?
Each panel is worked separately because the first and last stitch of every row is anchored under both loops, which keeps the panel edges firm for seaming. Working them as one piece would remove those reinforced edges where the shoulder and side seams need to hold.
How do you know when to stop adding rows to the sleeve?
Keep repeating Row 2 until the sleeve panel's width matches the child's bicep circumference, as stated in the pattern. There's no fixed row count for this part since it's measured against the arm directly.
New patterns, as they are filed
One short email when a batch lands, with the feel of each.