
38 rounds · filed under dense · 29 of them
Amigurumi · added 16 Sep 2026
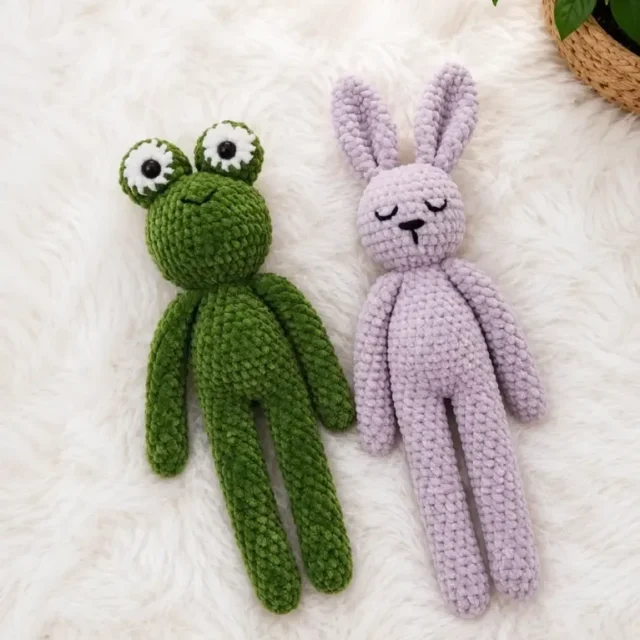
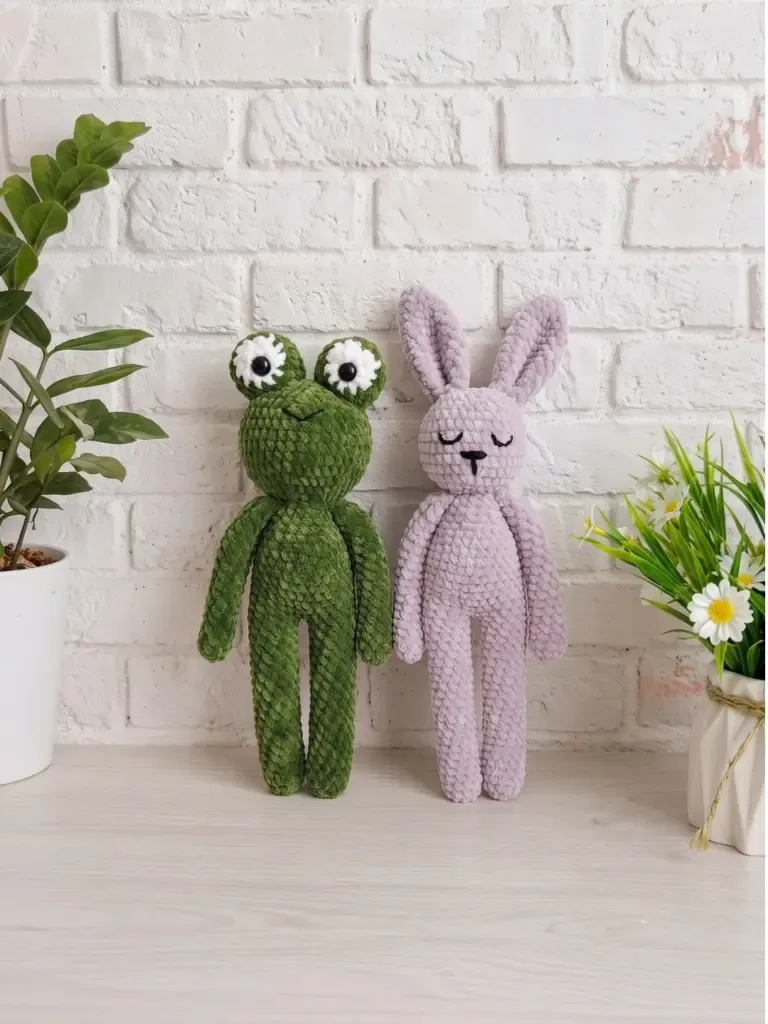
Long-legged amigurumi bunny and frog in dense single crochet
Tight single crochet builds a dense, stuffing-hiding fabric for this long-legged amigurumi bunny and frog with dangling legs.
- Skill
- Intermediate
- Time
- 4-6 hours
- Yarn
- Fingering to Sport
- Rounds
- 32
About this pattern
Worked in single crochet with a US B-1 / 2.25 mm hook on fingering to sport weight yarn, the fabric here closes up tight against your fingers — no gaps, no give past a firm press. That tightness is the whole point: it keeps the polyester fiberfill from peeking through, so the surface reads smooth and solid rather than fuzzy or lumpy no matter how thin the yarn.
The shape is built leg-first: two long tubes worked to 20 rounds each, joined at a two-chain bridge, then carried up into one body, neck-shaped, and topped with a separately worked head. The legs stay soft and bendable if left unstuffed, or firm and posable if packed tight — either way, this is a figure meant to sit with its legs hanging over an edge, not stand upright.
The swatch in numbers
- Rounds
- 32
- Parts
- 5
- Level
- Intermediate
- Time
- 4-6 hours
- Yarn
- Fingering to Sport
The yarn and the hook
Yarn
- Fingering to sport weight yarn in your chosen body color (main color), plus white for the frog’s eyes if making the round version; yarn weight will affect finished size
Safety eyes
- 2 safety eyes per figure (size to suit your yarn weight); additional safety eyes for the frog’s eye globes
Stuffing
- Polyester fiberfill — firm stuffing recommended for the legs; optional if you prefer them to dangle freely
Stitch markers
- 1–2 to track the start of each round
- Yarn needle / tapestry needle
- Scissors
Stitches, spelled out
ch Chain; dec Invisible Decrease (insert hook into front loops of next 2 sts, pull up a loop, yarn over, pull through all 3 loops); inc Increase (2 sc in same stitch); MR Magic RingDense; sc Single CrochetDense; sl st Slip Stitch; st / sts Stitch / Stitches.
Tension and hand-feel
After working the first leg past its increase round (6 sc in MR to 12 sts), lay the tube flat and check the stitches sit close enough that no fiberfill shows through when you press on it.
If the fabric feels loose or the stitches gap open under light pressure, drop to a smaller hook before starting the remaining rounds, since gauge here is judged by density, not a measured swatch.
Arms (make 2)
If you haven’t already worked the arms into Round 15, sew them onto the sides of the body using the long yarn tail and a whipstitch. Position them just below the neck shaping, one on each side, so they hang naturally at the body’s sides.
For the bunny: Sew both ears to the top of the head, centered and evenly spaced. Sew the tail to the center back of the body, just above where the legs begin.
For the frog: Sew both eye globes (round or oval style, depending on which you made) onto the top of the head. Space them wide apart for that classic frog look.
If safety eyes for the main face haven’t been inserted yet, add them now through the head fabric between Rounds 21 and 22.
Check that all stuffing is evenly distributed and that no thin spots are visible in the fabric.
Step by step: Weave in all remaining yarn ends securely; Tips & Tricks.
Keep your tension tight throughout. Amigurumi fabric should have no visible gaps — if you can see the stuffing through the stitches, go down a hook size. A tight, even gauge also gives your toy a cleaner, more professional finish.
Use the invisible decrease every time. The standard decrease creates a visible bump on the surface; the invisible decrease (worked through the front loops only of the next two stitches) lies flat and blends into the fabric beautifully. It makes a real difference on the head shaping.
Insert safety eyes earlier than you think you need to. Once the head decreases past Round 27, it becomes very difficult to reach inside and snap the backing onto the eye post. Insert eyes at Round 24 or 25 while there’s still room.
Leg stuffing is a stylistic choice. Stuffed legs hold their shape and stand upright more easily; unstuffed legs flop and dangle with wonderful floppy charm. If you’re making this as a shelf decoration, stuff them. If it’s for a child who’ll carry it everywhere, leave them free.
Joining the legs cleanly. When you work the chain bridge between the two legs and begin Round 1 of the body, count your stitches carefully before proceeding to Round 2. It’s easy to miss a stitch in the bridge area. A correct count of 28 at the end of Round 1 confirms you’re on track.
Step by step: Frequently Asked Questions Can I make this pattern larger by using thicker yarn?.
Yes — the entire pattern scales up proportionally when you switch to a heavier yarn and a larger hook. Use worsted weight yarn with a US G-6 / 4.0 mm hook for a toy roughly twice the size of the fingering-weight original. Keep in mind that heavier yarn will make the legs stiffer, so they may dangle less freely than the smaller version.
Step by step: How do I attach the arms if I choose not to work them in at Round 15?.
Leave a long yarn tail when you flatten and close each arm. Thread the tail onto your yarn needle and use a whipstitch to sew the flat closed edge of the arm directly to the side of the body, just below the neck shaping. Pull the stitches firmly so the arm sits flush against the body without sagging, then weave the tail through several stitches inside the body before trimming.
Step by step: Is this pattern safe for young children?.
Safety eyes have small parts that can detach if not secured properly, which makes them unsuitable for children under three. For a baby- or toddler-safe version, embroider the eyes with yarn instead of using plastic safety eyes, and make sure all sewn-on parts are attached very securely. Avoid loose yarn tails and double-check every seam before gifting.
Step by step: Which frog eye style should I choose — round or oval?.
The round style with the white sclera gives the frog a more expressive, cartoonish face with clearly visible eyeballs sitting on top of the head. The oval style is simpler and faster to make, with a sleeker look. Both are sewn onto the top of the head the same way — choose whichever suits the personality you want your frog to have.
You’ve just made something genuinely delightful — a little creature with legs that swing and a face that makes people smile the moment they see it. The body-and-head-in-one construction means your seams are minimal and your toy is all the sturdier for it. Share your finished bunny or frog with someone who needs a handmade smile today.
Step by step: Chubby Plush Kitten Amigurumi Crochet Pattern Leave a Comment Cancel reply.
Step by step: Switch to green yarn. sc, inc repeat 6 times around. (18).
Legs (make 2)
Stuff the legs firmly with fiberfill — or leave them unstuffed if you’d like them to dangle freely.
Body
The body picks up stitches across both legs and the chain bridge between them.
Part 6
Bunny Tail
Head
The head is worked continuously from the body — no joining, no fastening off between sections.
Now is the time to insert safety eyes if you haven’t already. Place them between Rounds 21 and 22, spaced evenly. Stuff the head and body firmly.
Close the opening, fasten off, and weave in the end.
Bunny Ears (make 2)
How the texture is built
- All the leg shaping happens in the first two rounds — 6 sc in MR straight to a full-round increase to 12 sts — after which the tube runs even for the rest of its 20 rounds, keeping the leg a straight cylinder rather than tapering.
- The second leg is joined to the first with a 2-chain bridge instead of a seam, and that bridge gets picked up directly in body round 1 (12 sc across each leg plus 2 sc across each side of the bridge, totaling 28 sts), so the gap between the legs is built into the fabric rather than stitched in afterward.
- Body round 10 pulls the stitch count from 28 down to 23 with a repeated 3 sc, dec pattern, narrowing the fabric at the shoulder line before the head is worked as its own separate 11-round piece and sewn on.
Putting the pieces together
If you swap the yarn
| Sport weight cotton | Produces a firmer, slightly heavier fabric with less stretch than a soft acrylic, hides stuffing well at the same B-1 hook, and yields a figure on the larger end of the size range. |
|---|---|
| Fingering weight wool | Gives a lighter, more elastic fabric with a softer hand, but the stitches relax more over time, so go down half a hook size from B-1 to keep the fiberfill from showing through. |
| Worsted weight acrylic, held with a smaller hook | Bulks up the finished size and stiffens the drape considerably, so size up the safety eyes to match and pack the legs more firmly to keep the thicker fabric from sagging. |
Colorways
- Meadow Hare Work legs, body, arms, and head in a soft sage main color; work both bunny ears and the tail in undyed cream so they stand apart from the body against the same tight single crochet fabric.
- Pond Frog Work legs, body, arms, and head in a mid-green main color; work the eye globes in white with the safety eyes seated on top, keeping the green fabric unbroken everywhere else.
Washing and blocking
Hand wash in cool water and avoid wringing the legs, since twisting a stuffed tube can shift the fiberfill inside unevenly.
Lay flat to dry rather than hanging, so the long legs don't stretch out of shape while the fabric is still wet.
Reshape the legs and ears by hand while the piece is still slightly damp, then store away from direct sun and damp storage to keep the tight single crochet from loosening over time.
When it does not look right
- Stuffing shows through the fabric as pale patches.
- The hook is running too large for the yarn; drop to a smaller size until the single crochet closes up tight enough to hide the fiberfill.
- The body sits crooked after the two legs are joined.
- The chain-2 bridge was twisted or the slip stitch joined the wrong stitch on the first leg; unpick back to the join and lay the bridge flat before starting body round 1.
- The legs feel floppy and won't hold a bent pose.
- The fiberfill was packed loosely; push stuffing in firmly round by round as you close the leg, or leave it deliberately soft if a dangling look is what you want.
Close-ups


Questions people ask
Do the legs have to be stuffed?
No. Firm stuffing lets the legs hold a bent pose, but leaving them unstuffed lets them hang loose and swing, which is a valid finished look for this pattern.
What actually changes between the bunny and the frog version?
The body, legs, arms, and head rounds are shared; the bunny adds two ears and a tail sewn on separately, while the frog adds eye globes with an extra safety eye set into each one.
Is the B-1 / 2.25 mm hook fixed, or can it be adjusted?
It's a starting point, not a fixed rule. The goal is a fabric tight enough to hide the stuffing, so size the hook up or down from B-1 until the single crochet closes up that way.
Why does the pattern call for 1-2 stitch markers?
Every part is worked in a continuous spiral with no joining or turning chain, so a marker at the start of each round is the only way to track where a round begins and ends.
New patterns, as they are filed
One short email when a batch lands, with the feel of each.