

37 rounds · filed under dense · 15 of them
Amigurumi · added 2 Oct 2026
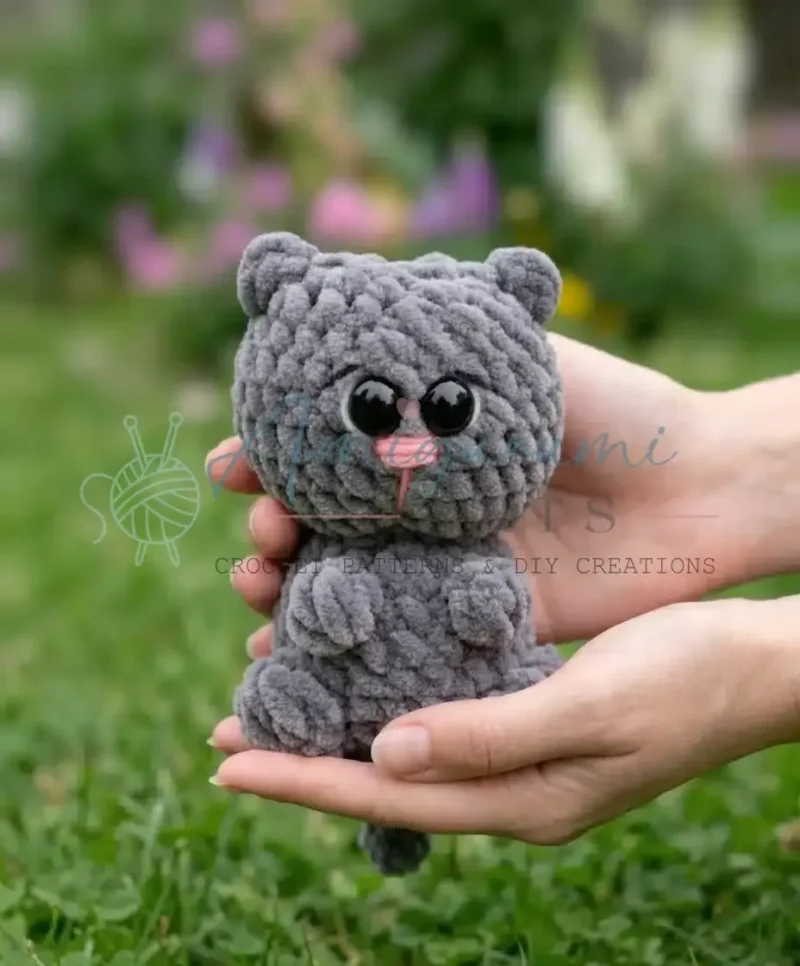
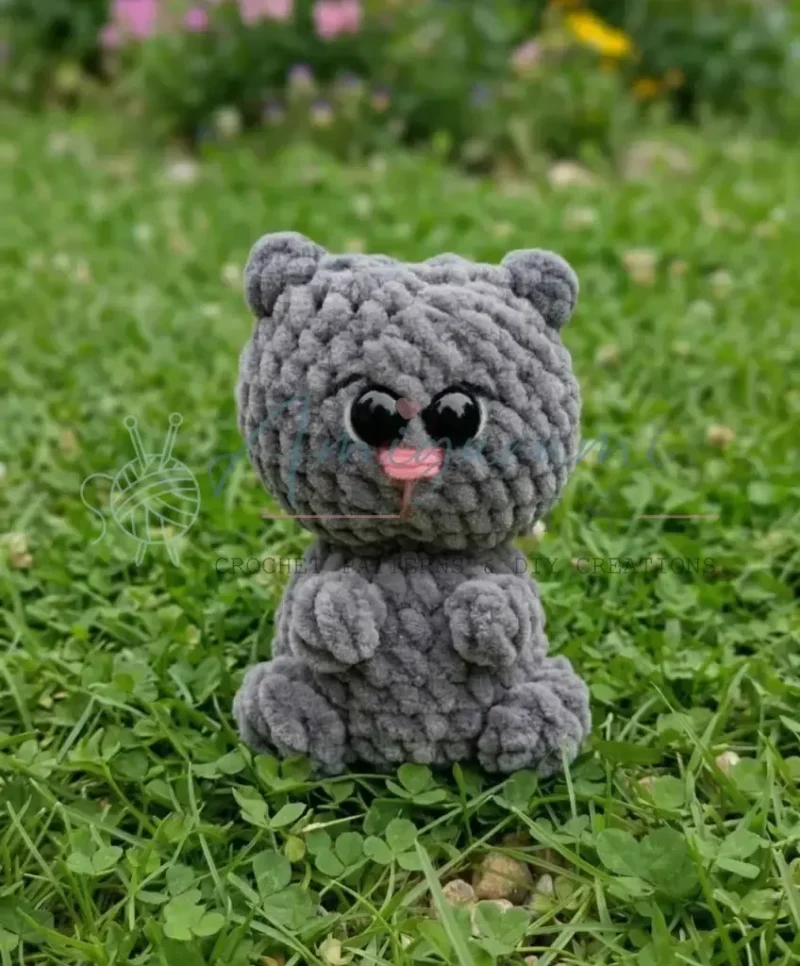
Mini kitten amigurumi: a plush one-piece build
Single crochet worked tight in a continuous spiral builds a dense, plush chenille fabric for this mini kitten amigurumi.
- Skill
- Intermediate
- Time
- 4-6 hours
- Hook
- 4.0 mm
- Yarn
- Worsted
- Rounds
- 20
About this pattern
Worked in chenille yarn with tight single crochet held in a continuous spiral, the fabric here comes out dense and soft under the fingers, closing up fully so the polyfill stuffing stays hidden rather than peeking through the gaps between stitches. The chenille fiber lays its own brushed texture over the sc base, giving the surface a slight halo that reads plush and rounded rather than ribbed or sharply defined the way a plain worsted would look.
The whole body, head, and limbs come from a single piece worked across all 20 rounds, starting at one end and shaping outward into two paws (the round 4 shells) and a tail (chained off and joined back to the body) before narrowing up into the head. Stuff firmly as you go rather than waiting until the end, since the continuous spiral leaves no side seam to push filling in through later.
The swatch in numbers
- Rounds
- 20
- Level
- Intermediate
- Time
- 4-6 hours
- Hook
- 4.0 mm
- Yarn
- Worsted
The yarn and the hook
- Plush chenille yarn (worsted weight, about half a skein, like YarnArt Dolce)
- 4.0mm crochet hook
- 10mm safety eyes
- Polyfill stuffing
- Tapestry needle
- Scissors
- Stitch marker (highly recommended!)
Stitches, spelled out
MR magic ringDense; sc single crochetDense; inc increase (2 sc in same stitch); dec decrease (single crochet 2 together, sc2tog); dc double crochetDrape; sl st slip stitch; ch chain; st(s) stitch(es); 5-dc Shell 5 double crochet stitches worked into the same stitch.Lace; dc5tog double crochet 5 together (yarn over, insert hook into next stitch, yarn over, pull up loop, yarn over, pull through 2 loops) 5 times, yarn over, pull through all 6 loops on hook.Drape; 4-dcBO 4-double crochet bobble (Yarn over, insert hook into stitch, yarn over, pull up loop, yarn over, pull through 2 loops) 4 times, working all partial double crochets into the same stitch. You will have 5 loops on your hook. Yarn over, pull through all 5 loops on hook..
Tension and hand-feel
After round 3, with the stitch count at 21 sc, lay the circle flat and press lightly from the inside to check that no polyfill shows through the gaps between stitches.
Body, Head, and Limbs (One Piece)
How the texture is built
- Increases run through rounds 1 to 3, doubling the stitch count from 7 to 14 to 21 — the standard build-up that opens one end of the body before any shaping starts.
- Round 4 breaks from plain single crochet twice to work 5-dc shells, raising two paw bumps above the surrounding sc surface while the rest of the round stays flat and low.
- The tail starts as a 6-chain extension off round 4, worked back in sc, then closed with a sl st into the main body — that sl st is what pulls the tail snug against the body instead of leaving it loose.
Putting the pieces together
If you swap the yarn
| Cotton, worsted weight | Stitch definition sharpens and the shell and dc5tog shaping at the paws reads more crisply, but the fabric loses the chenille halo and drapes stiffer; a 3.5mm hook keeps it from gapping. |
|---|---|
| Acrylic, worsted weight (non-chenille) | The finished piece comes out lighter in the hand with less loft, and stitch counts are easier to see round by round; dropping to a 3.5mm hook helps close gaps that chenille would normally fill on its own. |
| Velvet or plush polyester, worsted weight | Keeps a halo similar to chenille with less shedding, though the fabric sits slightly bulkier and the finished kitten comes out a touch larger at the same 4.0mm hook. |
Washing and blocking
Hand wash in cold water only — chenille pile mats and flattens under machine agitation.
Reshape the paws and tail by hand while still damp, then lay flat to dry away from direct heat, since high heat can scorch or flatten the chenille pile.
Store the finished piece stuffed and unflattened, and avoid stacking anything heavy on the paw shells or tail so the loft holds.
When it does not look right
- The paws look flat instead of raised bumps.
- The round 4 shell stitches were worked loosely or the round 5 dc5tog didn't fully gather them back down; work the shells snugly and stuff lightly behind each paw before closing round 5.
- The tail flops away from the body instead of sitting close.
- The sl st join at the end of the round 4 chain missed the intended stitch or the chain tension ran looser than the body; redo the sl st into the correct stitch and match the chain tension to the rest of the round.
- Stuffing shows through the stitches.
- The hook is running too large for the chenille thickness, leaving the stitches open; drop to a smaller hook and work noticeably tighter, especially through rounds 1 to 3.
Close-ups
Questions people ask
Why is the tail made with chains instead of crocheted straight off the body?
The tail starts as a 6-chain extension off round 4, worked back in sc, then joined with a sl st, which lets it sit as a flatter tab against the body rather than spiral the way the limbs do. This gives the tail a noticeably flatter profile than the rounded paws or head.
Can the safety eyes be swapped for embroidered eyes instead?
Yes — place them where the pattern indicates, between round 16 and round 17 on the head, evenly spaced and centered on the face. Embroidered eyes sit fine on the tight chenille fabric and skip the washer step entirely.
How much yarn does this piece actually use?
About half a skein of worsted weight chenille covers the whole body, head, and limbs piece, matching what the materials list calls for. Keep the remainder on hand in case the paws or tail get reworked in a contrast color.
Why does the pattern insist on a stitch marker for just one piece?
The entire body, head, and limb section works as a continuous spiral across 20 rounds, so without a marker it is easy to lose track of where each round starts, especially through the shell and dc5tog rounds. Moving the marker up every round keeps the shaping lined up correctly.
New patterns, as they are filed
One short email when a batch lands, with the feel of each.