Skip to the patterns
Hook Satisfied
Menu
Plush Monster Costume Doll With Layered Costume Pieces
Dense Amigurumi

121 rounds · filed under dense · 84 of them

SquishRidgeDenseNo feel

Amigurumi · added 29 Sep 2026

Plush Monster Costume Doll With Layered Costume Pieces

Single crochet builds a dense plush doll base, with a separate crocheted Sulley and Wazowski costume set to layer over the body.

Skill
Intermediate
Time
8-12 hours
Hook
4 mm
Yarn
Worsted
Rounds
111

About this pattern

Worked almost entirely in single crochet, the plush worsted yarn packs into a dense, slightly nubby fabric under your fingers — close enough that stuffing stays hidden but not so tight the stitches fight the hook. The continuous spiral used for the arms, legs, body, and head keeps that surface smooth, with no seam ridge breaking the line, while the few flat rows (ears, dress panels) sit noticeably thinner and more pliable in comparison.

You're building a full jointed-or-sewn doll body — legs and body worked as one long tapered tube, head and arms added separately, then a wig, ears, and pigtails finishing the figure. On top of that base sits a second, detachable layer: a Sulley costume with fins and eyes, plus a stand-alone Wazowski piece, both meant to dress over the finished doll rather than replace it.

The swatch in numbers

Rounds
111
Parts
13
Level
Intermediate
Time
8-12 hours
Hook
4 mm
Yarn
Worsted

The yarn and the hook

  1. Plush yarn, Worsted weight, 100g/120m, in the following colors: body/skin tone, pants color, white, hair color, dress color, Sulley-costume main color, fin/fur color, dark gray, and Wazowski main + contrast color
  2. Hook size 4mm (US G/6) for the amigurumi pieces
  3. Hook size 2.25mm (US B-1) or knitting needles, size 2mm, if working the knit version of the dress
  4. Fiberfill stuffing
  5. Stitch markers
  6. Yarn needle / tapestry needle
  7. Sharp sewing needle and black and white embroidery thread for the face
  8. Small buttons for the dress closure
  9. Sturdy thread for cinching and gathering
  10. Straight pins and scissors

Stitches, spelled out

BLO Back Loop OnlyRidge; ch Chain; dc Double CrochetDrape; dec Decrease (invisible decrease); dtr Double Treble CrochetDrape; FLO Front Loop OnlyRidge; hdc Half Double CrochetDense; inc Increase (2 sc in same stitch); MR Magic RingDense; Rnd Round; Row Row; sc Single CrochetDense; sl st Slip Stitch; sts Stitches; tr Treble CrochetDrape.

Tension and hand-feel

After Round 1 of the Legs & Body piece, check that the twelve stitches close into a flat, gap-free oval rather than a cupped or rippled one — a rippled edge means the tension is too loose for the fabric to hold stuffing later.

If the finished stuffed doll is running noticeably off the roughly 21cm (8¼in) target, go back to this early round and tighten or loosen your hold on the working yarn rather than changing hook size mid-piece.

Arms (make 2)

this …

Round 16 sc in MR. (6)
Round 2hdc inc, sc 5. (7)
Round 3hdc2tog, sc 5. (6)
Rounds 4–11sc in each st around. (6) Do not stuff the arms. Fold the arm flat so the decrease from Rnd 3 sits at the side seam. If needed, work 2–3 extra rounds before folding, then sc through both layers across 3 sts to close. Fasten off and weave in the end.Step by step: (sc 7, dec) twice. (16); sc in each st around. (16); (sc 6, dec) twice. (14); sc in each st around. (14).(sc 5, dec) twice. (12) Fold flat; sc through both layers: sc 2, dec, sc 2. Fasten off. These are crocheted directly into the main costume piece — don’t sew them on separately.

Ears (make 2)

Round 14 sc in MR, do not join, ch 1, turn. (5)
Round 2sl st in each of next 4 sts. (5) Fasten off, leaving a tail for sewing on.

Legs & Body

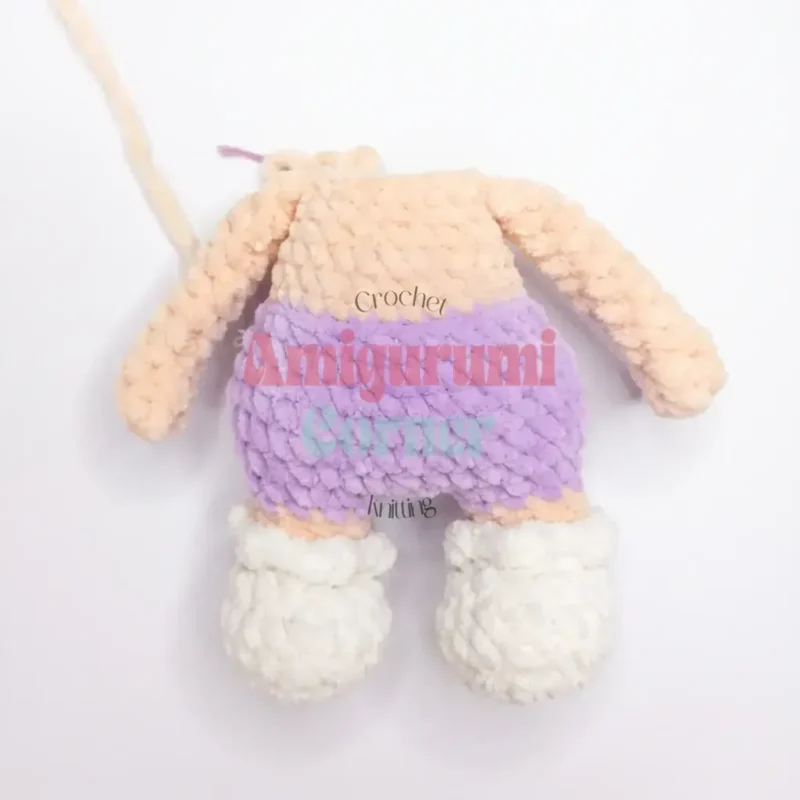
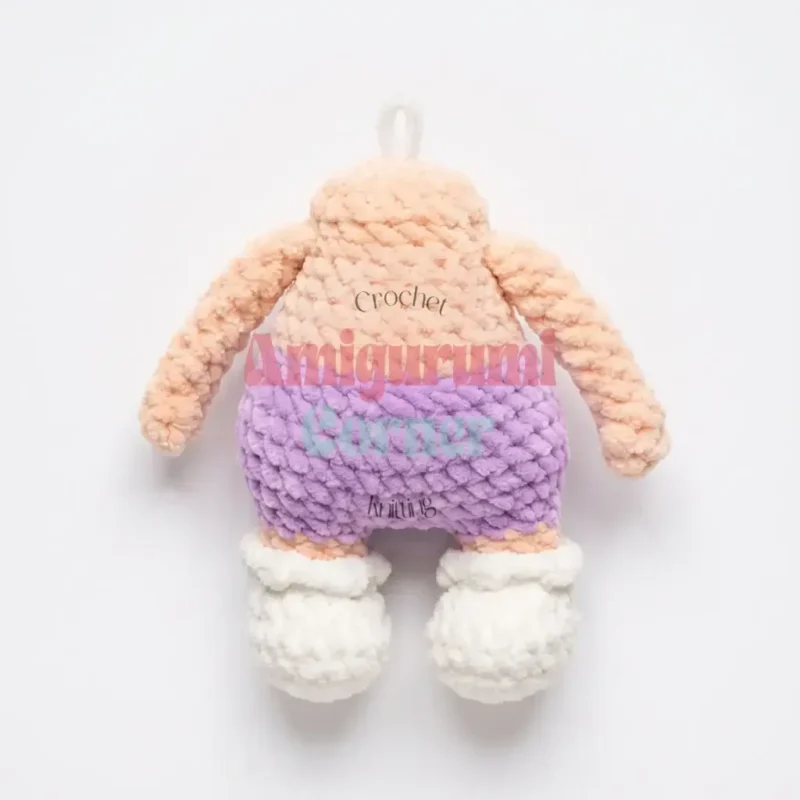
Begin with white yarn. Do not stuff the legs until they’ve been joined together in Round 11.

Round 1Ch 5. Starting in 2nd ch from hook: sc 3, 5 sc in last ch, then working into the back bumps of the foundation chain: sc 2, inc. (12)
Round 2inc, sc 2, inc 5 times, sc 2, inc, sc 1. (19)
Round 3BLO throughout: sc in each st around. (19)
Round 4sc in each st around. (19)
Round 5sc 4, dec 5 times, sc 5. (14)
Round 6sc 4, dec 3 times, sc 4. (11) At the end of the round, switch to body color. Don’t cut the white yarn — carry it up the inside of the work.
Round 7BLO throughout: sc 4, dec, sc 5. (10)
Round 8sc in each st around. (10) At the end of the round, switch to purple (pants color). Fasten off body-color yarn and weave in.
Round 9BLO throughout: sc in each st around. (10)
Round 10(sc 1, inc) 5 times. (15) On the left leg only, fasten off here. Using the remaining front loops from Rnd 7 and white yarn, work the sock trim: ch 2, sl st in same st, then sl st, ((hdc, sl st) in same st, sl st) 5 times. Fasten off and weave in.
Round 11sc 7, ch 1, turn; sc 4, ch 1, turn; sc 4, ch 1, turn. Take the left leg, count back 6 sts from the marker, hold it against the right-leg piece, and sc 4 through both the leg and the connecting chain to join. Place a marker to track round starts — its exact position doesn’t matter.
Round 12sc 1 into the join, (sc 1, inc) twice, sc 2, inc, sc 4, sc 1 into the join, sc 3, sc 1 into the join, sc 4, inc, sc 2, (inc, sc 1) twice, sc 1 into the join, sc 1, inc across the connecting chain. (38)
Rounds 13–15sc in each st around. (38) Begin stuffing the legs now.
Round 16(sc 2, dec) twice, sc 20, (dec, sc 2) twice, sc 2. (34)
Round 17(sc 6, dec, sc 7, dec) twice. (30) At end of round, switch to body color and fasten off purple.
Round 18BLO throughout: sc in each st around. (30)
Round 19(sc 4, dec) 5 times. (25)
Round 20sc in each st around. (25)
Round 21(sc 3, dec) 5 times. (20)
Round 22sc in each st around. (20) Stuff the body firmly.
Round 23Attach the arms here: sc 4, sc 3 attaching one arm, dec, sc 4, dec, sc 3 attaching the second arm, sc 2. (18) Position the arms with fingers pointing forward, and nudge stitch placement slightly if needed to keep them symmetrical.
Rounds 24–25sc in each st around. (18)
Round 26sc 16. If using a jointed neck: finish stuffing the body, insert the joint disc and cotter pin, then work 11 more decreases before fastening off, using the tail to cinch tightly around the joint post. If sewing the head on instead, fasten off here.

Head

Work in body-color yarn.

Round 1Ch 8. Starting in 2nd ch from hook: inc, sc 5, 3 sc in same st, sc 6. (16)
Round 2inc twice, sc 5, inc 3 times, sc 5, inc. (22)
Round 3(sc 1, inc) 3 times, inc (mark this stitch — it’s your face-center reference) , (inc, sc 1) 7 times, inc. (34)
Round 4(sc 8, inc, sc 7, inc) twice. (38)
Rounds 5–8sc in each st around. (38)
Round 9sc 6, dec twice, sc 4, dec twice, sc 20. (34) Double-check that the 4 sts between the decreases sit centered on the face.
Rounds 10–12sc in each st around. (34) Insert the safety eyes between Rnds 9 and 10, spaced evenly around the decrease points. If using a joint, insert it through Rnd 1, centered at the back of the head.
Round 13(dec, sc 15) twice. (32)
Round 14sc in each st around. (32)
Round 15(sc 6, dec) 4 times. (28) Begin stuffing the head.
Round 16(sc 5, dec) 4 times. (24)
Round 17dec 12 times. (12)
Round 18dec 6 times. Fasten off and weave in the end.

Wig

Work in brown yarn.

Round 16 sc in MR. (6)
Round 2inc 6 times. (12)
Round 3inc 12 times. (24)
Round 4(sc 2, inc) 8 times. (32)
Round 5(sc 3, inc) 8 times. (40)
Rounds 6–12sc in each st around. (40) Work 3–4 more sc, then fasten off. Try the wig on the doll’s head before finishing — gauge varies, so you may need extra or fewer rounds. Sew it on, embroider bangs, and finish the face.

Pigtails (make 2)

Begin with pink yarn and leave a 12in (30cm) starting tail.

Round 1Ch 10. Starting in 2nd ch from hook: sl st in each of next 9 sts, ch 1, turn. (9)
Round 2sc in each st around. (9) At the end of the row, switch to brown and fasten off pink. Then work: (ch 7, starting in 2nd ch from hook, sc 6 down the chain, sl st in FLO) 8 times. Fasten off and twist the finished pigtail.

Dress (Crochet Version)

Round 1Ch 32. Starting in 7th ch from hook: sc 26, ch 2, turn. (28) The small loop this creates is your button loop.
Round 2Work the whole row in FLO hdc: hdc 5, 3-hdc inc 3 times, hdc 11, 3-hdc inc 3 times, hdc 5, ch 1, turn. (27) From this row forward, work every row in BLO.
Round 3sc 4, sc inc, ch 5 (skip 6 sts), sc inc, sc 9, sc inc, ch 5 (skip 6 sts), sc inc, sc 4, ch 2, turn. (35)
Round 4hdc 8, hdc inc, hdc 17, hdc inc, hdc 8, ch 2, turn. (37)
Round 5hdc 9, 3 hdc in same st, hdc 17, 3 hdc in same st, hdc 9, ch 2, turn. (41)
Round 6hdc in each st around, ch 2, turn. (41)
Round 7hdc 10, hdc inc, hdc 19, hdc inc, hdc 10. (43) Try the dress on the doll. If the length is right, chain 1 and work an edging round. If you’d like it longer, add one more row of 43 hdc first.

Sulley Costume — Lower Fins (make 2)

Round 16 sc in MR. (6)
Round 2sc 5, inc. (7)
Round 3sc 3, inc, sc 3. (8)
Round 4(sc 3, inc) twice. (10)
Round 5(sc 4, inc) twice. (12)
Round 6(sc 5, inc) twice. (14)
Round 7(sc 2, inc) twice, (sc 3, inc) twice. (18)
Rounds 8–10sc in each st around. (18)
Round 11(sc 7, dec) twice. (16) Do not stuff. Fold flat and sc through both layers across 8 sts to close. Fasten off, leaving a tail for sewing on later.

Sulley Costume — Main Piece, Lower Section

Begin in the main costume color.

Round 1Ch 15. Starting in 2nd ch from hook: inc, sc 12, 4 sc in same st, sc 12, inc. (32)
Round 2inc twice, sc 12, inc 4 times, sc 12, inc twice. (40)
Round 3(sc 1, inc) twice, sc 12, (sc 1, inc) 4 times, sc 12, (sc 1, inc) twice. (48)
Round 4sc 4, inc, sc 14, inc, sc 8, inc, sc 14, inc, sc 4. (52)
Round 5BLO throughout: sc in each st around. (52)
Rounds 6–10sc in each st around. (52)
Round 11BLO throughout, worked in raised sc: sc in each st around. (52)
Round 12sc 4, inc, sc 16, inc, sc 8, inc, sc 16, inc, sc 4. (56)
Rounds 13–16sc in each st around. (56)
Round 17BLO throughout, raised sc: sc 4, inc, sc 18, inc, sc 8, inc, sc 18, inc, sc 4. (60) Try the costume on the doll now — it should sit loosely over her.
Rounds 18–22sc in each st around. (60)
Round 23BLO throughout, raised hdc: hdc in each st around. (60)
Round 24sc 58, attach an upper fin over the next 2 sts. (60)
Round 25attach an upper fin over 3 sts, sc 28, attach an upper fin over 5 sts, sc 24. (60)
Round 26sc 6; switch to white and work a BLO bobble (dc, tr, dc) in the same stitch; back to main color: sc 6; white bobble (dc, tr, dc) in same st; main color: sc 4; white bobble (tr, dtr, tr) in same st; main color: sc 6; white bobble of hdc inc (2 hdc in same st); main color: sc 1; white bobble of hdc inc; sc 12, sl st. Fasten off. This round is not worked to completion — it stops here intentionally.

Sulley Costume — Main Piece, Upper Section

Work in the main color.

Round 1Ch 15. Starting in 2nd ch from hook: inc, sc 12, 4 sc in same st, sc 12, inc. (32)
Round 2inc twice, sc 12, inc 4 times, sc 12, inc twice. (40)
Round 3(sc 1, inc) twice, sc 12, (sc 1, inc) 4 times, sc 12, (sc 1, inc) twice. (48)
Round 4(sc 2, inc) twice, sc 12, (sc 2, inc) 4 times, sc 12, (sc 2, inc) twice. (56) Nudge a stitch if needed to keep the pattern centered.
Round 5(sc 3, inc) 7 times, sc 28. (63)
Round 6BLO throughout: sc in each st around. (63)
Rounds 7–17sc in each st around. (63)
Round 18sc 5, tooth-bobble in BLO (2 hdc in same st), sc 6, tooth-bobble in BLO (dc, tr, dc) in same st, sc 4, tooth-bobble in BLO (dc, tr, dc) in same st, sc 7, tooth-bobble in BLO (dc, tr, dc) in same st, sc 2, tooth-bobble in BLO (2 hdc in same st), sc 27; join to the lower section and sc 14 through both layers to attach.

Sulley Costume — Eyes (make 2)

Begin with white/cream yarn.

Round 16 sc in MR. (6) Keep the ring loose enough to insert a safety eye later.
Round 2inc 6 times. (12)
Round 3(sc 1, inc) 6 times. (18)
Round 4sc in each st around. (18) At end of round, switch to gray, leaving a 20in (50cm) tail on the right side for whip-stitching later. Fasten off white and weave in.
Round 5BLO throughout: sc in each st around. (18)
Rounds 6–7sc in each st around. (18)
Round 8(sc 2, dec) 4 times, sc 2. (14) Center the safety eye in the magic ring and stuff the piece firmly.
Round 9(sc 1, dec) 4 times, dec. (9) Fasten off and cinch the opening closed. Using the tail from the earlier color change, whip-stitch around the front loops of Rnd 5. Fasten off and weave in.

Mike Wazowski

Begin with white/cream yarn.

Round 16 sc in MR. (6) Keep the ring loose — the eye will center here.
Round 2inc 6 times. (12)
Round 3(sc 1, inc) 6 times. (18) At end of round, switch to main color, keeping the contrast strand carried, leaving a 20in (50cm) tail on the right side for whip-stitching later.
Round 4BLO throughout: (sc 2, inc) 6 times. (24)
Round 5(sc 3, inc) 6 times. (30)
Round 6sc 10, inc, sc 8, inc, sc 10. (32)
Round 7sc 28; switch to contrast color and work a bobble (dc, tr, dc) in the same stitch; sc 3. (32)
Round 8sc 3; contrast-color bobble (dc, tr, dc) in same st; sc 4; work an arm in the next stitch: FLO sl st, ch 8, starting in 2nd ch from hook: hdc inc, sl st 6, sl st in same FLO st; continue along the body: sc 14; work the second arm the same way: FLO sl st, ch 8, starting in 2nd ch from hook: hdc inc, sl st 6, sl st in same FLO st; continue to end of round: sc 8. (32) Fasten off contrast color and weave in.
Round 9sc 8, sc in BLO of previous round, sc 4; work a leg: FLO sl st, ch 11, starting in 3rd ch from hook: (hdc inc, ch 1, sl st) in same st, sl st 8, sl st in same FLO st; sc 4 along the body; work the second leg the same way; sc 4 along the body, sc in BLO of previous round, sc 8. (32)
Round 10sc 13, sc in BLO of previous round, sc 4, sc in BLO of previous round, sc 13. (32) Center the eye in the magic ring.
Round 11sc 10, dec, sc 8, dec, sc 10. (30)
Round 12(sc 3, dec) 6 times. (24) Stuff the body firmly.
Round 13(sc 2, dec) 6 times. (18)
Round 14dec 9 times. Fasten off, weave in the end, and cinch the remaining opening closed. Using the earlier tail, whip-stitch around the eye, then embroider a mouth.

Nose

Ch 3. Fasten off, leaving tails on both ends for attaching later.

How the texture is built

  • The Arms increase once on Round 2 (hdc inc) and decrease once on Round 3 (hdc2tog), then run straight for eight rounds — that single increase-then-decrease pair sets the fold line, so the arm is meant to be flattened and closed with sc through both layers rather than stuffed round.
  • The Ears are worked flat in two short rows, with Row 2 made entirely of slip stitches — slip stitch fabric draws up tighter and stiffer than single crochet, which gives the small ear piece enough body to hold its shape without any stuffing.
  • Legs & Body opens with a Ch 5 base worked on both sides (sc 3, 5 sc in the last chain, sc 2 into the back bumps) to form an elongated foot, then Round 3 works in the back loop only — that back-loop ridge marks where the foot sole stops and the leg column begins, and stuffing is deliberately held off until the two legs join at Round 11.

Putting the pieces together

Step 1Stuff the Head firmly, then attach it to the Legs & Body piece using the joint (if jointed) or by whip-stitching around the neck opening (if sewn on).
Step 2Pin the Ears in place on either side of the head, just above the eyes, and sew them on using the tails left from finishing.
Step 3Sew the Nose onto the center of the face at the marked face-center point, then embroider the eyebrows and mouth with black thread.
Step 4Sew the Wig onto the top and back of the head, checking placement against the ears before securing every stitch.
Step 5Attach the Pigtails just behind the ears, tucking the twisted ends under the wig edge before sewing through both layers.
Step 6Slip the finished Dress onto the doll and close the button loop at the back.
Step 7For the Sulley Costume, sew the Lower Fins onto the back seam of the lower body section using their yarn tails, then sew the Eyes into place on the front of the costume using cinching thread. Work loop stitches across the shoulders for a furry texture.
Step 8Slip the completed costume over the dressed doll.
Step 9For Mike Wazowski, no separate assembly is needed — the arms and legs are crocheted directly into the body as you work.
Step 10Weave in every remaining yarn end throughout all pieces, trimming tails close to the fabric.

If you swap the yarn

Cotton, worsted weightStitch definition sharpens and the plush halo disappears, which reads well on the costume overlay pieces; the fabric has less give, so pack the fiberfill firmer to avoid a flat-sided look, and keep the same 4mm hook.
Acrylic, DK weightThe doll comes out smaller than the 21cm (8¼in) target unless every round is added to, so drop to a 3.5mm hook to keep the fabric dense; the wig and pigtails drape softer and lighter at this weight.
Chenille or velvet-style, worsted weightAdds loft and sheen close to Sulley's fur without extra fin pieces, but the pile can split under a small hook, so size up to 4.5-5mm and stuff more lightly to keep the pile from stretching thin.

Colorways

  • Classic doll base White covers the Round 1 foot base of the Legs & Body piece, pants color takes over from the leg into the body, skin tone runs through the Head and Arms, hair color fills the Wig and Pigtails, and dress color is reserved for the Dress rounds.
  • Costume overlay Sulley-costume main color covers the Main Piece's Lower and Upper Sections, fin/fur color works the Lower Fins, dark gray picks out the Eyes detail rounds, and the Wazowski main and contrast colors are kept separate for the stand-alone Mike Wazowski piece.

Washing and blocking

Hand wash the finished pieces in cold water and avoid wringing, since twisting flattens the plush pile that gives the fabric its texture.

Reshape fins, ears, and the wig while still damp, then lay everything flat to dry so the stuffed rounds keep their shape instead of drying stiff in a wrinkled state.

Store the doll unstacked, with nothing pressing on the wig, pigtails, or fins, so the loft in those plush rounds doesn't get crushed over time.

When it does not look right

The foot base of the Legs & Body piece puckers instead of lying flat after Round 1.
The stitches worked into the chain and the ones worked into the back bumps are pulling at different tensions; work the back-bump stitches snugger and recount for 12 stitches before starting Round 2.
The Arm looks lumpy instead of folding flat at the side seam.
Fiberfill has been added where the instructions call for none; leave the arm unstuffed, fold so the Round 3 decrease sits at the side, and close with sc through both layers.
The Ear curls too tightly or stands stiff away from the head.
Row 2's slip stitches were worked too tight; loosen your tension on that row, or size up the hook for just that row, so the ear lies with a gentle curve instead of clenching shut.

Questions people ask

Can the Dress be knit instead of crocheted?

Yes, the pattern offers a knit alternative worked on 2mm needles (or a 2.25mm hook if you'd rather crochet a tighter version), in place of the standard Dress rounds. The knit version produces a thinner, more drapey fabric than the crocheted dress, so expect a softer skirt line.

Do the Sulley and Wazowski costume pieces replace the base doll?

No, they're an additional set — Lower Fins, the Main Piece in Lower and Upper Sections, Eyes, and the separate Mike Wazowski piece — built to layer over the finished doll body rather than substitute for it.

How firmly should each piece be stuffed?

The Head is stuffed firmly before attaching, the Arms are left unstuffed entirely and folded flat instead, and the Legs & Body piece holds off on stuffing until the legs are joined at Round 11, after which it's packed firmly to hold the standing shape.

New patterns, as they are filed

One short email when a batch lands, with the feel of each.