
20 rounds · filed under dense · 12 of them
Footwear · added 10 Oct 2026
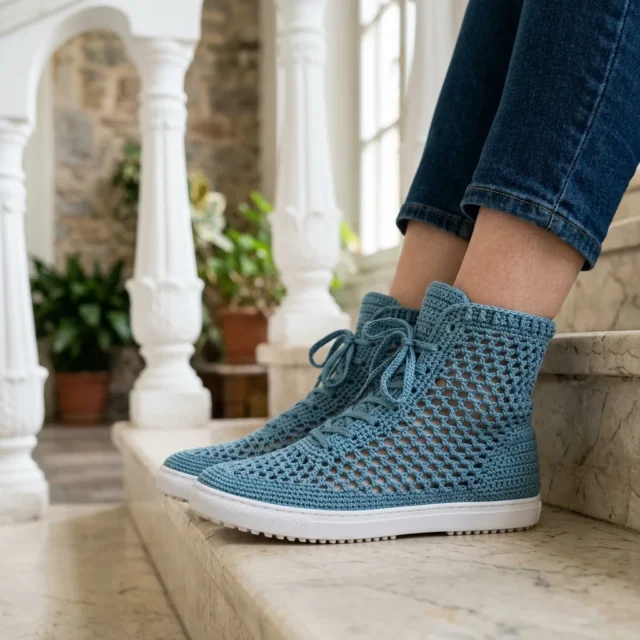
Ocean blue lattice crochet high-top sneakers
Double crochet lattice makes an airy, firm mesh for these high-top uppers, fitted to real rubber soles.
- Skill
- Intermediate
- Time
- 6-8 hours
- Hook
- 3.5 mm
- Yarn
- DK
- Rounds
- 20
About this pattern
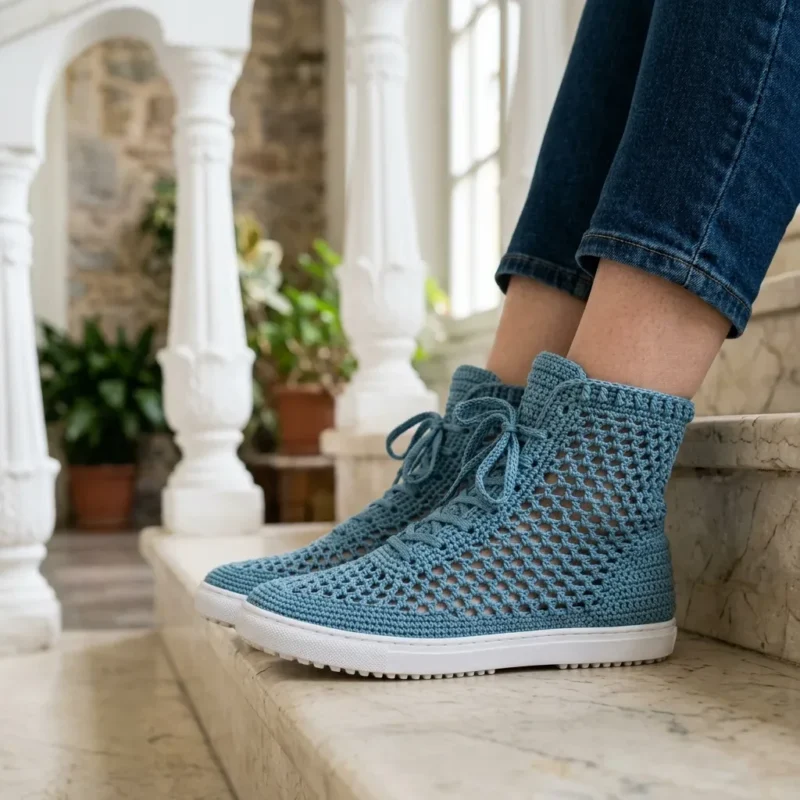
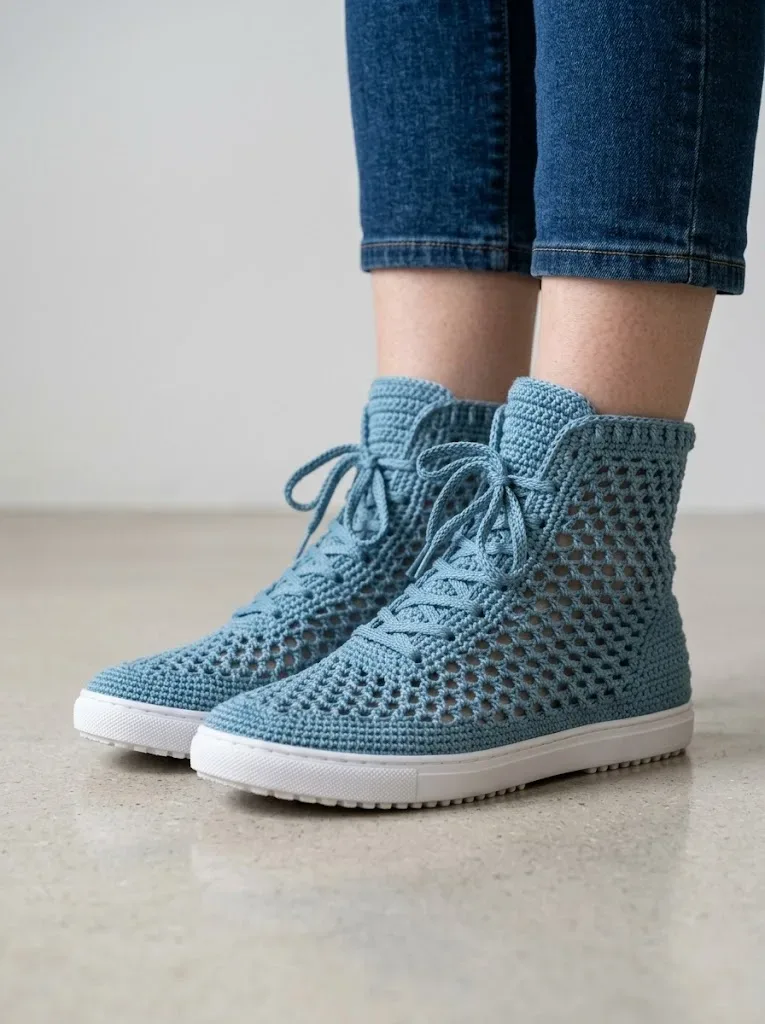
The lattice body of this upper comes from double crochet worked in an open, diamond-spaced pattern, so the fabric holds a crisp mesh instead of a dense wall. Mercerized cotton at DK weight keeps each loop of the lattice crisp rather than slack, which means the holes stay diamond-shaped under tension instead of sagging into ovals. Run a finger across a finished panel and you feel ridges and gaps in even rhythm, firm enough to keep its shape but light enough to flex with a foot moving inside a shoe.
Underneath the lattice sits a tighter toe box worked in closer stitches for durability, then the whole upper joins to a punched rubber sole around its full perimeter. The front opening is worked flat in short rows that taper near the top, leaving a gap wide enough for a lace to cross through. Once the rounds and rows are done, the piece becomes wearable footwear: thread the laces through the front opening, pull snug, and tie off at the ankle.
The swatch in numbers
- Rounds
- 20
- Parts
- 3
- Level
- Intermediate
- Time
- 6-8 hours
- Hook
- 3.5 mm
- Yarn
- DK
The yarn and the hook
Yarn
- 200 grams of DK weight cotton yarn (approximately 400 yards total)
- Cotton or cotton blend works best for structure and durability
Suggested yarns
- Drops Safran, Scheepjes Catona, or any mercerized cotton
Hook
- 3.5mm (US E/4) crochet hook for the upper
- 3.0mm (US D/3) crochet hook for tighter sections near the sole
Additional Supplies
- Rubber sneaker soles in your size (available online or at craft stores)
- Yarn needle for weaving ends
- Stitch markers (at least 4)
- Awl or leather punch for creating holes in the sole
- Scissors
- Measuring tape
- Gauge
- 18 stitches and 10 rows = 4 inches in double crochet using 3.5mm hook
- Size Information
To adjust sizing
- Measure your foot length and width before beginning
- The sole should be approximately half an inch longer than your foot
Stitches, spelled out
ch chain; st stitch; sts stitches; sl st slip stitch; sc single crochetDense; dc double crochetDrape; sc2tog single crochet 2 stitches together (decrease)Dense; sk skip.
Tension and hand-feel
After working a swatch of a few rows of double crochet with the 3.5mm hook, measure a 4-inch square and count the stitches and rows against the stated 18 stitches and 10 rows.
If the count runs higher than that, the fabric is coming in tighter and denser than intended, so move up a hook size; if it runs lower, the lattice will gape more than planned, so drop down a size until the square matches.
To adjust sizing
For smaller sizes, reduce starting chain by 4 stitches per size down For larger sizes, increase starting chain by 4 stitches per size up
Measure your foot length and width before beginning The sole should be approximately half an inch longer than your foot Abbreviations and Stitch Definitions
Before we dive into the pattern, let me explain each stitch you will need.
Ch = Chain. Wrap yarn over hook and pull through the loop on your hook. This creates one chain stitch.
Sl st = Slip stitch. Insert hook into stitch, yarn over, pull through both the stitch and the loop on your hook in one motion. Used for joining rounds.
Sc = Single crochet. Insert hook into stitch, yarn over and pull up a loop (2 loops on hook), yarn over and pull through both loops.
Dc = Double crochet. Yarn over, insert hook into stitch, yarn over and pull up a loop (3 loops on hook), yarn over and pull through 2 loops (2 loops remaining), yarn over and pull through remaining 2 loops.
Ch-sp = Chain space. The gap created by chain stitches in the previous row. You work into this space, not into individual chains.
Sk = Skip. Pass over the indicated number of stitches without working into them.
Understanding the Lattice Stitch Pattern
The beautiful open mesh you see in these high tops is created using a lattice stitch pattern . This technique alternates chain spaces with double crochet stitches to create a grid-like appearance with diamond-shaped openings.
Here is how it works: Lattice Pattern (worked in rows):
Pattern Instructions Preparing Your Sole Before crocheting, you need to prepare your rubber sole for attachment.
1. Using an awl or leather punch, create holes around the entire perimeter of the sole 2. Space holes approximately half an inch apart
3. Keep holes about a quarter inch from the edge 4. You should have roughly 50 to 60 holes per sole, depending on size Part 1: The Sole Foundation
Using your 3.0mm hook, you will create a crocheted base that attaches directly to the rubber sole.
Part 3
Part 2: The Toe Box
The toe section is worked in tighter stitches for durability before transitioning to the lattice pattern.
Switch to your 3.5mm hook.
Now we transition into the beautiful open mesh pattern that gives these sneakers their distinctive look.
Part 4: Creating the Tongue Opening To create the lace-up front, we now work in rows instead of rounds.
Part 4
Alternatively, create a simple i-cord or twisted cord for more substantial laces.
Finishing Your Crochet High Tops Weaving the Laces
Thread your laces through the ch-1 spaces along the front opening, just like you would lace regular sneakers. Start from the bottom and work your way up, creating an X pattern.
Blocking (Optional but Recommended)
Wet block your finished shoes by dampening them and stuffing with tissue paper. Allow to dry completely. This helps the stitches settle into place and gives a more polished finish.
How the texture is built
- Round 2 of the sole places two sc into the corner stitches marked at the toe and heel, which is where the stitch count jumps from 54 to 58 sc; the increase is deliberately confined to those two marked points rather than spread around the round, so the sole keeps a flat oval rather than ballooning evenly.
- The sole rounds are worked in the round and closed with a slip stitch join to the first stitch each time, which keeps the perimeter continuous and lets the sc sit directly through the pre-punched holes without a seam breaking the line where the upper will later attach.
If you swap the yarn
| Worsted weight cotton | Lattice diamonds open wider and the whole upper grows in scale, so fewer stitches are needed per round; move up to a 4.0mm hook and expect a stiffer, heavier sneaker. |
|---|---|
| Cotton-acrylic blend, DK weight | The same 3.5mm hook still works but the mesh drapes rather than holds its shape, so the toe box loses some of the firmness that keeps the shoe's front structured. |
| Linen-cotton blend, DK weight | Stitches sit stiffer and more textured at the same hook size, which suits the structured lattice well but gives a slightly drier, less smooth hand than pure cotton. |
Colorways
- Deep Sea Two-Tone Sole rounds 1 through 3 worked in navy, the lattice upper and toe box in ocean blue, front opening rows and both laces in white.
- Sandy Shore Sole rounds 1 through 3 in cream, the lattice body in seafoam, front opening rows in cream to match the sole, laces in cream.
Washing and blocking
Hand wash the cotton upper in cool water and keep the rubber sole away from a washing machine drum, since the glued or stitched join between sole and upper is not built for agitation.
Lay the shoes flat to dry, reshaping the toe box and smoothing the front opening while the cotton is still damp so the lattice sets flat instead of curling.
Store with a shoe form or stuffed with tissue to keep the open lattice from collapsing in on itself, and keep them out of direct sun so the cotton color does not fade unevenly.
When it does not look right
- The sole edge puckers or ruffles after Round 2.
- A corner increase at the toe or heel marker was skipped; recount to 58 sc and add the missing 2-sc increase at each marked stitch.
- The front opening curls at the edges instead of lying flat.
- The sc2tog decreases in rows 13 and 14 were pulled too tight; rework them with relaxed tension and block the opening flat before lacing.
- The lattice upper feels loose and floppy rather than structured.
- The 3.5mm hook is sitting too large for the cotton's tension; drop to the 3.0mm hook or check the swatch against the 18-stitch, 10-row gauge before continuing.
Close-ups
Questions people ask
Can this pattern be resized for a different foot length?
Yes, the sizing adjustment calls for reducing the starting chain by 4 stitches per size down or increasing it by 4 stitches per size up. Measure foot length and width first, since the sole should end up about half an inch longer than the foot.
Why does the pattern call for two different hook sizes?
The 3.5mm hook works the open lattice on the main upper, while the 3.0mm hook tightens the stitches in the sections nearest the sole. The smaller hook keeps that area dense enough to hold against a rubber sole without gapping.
How many laces does one pair of shoes need?
Each shoe takes two laces, so four total for a pair. Every lace starts with a chain of 120 followed by a row of slip stitch back across.
Does the yarn have to be cotton?
Cotton or a cotton blend is recommended because it holds the lattice open and gives the upper enough structure to stay attached to a rigid sole. A softer blend will still work but drapes more and gives less support through the toe box.
New patterns, as they are filed
One short email when a batch lands, with the feel of each.