
8 rounds · filed under dense · 7 of them
Amigurumi · added 4 Oct 2026
Pink amigurumi bunny worked in single crochet rounds
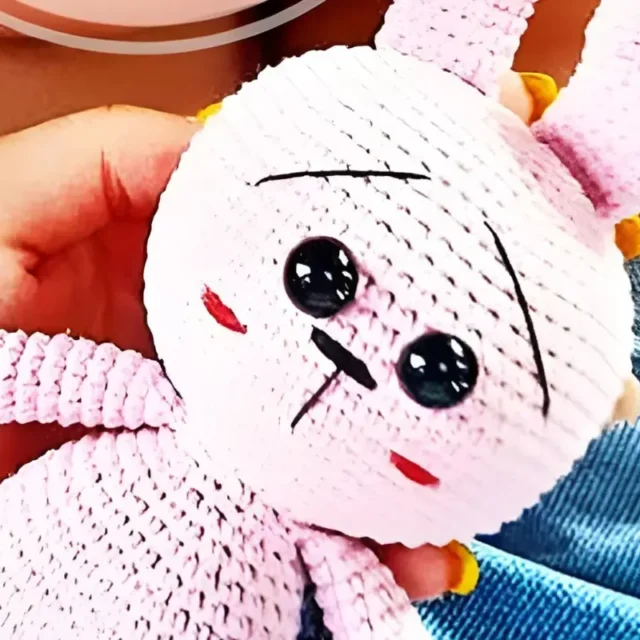
Single crochet builds a dense, firm fabric for this pink amigurumi bunny, shaped by decrease rounds and flat-seamed arms.
- Skill
- Intermediate
- Time
- 4-6 hours
- Yarn
- Worsted
- Rounds
- 8
About this pattern
Under the hand this bunny feels dense and solid, the kind of fabric that holds its shape before the fiberfill even goes in. Single crochet, worked round after round with no gaps between stitches, packs the loops close enough that light does not pass through and stuffing cannot peek out between stitches. There is almost no stretch to it — pull at the fabric and it resists rather than gives, which is exactly what a piece meant to hold a rounded, stuffed form needs.
The shape builds from tight, closed tubes — head, body, and a pair of arms worked straight for ten rounds before flattening — into a rounded, plush silhouette once stuffed. Decrease rounds pull the open ends closed into smooth curves rather than points, so the head and body taper instead of coming to a corner. Stuff each piece firmly as you close it, then use a sewing needle to join the parts and, if you like, tack on a ribbon bow at the neck or ear.
The swatch in numbers
- Rounds
- 8
- Parts
- 8
- Level
- Intermediate
- Time
- 4-6 hours
- Yarn
- Worsted
The yarn and the hook
- One ribbon bow if you want
- Fiberfill for stuffing
- Sewing needle and scissors
Stitches, spelled out
ch chain; st stitch; sl st slip stitch; sc single crochetDense; dec decrease.
Tension and hand-feel
After working the first several rounds of the head or body, lay the piece flat and check that it curves into a shallow dome rather than ruffling at the edge or cupping sharply inward.
If the fabric ruffles, the stitches are too loose for the decrease rate and you should drop to a smaller hook; if it cups tightly or won't lie even slightly flat, go up a hook size so the single crochet has room to curve instead of bunching.
R 21
R 44
R 2
R 6
Body
Start with pink color yarn
R 22
Head
Start with pink yarn color
R 50
Note: Insert safety eyes (or normal eyes) between round 36 and round 37 at the distance of 3-4 stitches in between the eyes.
How the texture is built
- R21's decrease pattern of (3 sc, dec) x6 removes one stitch out of every four, a fast decrease rate that pulls the round down to 24 stitches quickly — this kind of tight shaping is used to close a smaller curved part rather than taper it gradually.
- R44's decrease pattern of (7 sc, dec) x6 removes only one stitch out of every eight, a much gentler rate that still lands the round at 48 stitches — spacing the decreases this far apart keeps the curve shallow, which is how a larger piece tapers without pinching.
- The arm worked at R2 skips decreasing altogether: nine stitches run straight for ten rounds, then the tube is folded flat and closed with 4 sc worked through both layers at once. That flat seam, rather than a rounded decrease cap, is what a narrow tube needs to close cleanly without bunching fabric at the tip.
If you swap the yarn
| Cotton, worsted weight | Produces a firmer, less forgiving fabric with sharper stitch definition, so every round of single crochet shows cleanly. Drop to a smaller hook than you'd use for acrylic, since cotton has less give and the stitches need to stay tight enough to hide the fiberfill. |
|---|---|
| Acrylic, sport weight | Makes a noticeably smaller, lighter bunny, since a thinner yarn shrinks every round's circumference. Use a smaller hook to keep the fabric dense, and reduce the amount of fiberfill slightly so the smaller shell doesn't overstuff. |
| Wool blend, worsted weight | Adds loft and a little stretch to the fabric, so the finished piece feels softer and slightly springy rather than rigid. The same hook size works, but the fabric will felt if washed warm, so handle it like a piece meant for cool washing only. |
Colorways
- Solid Blush Keep one pink across every part — Head, Body, the arm worked at R2, and the shaping rounds R6, R21, R22, R44, and R50 — so the surface reads as one continuous color with no seams to hide. Save a contrasting white or cream only for the optional ribbon bow.
Washing and blocking
Hand wash in cool water only — warm water and agitation can felt or mat a wool-blend yarn and flatten the dense single crochet fabric.
Reshape the head, body, and arms by hand while still damp, pressing the stuffed curves back into their rounded form before they dry, then lay flat on a towel away from direct heat.
Store the finished bunny upright or on its side rather than folded, so the firm single crochet fabric doesn't crease at the neck or arm seams.
When it does not look right
- The head or body curves too sharply and looks pinched rather than rounded.
- The decrease round is likely too tight for the stitch count — this happens when a fast decrease like R21's (3 sc, dec) pattern gets worked with a hook too small for the yarn. Size up one hook for that round only and the curve will relax.
- The arm's flattened top puckers instead of closing smoothly.
- This happens when the fold isn't centered before working the 4 sc through both layers at R2's closing row. Flatten the tube so the final round splits evenly in half first, then work the closing stitches through both layers at once.
Questions people ask
Why does the arm get worked flat instead of decreased closed like the head?
The arm at R2 is a narrow, straight tube of only nine stitches, too small to decrease gradually without distorting. Folding it flat and closing with 4 sc through both layers gives a clean seam at the tip, which suits a slim tube better than a rounded decrease cap.
Does this pattern need more than one color of yarn?
No — the materials list calls for a single pink yarn, and every part can be worked in that one color. Any second color, like for a contrast paw or the ribbon bow, is optional and up to you.
Why does R44's decrease round feel so much gentler than R21's?
R21 removes a stitch every four stitches, while R44 only removes one every eight, so R44 tapers a larger round far more gradually. That slower decrease rate is what keeps a bigger curved piece smooth instead of pinching in too fast.
What hook size should you use if the fabric feels too loose to hide the stuffing?
Drop to a smaller hook than the one you started with — the single crochet needs to sit tight enough that fiberfill doesn't shadow through. Test on an early round like R6 or R2 before committing to the full piece.
New patterns, as they are filed
One short email when a batch lands, with the feel of each.