
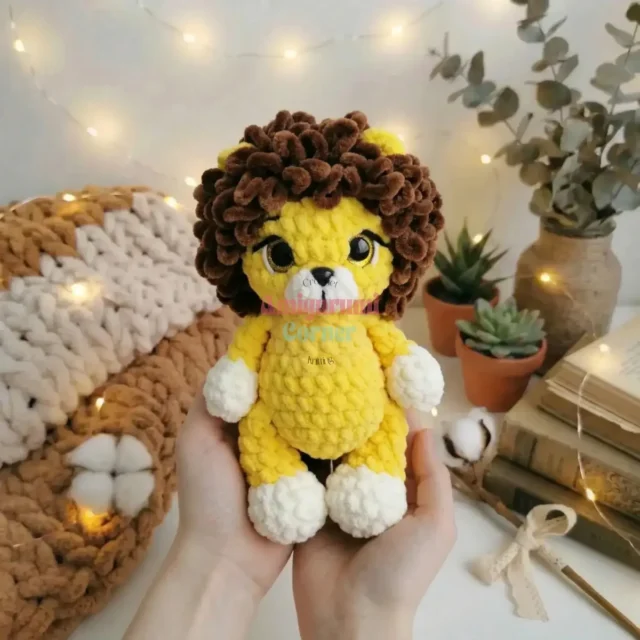
40 rounds · filed under dense · 28 of them
Amigurumi · added 28 Sep 2026
Plush velvet amigurumi lion crochet pattern
Single crochet in velvet yarn builds a dense, plush fabric for this amigurumi lion, from paws to pulled-loop mane.
- Skill
- Beginner
- Time
- 4-6 hours
- Hook
- 16 mm
- Yarn
- Bulky
- Rounds
- 33
About this pattern
Single crochet worked in continuous spiral rounds through a velvet/chenille yarn builds a fabric that feels dense and slightly plush under the fingers, with no gaps between stitches to let stuffing show through. The plush nap catches light unevenly, giving each round a soft, brushed texture rather than a flat sheen. Because the stitch stays tight and short, the fabric holds its shape without curling, which matters for parts like the lower legs and upper arms that need to stand on their own before stuffing.
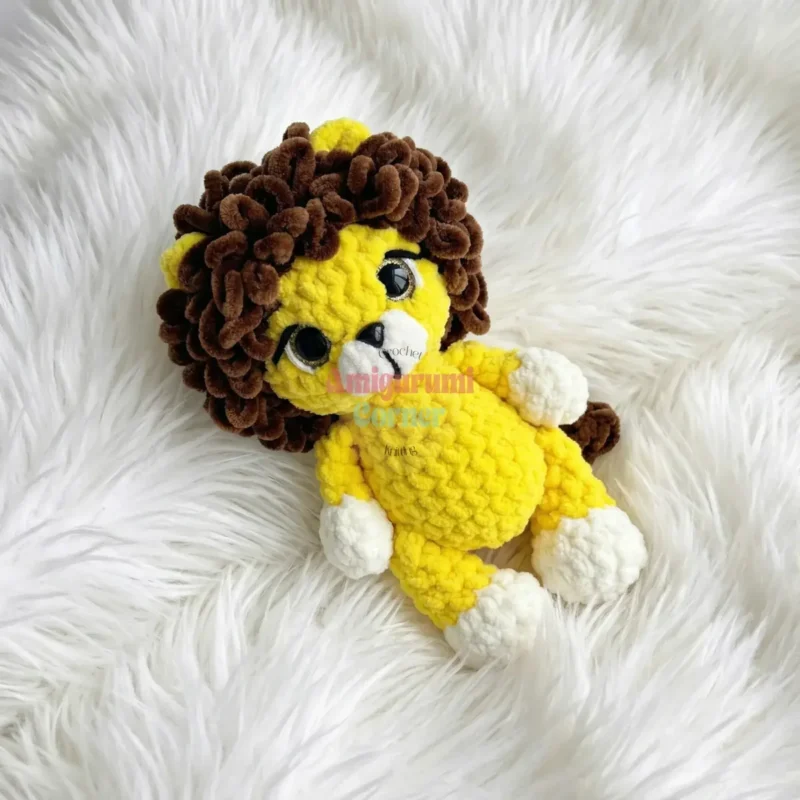
The lion's shape comes together from separate pieces — lower legs, upper arms, a tapered tail, two ears, and a head and body worked as one continuous piece — then joined by sewing. The mane is made flat rather than in rounds, its pulled loops adding a shaggy ring around the face once attached. Stuff each limb firmly before closing so the plush fabric keeps its rounded line instead of collapsing at the seams.
The swatch in numbers
- Rounds
- 33
- Parts
- 5
- Level
- Beginner
- Time
- 4-6 hours
- Hook
- 16 mm
- Yarn
- Bulky
The yarn and the hook
- Velvet/plush yarn — YarnArt Dolce or equivalent (weight: bulky/chenille):
- Yellow (color 761)
- Brown (color 775)
- Cream/Milk (color 745)
- Safety eyes — 16 mm, 1 pair
- Safety nose — 10×11 mm, 1 piece
- Cotton yarn — small amount, for embroidering facial details
- Polyester fiberfill stuffing
- Crochet hook — 4.0 mm
- Scissors, long tapestry needle, stitch marker, strong thread (for eye indentation)
Stitches, spelled out
mr Magic RingDense; ch Chain; sc Single CrochetDense; dc Double CrochetDrape; inc Increase (2 sc in same stitch); dec Decrease (invisible decrease); sl st Slip Stitch; BLO Back Loop OnlyRidge; Popcorn st 4 unfinished dc worked into one stitch, closed together (used for muzzle bumps)Squish.
Tension and hand-feel
After Rnd 1's six single crochets into the magic ring, check that the fabric closes tight with no visible hole at the center.
If the ring gapes or the stitches feel loose against the plush yarn, drop to a smaller hook until the fabric holds its density.
Lower Legs (make 2)
Work in cream yarn.
Upper Arms (make 2)
Work in cream yarn.
Tail
Work in brown yarn.
Head & Body (make 1)
Work in yellow yarn throughout, except where noted.
The neck section is now complete. Continue for the body.
Note: On all rounds of the mane, pull each loop up to approximately 2–3 cm as you work to create the fluffy mane texture.
(partial): 20 sc — stop here. The remaining 10 unworked stitches will sit at the forehead area.
Ears (make 2)
Work in yellow yarn. Leave a 10 cm tail at the start for sewing.
Foundation: Ch 3.
Working into the 3rd chain from the hook: 2 dc, ch 2, sl st.
Fasten off, leaving a sewing tail. Make second ear the same way.
How the texture is built
- The lower legs increase over the first three rounds (6, 12, 15 stitches) before holding steady, building a rounded foot base before the leg walls go straight.
- The head and body run as a single 18-round piece rather than two parts sewn together, removing a neck seam from the finished fabric.
- The mane is worked flat instead of in continuous rounds, letting each row's loops be pulled loose for texture without disturbing the spiral join used everywhere else.
Putting the pieces together
If you swap the yarn
| Worsted-weight cotton | Finished lion comes out smaller and firmer, stitches show more definition instead of the brushed velvet finish, and a 3.5mm hook keeps the fabric dense enough to hold stuffing. |
|---|---|
| DK-weight acrylic held double | Keeps stitch count and shape close to the original, but drape gets stiffer, so add stuffing in smaller pinches to avoid lumps showing through the thinner double strand. |
Colorways
- Golden Savanna Yellow (761) for the head and body, brown (775) for the mane, tail, and ear centers, cream (745) for the lower legs, upper arms, and muzzle patch.
- Sand and Cocoa Cream (745) for the head and body, brown (775) for the mane and tail tip, yellow (761) reserved for the ear centers and paw pads on the lower legs.
Washing and blocking
Hand wash the finished lion in cool water; chenille pile sheds less when it isn't agitated in a machine.
Lay flat to dry away from direct heat, since heat can flatten the plush nap of the velvet yarn.
Reshape by fluffing the pile with fingers or a soft brush, especially around the mane, and store the lion loose rather than pressed against other toys to keep the loops from matting.
When it does not look right
- The mane loops look flat and matted after joining.
- Chenille pile crushes easily under tension; work the mane flat as instructed, sew it on last, then pull each loop gently loose with a needle instead of stretching the strip while attaching.
- The upper arms don't sit flush where they meet the body.
- The taper from Rnd 2's 9 stitches down to 6 by Rnd 4 needs to land right at the shoulder; if the arm still gaps, add one extra decrease round before sewing to narrow it further.
- The eyes look uneven or too far apart after the indentation step.
- The indentation thread pulls between Rnd 12 and Rnd 17; if the pull is uneven, the eyes sit crooked, so re-thread and pull both sides evenly before knotting off.
Close-ups

Questions people ask
Why are the head and body worked as one piece instead of separate parts?
Working all 18 rounds in one continuous piece removes the seam that would normally sit at the neck, so the plush fabric reads as one unbroken surface from crown to base. It also means stuffing can be added gradually as the rounds progress instead of packed in after sewing two halves together.
Why is the mane worked flat instead of in the round?
A flat piece lets each row's loops be pulled out for texture without disturbing the spiral join used everywhere else on the body. Once the loops are pulled and the piece is stitched around the head, the flat construction disappears under the shaggy texture.
What does the eye indentation step actually change?
Pulling strong thread between Rnd 12 and Rnd 17 draws the plush fabric in slightly at the inner corners of both eyes, giving the face a gentler, more rounded expression instead of flat safety-eye placement. It's a tension adjustment made after the eyes are set, not a stitch.
Can the safety eyes and nose be swapped for embroidered features?
Yes, since the dense single crochet fabric holds embroidery stitches without stretching out of shape. Embroidered features sit flatter than the 16mm safety eyes and 10×11mm nose, so expect a softer, less dimensional face.
New patterns, as they are filed
One short email when a batch lands, with the feel of each.