

34 rounds · filed under dense · 32 of them
Amigurumi · added 3 Oct 2026
Rust and mustard chameleon amigurumi pattern
Single crochet on a 3.0mm hook builds a dense, firm chameleon body that hides the stuffing and holds its curve.
- Skill
- Intermediate
- Time
- 4-6 hours
- Hook
- 3.0 mm
- Yarn
- Worsted
- Rounds
- 34
About this pattern
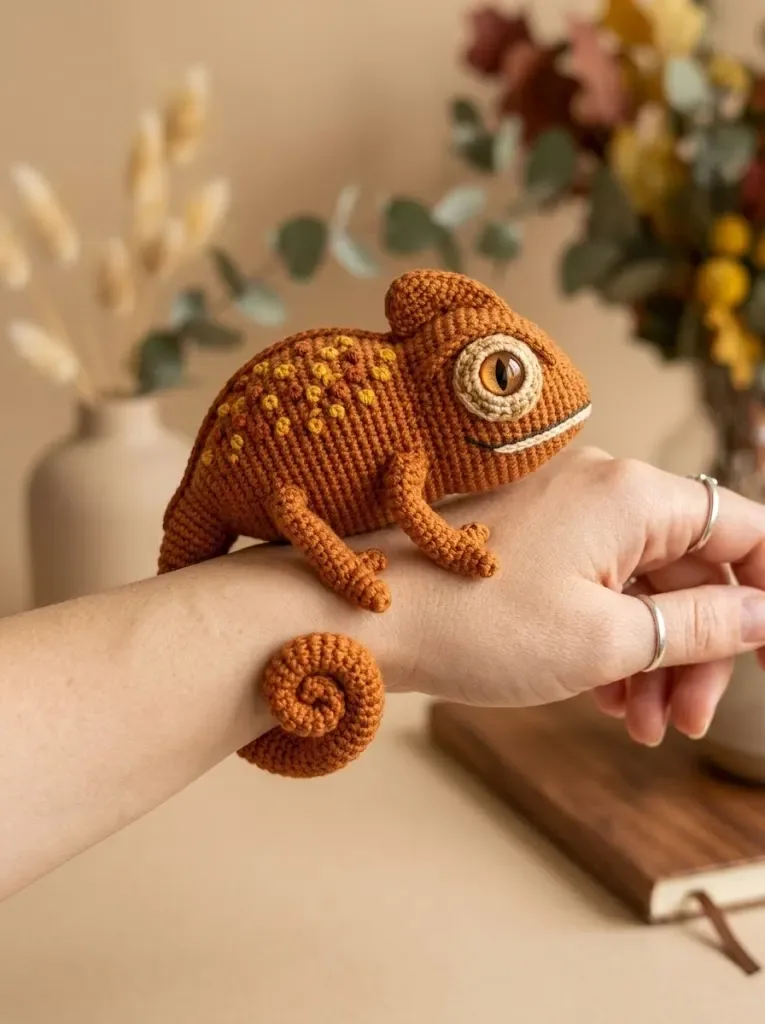
Under the hand this chameleon comes out dense and a little stiff, the result of single crochet worked tightly on a 3.0mm hook with a worsted cotton blend. Dropping a hook size below what the yarn usually calls for closes the gaps between stitches, so the fabric reads as solid rather than airy, and the fiberfill packed inside never shows through the surface. Stitch definition stays crisp, which matters once the mustard spots and cream eye patches go on top.
The body builds from a tight round into a dome, the small limb piece stays short and rounded, and the flat piece is worked back and forth in rows so it lies thin instead of puffing into a ball. Once stuffed and joined, the rounded parts give the figure its curled, perched posture, while the flat piece sits against the body as a surface feature rather than a stuffed limb. Set the finished piece on a shelf or desk where the firm fabric holds its pose without sagging.
The swatch in numbers
- Rounds
- 34
- Parts
- 4
- Level
- Intermediate
- Time
- 4-6 hours
- Hook
- 3.0 mm
- Yarn
- Worsted
The yarn and the hook
- for Your Crochet Chameleon
Yarn
- Main color (MC): Worsted weight yarn in burnt orange or rust, approximately 120 yards. I used a cotton blend for nice stitch definition.
- Contrast color 1 (CC1): Worsted weight yarn in cream or off-white, approximately 15 yards for the eye area
- Contrast color 2 (CC2): Worsted weight yarn in mustard yellow, approximately 10 yards for the spots
- Contrast color 3 (CC3): Small amount of amber or golden brown for eye details
Hook
- 3.0mm crochet hook. Going down a hook size from the yarn recommendation creates tighter stitches so stuffing doesn’t show through.
Notions
- One pair of 12mm amber or orange safety eyes
- Polyester fiberfill stuffing
- Yarn needle for sewing and weaving ends
- Stitch marker
- Pins for positioning pieces before sewing
- Small amount of black embroidery floss for mouth detail
Stitches, spelled out
ch chain; st stitch; sts stitches; sc single crochetDense; inc increase; dec decrease; mr magic ringDense.
Tension and hand-feel
After round 4 of the main body, lay the piece flat and check that the 24 stitches sit in an even, slightly cupped circle rather than a flat disc or a tight cone.
With MC
With MC
With MC
Notions
One pair of 12mm amber or orange safety eyes Polyester fiberfill stuffing Yarn needle for sewing and weaving ends Stitch marker
Pins for positioning pieces before sewing Small amount of black embroidery floss for mouth detail
How the texture is built
- The main body piece increases every round through round 4, moving from 6 to 12 to 18 to 24 stitches, which spreads the growth evenly so the fabric curves into a dome rather than lying flat.
- The flat piece starts from a 25-chain foundation and increases at both edges over rows 2 and 3, holds steady through rows 4 to 6, then begins decreasing from row 7, producing a piece that is widest in the middle and tapers at each end, suited to lying against the body rather than standing stuffed on its own.
If you swap the yarn
| Acrylic, worsted weight | Keeps the same hook size and stitch counts but gives a springier, lighter fabric with less crisp stitch definition than the cotton blend, so edges of the spots and eye patches look softer. |
|---|---|
| Wool-blend, worsted weight | Adds loft and a warmer, fuzzier hand; because the strand is airier than cotton, dropping to a smaller hook than the 3.0mm specified helps keep the fabric dense enough to hide the fiberfill. |
| Cotton, DK weight | Produces a smaller, more compact figure with tighter, more defined stitches; pair with a smaller hook than 3.0mm and use slightly less stuffing per section since the finished pieces come out more compact. |
Colorways
- Classic Rust and Moss Work the body, the small limb piece, and the flat piece entirely in MC burnt orange; keep CC1 cream only at the eye-area rounds, add CC2 mustard as scattered spot accents stitched on after assembly, and use CC3 amber for the fine eye outline detail.
- Mustard Crest Swap the flat piece from MC to CC2 mustard so it reads as a contrasting crest against the rust body; leave the main body and the small limb piece in MC, keep CC1 cream at the eye area as given, and use CC3 amber for the eye detail.
Washing and blocking
Hand wash in cold water and avoid wringing; the cotton blend holds its dense structure well but loses crispness if agitated in a machine.
Lay flat to dry away from direct heat, since a wet cotton-blend body is heavier than it looks and hanging it can pull the stuffed shape out of round.
Smooth and reshape each rounded section by hand while still slightly damp, then store the finished piece out of direct sun so the rust and mustard colors do not fade.
When it does not look right
- The body rounds flare outward instead of curving into a dome.
- Increases are landing unevenly or the hook has crept up past 3.0mm; check that each increase round spaces its added stitches evenly and confirm hook size before continuing.
- The flat piece cups or buckles instead of lying flat after the even rows.
- Tension is tighter on the increase rows than on the plain rows; work the increases at the same tension as the rest of the row and press the piece gently flat before sewing it on.
Close-ups

Questions people ask
Why does this pattern call for a 3.0mm hook with worsted weight yarn?
Worsted yarn is usually worked on a larger hook, but dropping to 3.0mm tightens the stitches enough that the polyester fiberfill inside stays hidden. The trade-off is a firmer, stiffer fabric, which is exactly what keeps the rounded body and limb pieces holding their shape.
Does the flat piece need stuffing like the rest of the figure?
No, since it is worked back and forth in rows rather than in the round, it naturally sits thin and flat. Light pinning or pressing before sewing is enough to keep its tapered shape.
How are the eye details worked onto the amigurumi?
The 12mm safety eyes are seated into the body before the eye-area rounds close, and CC3 amber is added around them in small amounts for the eye outline. The mouth comes afterward, worked directly onto the finished surface with black embroidery floss.
What causes the stuffed body to look lumpy instead of smooth?
Lumps usually mean the fiberfill went in by the handful instead of in thin layers across several rounds. Adding small amounts of stuffing as each round closes keeps the surface even rather than ridged.
New patterns, as they are filed
One short email when a batch lands, with the feel of each.