
45 rounds · filed under dense · 32 of them
Amigurumi · added 15 Sep 2026
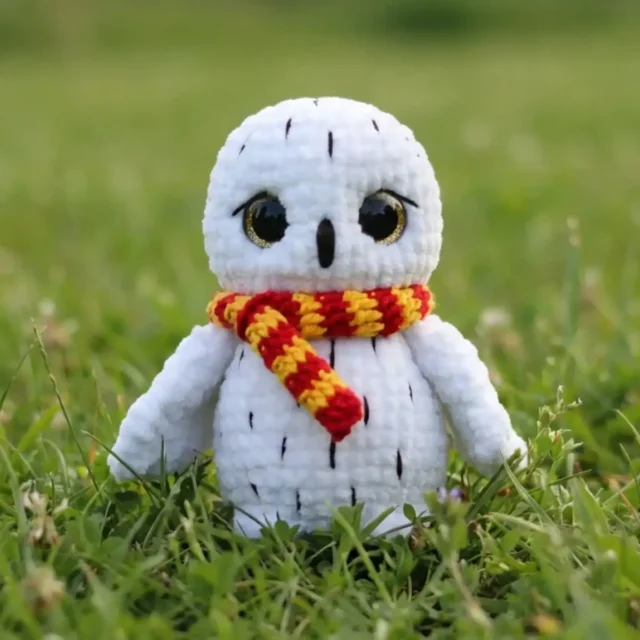
Single crochet mini owl amigurumi with a movable head
Single crochet worked in the round builds a dense, huggable mini owl amigurumi with a movable jointed head.
- Skill
- Intermediate
- Time
- 4-6 hours
- Hook
- 3.5 mm
- Yarn
- Worsted
- Rounds
- 45
About this pattern
Worked in single crochet through every round, the head-body builds into a tight, dense fabric that holds its shape without a wire armature. The 3.5 mm hook pulls the plush yarn close, so each stitch locks against its neighbor and the stuffing stays hidden rather than poking through. Under the hand the surface feels thick and slightly springy, with almost no stretch along the round, which is exactly what keeps the crown from sagging as it grows past round twenty-five.
The finished shape is a single rounded body that flows from head to tail with no waist seam, following the head-body's top-down spiral rather than separate pieces sewn together. Wings and tail attach afterward - the wings on a thread joint that lets them tilt, the tail worked flat across the back edge so it points outward instead of curving in. At 6-7 inches, the result sits upright on its own and holds up to handling, whether it ends up on a shelf or in a child's grip.
The swatch in numbers
- Rounds
- 45
- Parts
- 8
- Level
- Intermediate
- Time
- 4-6 hours
- Hook
- 3.5 mm
- Yarn
- Worsted
The yarn and the hook
Main yarn
- 50-65 grams of plush yarn (recommended: Himalaya Dolphin Baby, YarnArt Dolce, Wolans Bunny Baby, or Lavita Yarn)
Crochet hook
- 3.5 mm (adjust according to your tension and yarn choice)
Safety eyes
- 18-20 mm size
- Black embroidery thread : For facial details
Strong thread
- Matching body color for thread jointing
Tapestry needle
- For sculpting, embroidery, and assembly
Polyester stuffing
- Ball-fiber polyester recommended
Optional
- 30 mm plastic joint with long post for movable head
For scarf
- Alize Cotton Gold yarn in yellow (216) and red (56), 3 mm hook
Stitches, spelled out
sl st Slip stitch; ch Chain; sc Single crochetDense; hdc Half double crochetDense; dc Double crochetDrape; inc Increase (work 2sc in one stitch); dec Decrease (work 2sc together); 3hdc bobble stitch Yarn over, insert hook, pull through (3 loops), yarn over and pull through (5 loops), repeat once more (7 loops), pull through all loopsSquish; Displacement/shift stitch Work 1sc additionally at round end to align beginning; move stitch marker 1 stitch along; Important tip Always place your stitch marker in the first stitch of each row/round. Choose between regular or invisible decreases based on your preference..
Tension and hand-feel
After round 4 the 32 single crochet stitches should still lie in a flat, gently domed circle rather than cupping under or ruffling at the edge.
If it cups, drop to a smaller hook; if it ruffles and won't sit flat, move up a size before continuing into round 5.
1. Wings (Make 2)
Crochet the wings spirally in your main color:
For a movable head, crochet the head separately and attach with a plastic joint: HEAD Crochet spirally in main color. Watch the rounds beginning line.
2. Head-Body
Crochet spirally in main color. Watch the rounds beginning line.
3. Tail
Crochet the tail right across the body, rounds 28-29 in turning rows. Mark the tail edge stitches with markers – 6 sts. Join yarn and crochet as follows:
6. Ears (Optional)
You can add ears to your owl for extra personality. Crochet the ears across the head stitches at the level of rounds 4-7, working in main color in turning rows.
Mark 2 points, join yarn and crochet:
Optionally, you can add tassels to the ears using cotton yarn.
9. Scarf (Optional)
Work in a round, alternating colors in each round. Begin working in red.
You can use any other yarn for the scarf. You can make it wider or narrower by chaining more or fewer stitches initially.
4. Wings Thread Jointing
Use strong non-slip white thread for thread jointing. You can thread a needle with 4 strands at once.
Mark the wings attachment points: 2 points next to the neck at the sides, 18sts apart across the chest. When attached like this, the wings are slightly at an angle to the body on the finished toy.
To attach the wings:
Insert your needle at the back of the neck in the middle and extract it at one wing attachment point Go through the wing edge, grabbing 1-2 stitches
Insert your needle into the same side point and go through the body coming out at the opposite side – point 2 Sew through the second wing and go through the body again
Repeat 2-3 rounds like that, pulling on the thread slightly to draw wings closer to the body
Important note: You should insert and extract the needle right in and out of the wings attachment points. This is key for the wings to be movable.
To finish, send your needle to the initial inserting point at the back of the neck, snip off yarn, pull on the thread ends, tie them and weave in.
5. Decoration
Eye Sculpting: Do the eyes needle sculpting using strong thread matching the body color. Insert your needle at the back of the neck in the middle. Do eyes needle sculpting along the eyes inner corners – 2 rounds. Send your needle to the initial inserting point, pull on thread ends carefully to deepen the eyes. Fasten off and weave in.
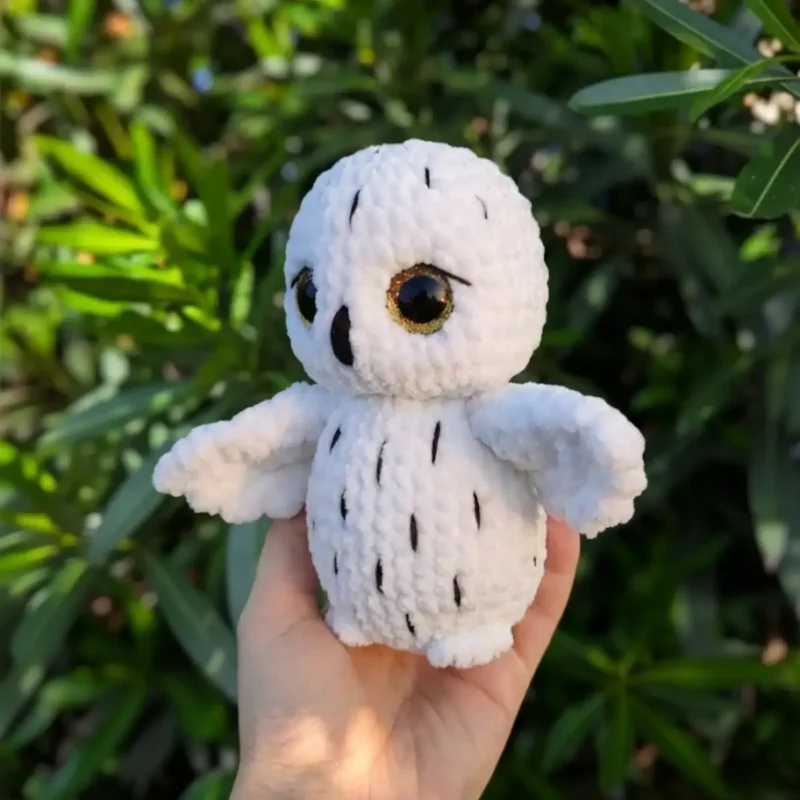
Eyelashes and Beak: Embroider eyelashes and a beak referring to the photos or your taste. The beak should be embroidered at the level of rounds 11-13 of the head using embroidery floss (without splitting it into strands). Do approximately 8-10 parallel stitches across the same crocheted stitches.
Feathers: Embroider feathers over the head and body for added texture and detail.
8. Pink Owl Color Variation
For the pink owl variation, use these yarn color changes: Wings yarn color change: Rounds 1-3: in pink Rounds 4-5: in dark pink
Round 6: in yellow (no need to crochet across the wing side) Cut yarn and secure its tail after switching to each color.
Embroider a beak in yellow, and feathers in dark pink. The ears are decorated using yellow yarn.
How the texture is built
- Increases in the Head-Body run eight per round through round 4 (8, 16, 24, 32), spaced evenly so the crown grows as a flat disc before the sides begin to curve upward.
- The tail leaves the spiral construction at rounds 28-29, worked flat over 6 marked stitches in rows that swap sc for taller hdc, finishing with 3-chain picots at 4 points across row 4 for a saw-toothed edge.
- The head takes a 30 mm plastic joint with a long post, and the wings are set with a thread joint rather than sewn flat, so both head and wings pivot independently of the body.
If you swap the yarn
| DK weight cotton | Produces a smoother, less fuzzy surface with more stitch definition than plush yarn; drape softens and holds less loft, so use a slightly smaller hook, around 3 mm, and pack stuffing tighter to keep the shape from sagging. |
|---|---|
| Worsted weight acrylic | Keeps the same 3.5 mm hook and stitch counts, but the fabric feels lighter and less dense than the plush yarn, so stuffing more firmly compensates for the thinner wall. |
Colorways
- Barn Owl Tan Head-body, wings, and tail in a warm tan or oatmeal plush main color; scarf worked in Alize Cotton Gold red (56); beak and feet accents in yellow (216).
- Slate Grey Contrast Head-body and wings in a cool grey plush main color; tail left in the same grey for a seamless line; scarf in yellow (216) trimmed with a few red (56) stitches at the ends.
Washing and blocking
Spot clean with a damp cloth first, since plush polyester yarn sheds less fiber when it isn't fully saturated; if a full wash is needed, hand wash cold and press out water rather than wringing.
Reshape the head-body and wings while still damp, smoothing the pile in one direction so the plush surface doesn't look matted once dry.
Air dry flat away from direct heat, then store the finished owl with its stuffed areas supported so the polyester fiberfill doesn't compress or shift out of shape over time.
When it does not look right
- The head wobbles loosely or spins on the joint.
- The 30 mm plastic joint post needs its washer seated tight against the fabric on both head and body; if it still moves, add a felt or fabric disc behind the washer to take up the gap.
- The wings hang stiff and won't tilt the way a thread joint should.
- Thread jointing needs the connecting thread pulled snug but not overtightened; loosen slightly if the wing can't swing, or re-anchor it if it's too loose to hold a pose.
Close-ups

Questions people ask
How big is the finished owl?
Made with the recommended plush yarn and hook sizes, the owl measures about 6-7 inches (14-18 cm) tall. Swapping to a thinner or thicker yarn will shift that size up or down.
How much yarn does the project use?
The main color takes 50-65 grams of plush yarn, depending on tension and how tightly the head-body is stuffed. The accent scarf uses a separate small amount of Alize Cotton Gold in yellow and red.
Can the head be left unjointed?
Yes, the head-body can be crocheted as one continuous spiral instead of joined separately. Skip the 30 mm plastic joint step and simply continue the rounds through the neck without a break.
Are the ears and scarf required?
No, both the ears and the scarf are listed as optional parts. They can be left off for a simpler owl or added afterward without changing the head-body or wing rounds.
New patterns, as they are filed
One short email when a batch lands, with the feel of each.