
6 rounds · filed under dense · 3 of them
Bags · added 15 Sep 2026
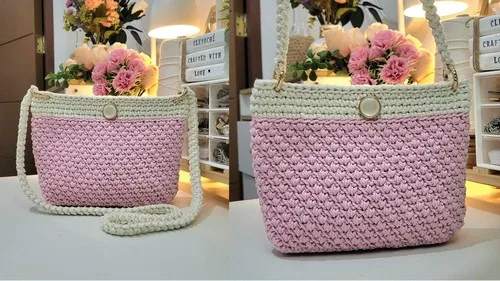
A structured single crochet sling bag with a twisted strap
Single crochet works up dense, firm fabric for a structured sling bag with a twisted strap and magnetic closure.
- Skill
- Intermediate
- Time
- 4-6 hours
- Hook
- 2 mm
- Yarn
- Bulky
- Rounds
- 6
About this pattern
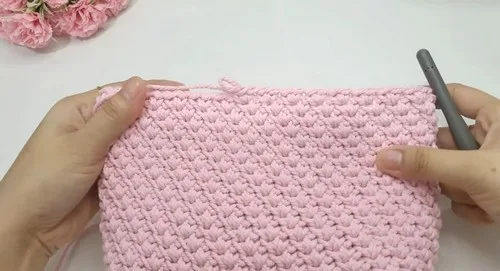
Single crochet, worked row after row at a steady 22 stitches, builds a fabric with no gaps between stitches — under your hand it feels dense and almost woven, closer to canvas than to a typical crochet drape. The 2 mm macro cotton yarn adds body on top of that tight stitch structure, so the panel holds its shape on its own without sagging or stretching sideways when you pick it up.
That firm panel starts flat, worked back and forth for eight rows before the piece shifts into rounds and narrows by a couple of stitches. The result is a compact, structured body rather than a floppy pouch, sized to sit against your side without collapsing — fill it, close the magnetic button, and it keeps its rectangular block shape through the day rather than slumping into a sack.
The swatch in numbers
- Rounds
- 6
- Parts
- 5
- Level
- Intermediate
- Time
- 4-6 hours
- Hook
- 2 mm
- Yarn
- Bulky
The yarn and the hook
- 2 mm macro cotton yarn (~250g) in main and accent shades
- Non-splitting yarn for smoother work
- 6 mm hook for foundation chain
- 5 mm Tulip hook for the body
- Two spring rings
- 19 mm magnetic buttons
- 18 mm decorative round button
- Sewing thread and needle
- Scissors
- Darning needle
- Stitch markers
Stitches, spelled out
sc single crochetDense.
Tension and hand-feel
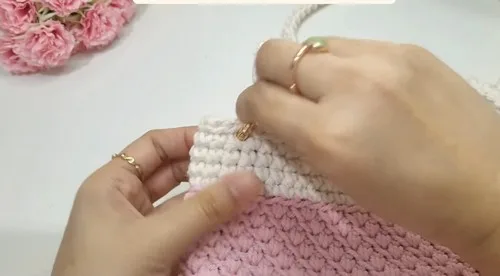
After working the first few rows of 22 single crochets, press the panel flat and run your fingers across it — the stitches should sit close enough that no light or gap shows between them.
If the fabric feels loose or the panel splays wider than expected, drop to a hook one size smaller for the body and rework the row before continuing.
Main Pattern
Base Creation Step by step: Make a slip knot using a 6 mm hook; chain 23; switch to the 5 mm hook; work into the back bumps of the chain.
Part 2
Turn clockwise
7 sc along the short side 22 sc on the long side 7 sc on the other short side Total: 57 stitches
Edging
Strap
Use accent yarn for the strap.
Strap Make a slip knot, chain 2 Skip one, sc in the next Turn, insert hook, and sc Turn again, sc in both loops Repeat until desired strap length Slip stitch in last stitch Cut yarn and weave in tails
Insert needle in strap ends to create ring holes Attach spring rings to strap and then to the bag
How the texture is built
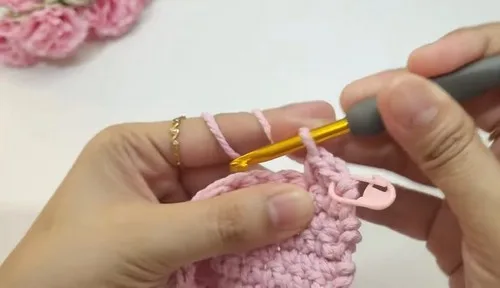
- Rows 1 through 8 are worked flat at a fixed 22 single crochets before any shaping happens — the flat stage builds the main panel, and only once that's complete does the piece decrease to 20 sc, with markers placed in the first and last stitch of that round to keep the two sides of the decrease symmetrical.
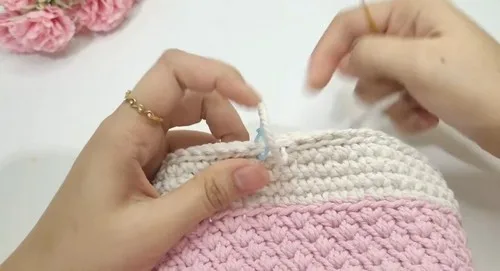
- The edging's first round works in back loops only, leaving the front loops standing proud as a ridge at the base of the trim, while the following rounds add a chain-1 and skip two stitches at the round's end — a small, repeated decrease that draws the top opening in snugly around the button closures.
If you swap the yarn
| Worsted-weight cotton, single ply | Stitches sit smaller and the fabric turns noticeably thinner, so more rows are needed to match the same panel size; drop to a 4 mm or 3.5 mm hook to keep the fabric close and firm rather than airy. |
|---|---|
| Cotton-acrylic chunky blend | Drape turns softer and the bag loses some of the boxy structure the macro cotton gives, so the finished piece leans more toward a slouchy pouch than a rigid block — useful if a stiffer bag isn't the goal. |
| Flat cotton fabric yarn, similar | The fabric turns even sturdier and heavier in the hand than the original, holding its rectangular shape with almost no give; size up the hook slightly if the stitches feel stiff to work into. |
Colorways
- Soft Contrast Main color carries the flat panel through Rows 1-8 and the decrease round of Part 2; accent color takes over for both edging rounds, framing the top opening in a second tone.
- Reverse Block Accent color forms the entire flat body panel and Part 2; main color is reserved for the edging rounds, so the neutral trim and buttons stand out against the bolder body.
Washing and blocking
Hand wash in cool water and avoid wringing the panel — the macro cotton is bulky enough that twisting it can distort the tight single crochet rows.
Dry flat, away from direct heat, and keep it out of the sun while the magnetic button area is damp so no moisture sits against the hardware.
Reshape the panel by hand while still slightly damp, pressing the edges square, then store it stuffed lightly with tissue so the boxy shape holds between uses.
When it does not look right
- The side edges of the flat panel run
- The first and last stitch markers likely shifted or were skipped on a turn — replace a marker in the very first and last stitch of every row and count all 22 sc before turning.
- The top opening puckers or pulls in
- The skip-two-stitches-at-the-end step in Rounds 2 through 4 is being worked too often or on the wrong stitch — check the chain-1 counts as the turning stitch only, not an extra stitch, before skipping two at the round's close.
- The magnetic button sits crooked or
- The center stitch marker used for placement likely moved before sewing — re-mark the exact center point and stitch the button through several strands of the non-splitting yarn so it anchors flat.
Close-ups
Questions people ask
Can the panel be made wider or narrower than 22 single crochets?
Yes, adjust the starting chain length and stitch count in the flat rows, keeping the decrease in Part 2 proportional to the new total. Keep the 5 mm Tulip hook for the body regardless of size so the fabric stays equally dense.
Is the second color in the edging necessary?
No, the accent color in the edging rounds is a styling choice, not a structural one. Working the entire piece, including the edging, in a single color still produces the same back-loop ridge and the same firm trim.
New patterns, as they are filed
One short email when a batch lands, with the feel of each.