
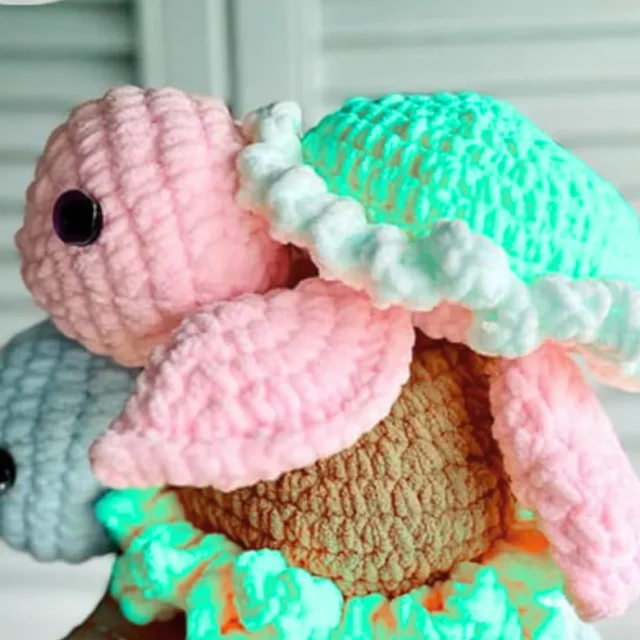
27 rounds · filed under dense · 8 of them
Amigurumi · added 5 Oct 2026
Sunflower shell turtle amigurumi crochet pattern
Single crochet builds a dense, stuffable shell for this sunflower turtle amigurumi.
- Skill
- Intermediate
- Time
- 4-6 hours
- Yarn
- Worsted
- Rounds
- 27
About this pattern
Every round in this turtle works single crochet, and that's what gives both the head and the daisy shell their tight, dense hand. Sc fabric closes up with almost no gap between stitches, so light doesn't show through and stuffing stays contained rather than poking out between loops. Worked in continuous rounds rather than rows, the surface has no seam to catch on a nail, just a smooth, slightly ridged texture from the spiral turns. It feels firm under the fingers, closer to a woven cotton swatch than a loose, airy knit.
Each piece starts from a magic ring and grows outward in rounds that increase at regular intervals, building the head into a rounded dome and the daisy shell into a wider, flatter disc that sits against the turtle's back. The shell starts with one more stitch than the head, so it spreads faster across its rounds and ends up broader than it is deep. Once both are complete, stuff the head firmly before closing it, then set the flatter shell against the body like a panel, letting the yellow center read like a sunflower face peeking out from the shell.
The swatch in numbers
- Rounds
- 27
- Parts
- 4
- Level
- Intermediate
- Time
- 4-6 hours
- Yarn
- Worsted
The yarn and the hook
- Crochet hook
- Yarn in body colour (for the head and fins)
- Yellow yarn (for the daisy shell)
- White yarn (for the daisy shell petals)
- Safety eyes
- Stuffing
Stitches, spelled out
MR Magic ringDense; Sc Single crochetDense; Inc Increase; Dec Decrease; FLO Front loop onlyRidge; BLO Back loop onlyRidge; Ch Chain; Dc Double crochetDrape; Ps Picot stitch (ch 2, slst in second stitch from hook).
Tension and hand-feel
After round 4, the head should measure around 28 stitches and the daisy shell around 32 stitches around the outer edge, so lay the round flat and count stitches to check it against those numbers.
If the fabric feels tight and cups instead of lying flat at that point, move up a hook size, and if it ruffles or won't hold a round shape, drop down a size.
Head
Using body colour.
Stuffing head.
Big Fins
Small Fins
Daisy Shell
Start with yellow.
How the texture is built
- The increase placement shifts one stitch farther apart with each round (every stitch in round 2, then one stitch between increases in round 3, then two in round 4), which spreads the extra fullness evenly instead of stacking it in a column, keeping the dome rounded rather than ruffled.
- The head starts with 7 sc in a magic ring while the daisy shell starts with 8 sc, so the shell reaches a wider diameter than the head across the same nine-round structure.
- The head is worked in body colour while the shell starts separately with yellow, so the colour change happens at the start of a new piece rather than mid-round, keeping the join at the seam between parts instead of crossing through a round of stitches.
If you swap the yarn
| Cotton, worsted weight | Produces a firmer, less stretchy fabric that holds the shell's disc shape well without blocking, though the stitches sit tighter so a half-size-up hook keeps the rounds from puckering. |
|---|---|
| Acrylic, DK weight | Makes a smaller, lighter finished turtle with a softer drape; drop to a smaller hook to keep the fabric dense enough to hold stuffing without gaps. |
| Wool-blend, worsted weight | Adds more stretch and a softer hand, which makes the dome easier to coax back into shape after handling, though it needs a gentler wash so the fibers don't felt and shrink the shell. |
Colorways
- Classic sunflower Work the head in a mossy olive green for the body colour, and keep the daisy shell in bright yellow throughout its rounds so the shell reads as a solid bloom against the darker head.
- Muted meadow Work the head in a soft sage green for the body colour, and work the daisy shell in a dustier mustard yellow so the shell and head sit closer in tone rather than contrasting sharply.
Washing and blocking
Hand wash the finished turtle in cool water and press out excess moisture in a towel rather than wringing, since wringing can distort the stuffed head.
Lay the piece flat to dry, turning it occasionally so the stuffing dries evenly and the shell's center doesn't stay damp longer than the edges.
While still slightly damp, smooth the shell's increase rounds by hand to flatten any cupping, then let it finish drying flat so the disc shape sets.
When it does not look right
- The daisy shell cups instead of lying flat.
- The increases are likely pulled too tight for the round's stitch count, which curls the disc inward; loosen tension slightly or move up half a hook size so the rounds spread flat.
- The head measures smaller than expected by round 4.
- Stitches are being worked tighter than the fabric needs; check the count against 28 stitches at round 4 and loosen tension or size the hook up if it falls short.
- A visible gap shows at the center of the magic ring.
- The starting tail wasn't pulled fully closed before round 2 began; tug the tail snug once the first round is in place, or close any remaining gap with a few whip stitches once the piece is finished.
Questions people ask
How can you tell if you have enough yarn for both the head and the daisy shell?
No yardage is fixed in the materials for this pattern, so watch how much strand remains as the shell's rounds grow and keep a second ball within reach before starting the later rounds. Running short partway through a round is easier to fix with a quick join than running out mid-stitch.
Can the head and the daisy shell be worked in different yarn weights?
Keeping both pieces in the same weight keeps the increase pattern working at the same proportions, since the rounds are built around matching stitch counts. Mixing a thicker yarn for one part and a thinner one for the other leaves one piece looser or tighter than intended.
Does the daisy shell need the same firm stuffing as the head?
The head is built like a standard amigurumi sphere and needs firm stuffing to hold its round shape under tension. The shell forms a flatter disc meant to sit against the body, so a lighter fill keeps it from bulging instead of lying against the turtle.
Why does the daisy shell start with a different stitch count than the head?
The shell begins with 8 sc in the magic ring compared to the head's 7 sc, giving it one more increase point in every round. Across the nine rounds that adds up to a noticeably wider finished diameter, suited to the shell's role as the turtle's back piece.
New patterns, as they are filed
One short email when a batch lands, with the feel of each.