
69 rounds · filed under dense · 59 of them
Amigurumi · added 1 Oct 2026
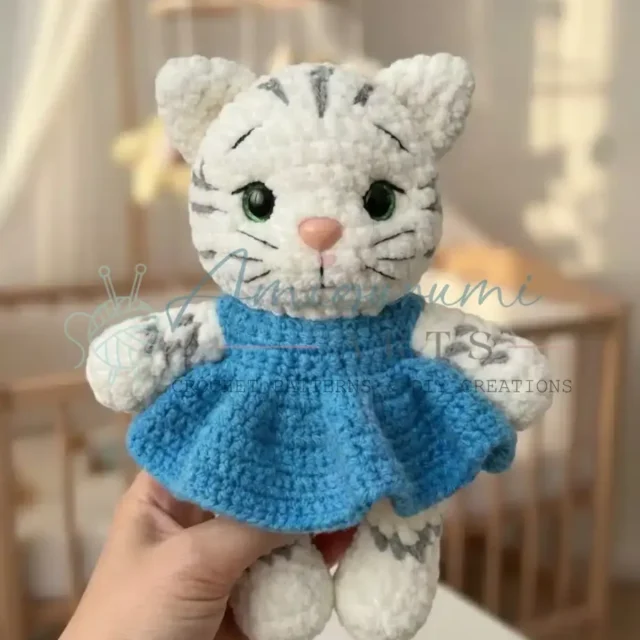
Plush tabby kitten amigurumi with a crocheted dress
Single crochet in plush yarn builds a dense, huggable tabby kitten body, finished with a knit-like teal dress.
- Skill
- Intermediate
- Time
- 4-6 hours
- Hook
- 3.5 mm
- Yarn
- Bulky
- Rounds
- 65
About this pattern
Worked in plush or chenille yarn with a 3.5mm hook, the body fabric comes out dense and slightly fuzzy, the single crochet stitches packed close enough that stuffing never peeks through. Rounds build in a tight spiral, so there's no seam line running down the legs or arms, just an unbroken tube of squish. The ears break that softness on purpose: worked entirely in half double crochet, they come out taller and stiffer, holding their shape upright instead of curling flat against the head.
The whole kitten grows from separate small pieces — lower legs, upper arms, ears, a tail — before the body and head are worked as one continuous column, so there's only one major shape to stuff and finish. Once assembled, the dress goes on next: a bodice worked flat with armholes opened at row 4, then a skirt widening out from the waist, closed with a small button at the back. Pin every limb before sewing and check the kitten from all sides first.
The swatch in numbers
- Rounds
- 65
- Parts
- 16
- Level
- Intermediate
- Time
- 4-6 hours
- Hook
- 3.5 mm
- Yarn
- Bulky
The yarn and the hook
- Main color (cream/white): 100g of plush/chenille yarn such as Himalaya Dolphin Baby (color 80308 milk/cream) or Wolans Bunny Sweater (color 14) in cream/ivory
- Stripe color (gray): Small amount (10-15g) of medium weight yarn in gray for embroidered tabby stripes
- Dress color (teal blue): 50g of DK/sport weight yarn such as YarnArt Jeans (color 11) in teal/turquoise blue
- Pink/peach: Small amount for nose (if embroidering)
Crochet hook
- 3.5mm (E-4) for kitten body
Crochet hook
- 2.5mm (C-2) for dress
Safety eyes
- 13mm in green
Safety nose
- 12mm in pink/peach (optional – can embroider instead)
- Fiberfill stuffing
- Black embroidery thread or thin yarn for facial details and whiskers
- Yarn needle for sewing and embroidery
- Stitch markers
- Scissors
- Small button or snap fastener for dress closure
Stitches, spelled out
mr magic ringDense; sc single crochetDense; hdc half double crochetDense; dc double crochetDrape; tr treble crochetDrape; inc increase (2 sc in one stitch); dec invisible decrease; ch chain; sl st slip stitch; st(s) stitch(es); BLO back loop onlyRidge; FLO front loop onlyRidge; () total stitch count after round; [] repeat instructions in brackets; × repeat X times.
Tension and hand-feel
After round 3 of a lower leg, the piece should sit as a snug, flat circle with the 18 stitches close enough that no stuffing shows through the gaps between them.
If the circle splays instead of cupping or you can see light through the fabric, drop to a smaller hook until the stitches pack tight against each other.
Lower Legs (Make 2)
Make 2 in cream/white plush yarn with 3.5mm hook
Assembly note: Legs will be attached to the front-bottom of the body in a sitting position.
Upper Arms (Make 2)
Make 2 in cream/white plush yarn with 3.5mm hook
Assembly note: Arms will be attached to the sides of the body just below the neck area.
Ears (Make 2)
Make 2 in cream/white plush yarn with 3.5mm hook IMPORTANT: Ears are worked entirely with half double crochet (hdc) stitches for better structure
Shaping note: The ears should be positioned pointing slightly outward and upward on the head, creating the characteristic cat ear shape.
Body Section (Rounds 1-12)
IMPORTANT: Stuff the body section firmly at this point before continuing to the head
Bodice Foundation
Foundation Row: Ch 30 + 1 ch for turning
Leave a long starting tail (approximately 8 inches) for creating button loop later, or if using snap closure, leave standard tail
Bodice continues to expand at the four corner points
Tail (Make 1)
Make 1 in cream/white plush yarn with 3.5mm hook
Creating Armholes (Row 4)
The 6 chains create the armhole openings where the kitten’s arms will go through. The skipped 9 stitches create the shoulder/sleeve opening
Skirt Section (Rows 7-14)
Neck/Head Transition (Round 13)
Head Section (Rounds 14-26)
IMPORTANT PLACEMENT MARKERS: Insert 13mm safety eyes between rounds 23-24, spacing them approximately 8-9 stitches apart
Position eyes slightly lower than center of head for sweeter expression
Insert 12mm safety nose (or mark position for embroidered nose) between rounds 22-23, centered between and below the eyes
Body-Head (One Continuous Piece)
Make 1 in cream/white plush yarn with 3.5mm hook
Blue Dress
Note: The dress is worked flat in turned rows from top down. Each row begins with 1 ch (turning chain – does not count as a stitch). Work with a relaxed tension for best drape and fit. The dress should fit snugly but comfortably around the kitten’s body.
With teal blue yarn and 2.5mm hook:
Decorative Edging
Edging Round: Work reverse single crochet (crab stitch) along the bottom edge of the skirt
To work crab stitch: Instead of working left to right, work right to left (backwards). Insert hook in stitch to the right, yo, pull through, yo, pull through both loops. This creates a decorative twisted cord edge
Fasten off and weave in end.
Color Variations
Orange Tabby Cat: Main color: Orange, rust, or ginger plush yarn Stripes: Dark brown or burnt orange Nose: Pink or brick red
This creates the classic marmalade cat look Gray Tabby Cat: Main color: Light gray or silver plush yarn Stripes: Charcoal gray or dark gray
Nose: Pink or gray Eyes: Yellow or green Classic and elegant appearance Brown Tabby Cat: Main color: Tan or light brown plush yarn
Stripes: Dark chocolate brown Nose: Pink or brown Natural, realistic coloring Black Cat: Main color: Black plush yarn (omit all stripes)
Nose: Black or pink Eyes: Yellow or green for dramatic contrast Mysterious and elegant Calico Cat: Main color: White plush yarn
Patches: Add large patches of orange and black by embroidering or crocheting sections Complex but stunning result Siamese Cat:
Main color: Cream or ivory Points: Dark brown or seal brown for ears, face edges Eyes: Bright blue Elegant and distinctive
Dress Variations
Different Colors: Pink dress: Classic and sweet for a feminine look Yellow dress: Bright and cheerful Purple/Lavender dress: Soft and pretty
Red dress: Bold and festive Green dress: Fresh and natural White dress: Clean and angelic Style Modifications: Longer Dress:
Work rows 9-20 instead of 9-14 for skirt length Creates a floor-length gown effect Shorter Dress (Tunic style): Work rows 9-11 only for skirt length
Creates a short, playful dress Sleeveless Sundress: Make armhole chains smaller (ch 4 instead of ch 6)
Creates a tank-style bodice With Sleeves: After completing row 6, return to armhole edges Pick up stitches around armhole and work sc in rounds for 3-5 rounds
Creates short sleeves Pinafore Style: Work bodice in white/cream color Change to contrasting color for skirt
Additional Accessories
Collar: With white yarn, ch enough to go around neck Work 2-3 rounds of sc Creates a sweet Peter Pan collar effect Bow: Crochet a small rectangle, cinch in middle
Attach to dress front or head as decoration Apron: Crochet a small rectangle for apron
How the texture is built
- Lower legs increase through rounds 1-3 (6, 12, 18) and then hold flat for the remaining rounds, which rounds out a foot base before the leg settles into a straight tube.
- Upper arms increase only once, to 9 stitches at round 2, then decrease back down by round 4 — a short five-round taper that fits a narrow wrist end onto a small-scale limb.
Putting the pieces together
If you swap the yarn
| Acrylic chenille, bulky weight | Keeps the same plush hand and works at the same 3.5mm hook, though the pile tends to be slightly stiffer than a plush baby yarn, so stitches may need a touch more stuffing pressure to round out fully. |
|---|---|
| Cotton, DK/worsted weight | Replacing the plush main color with cotton firms up the fabric considerably and removes the fuzzy surface; drop to a hook closer to 3mm so the stitches stay dense enough to hold stuffing without gapping. |
| Wool-blend, sport weight, for the dress | Swapped in at the same 2.5mm hook, this gives the bodice and skirt more drape and a softer fold than the DK yarn specified, though the fabric will relax rather than hold the crisp A-line shape as firmly. |
Colorways
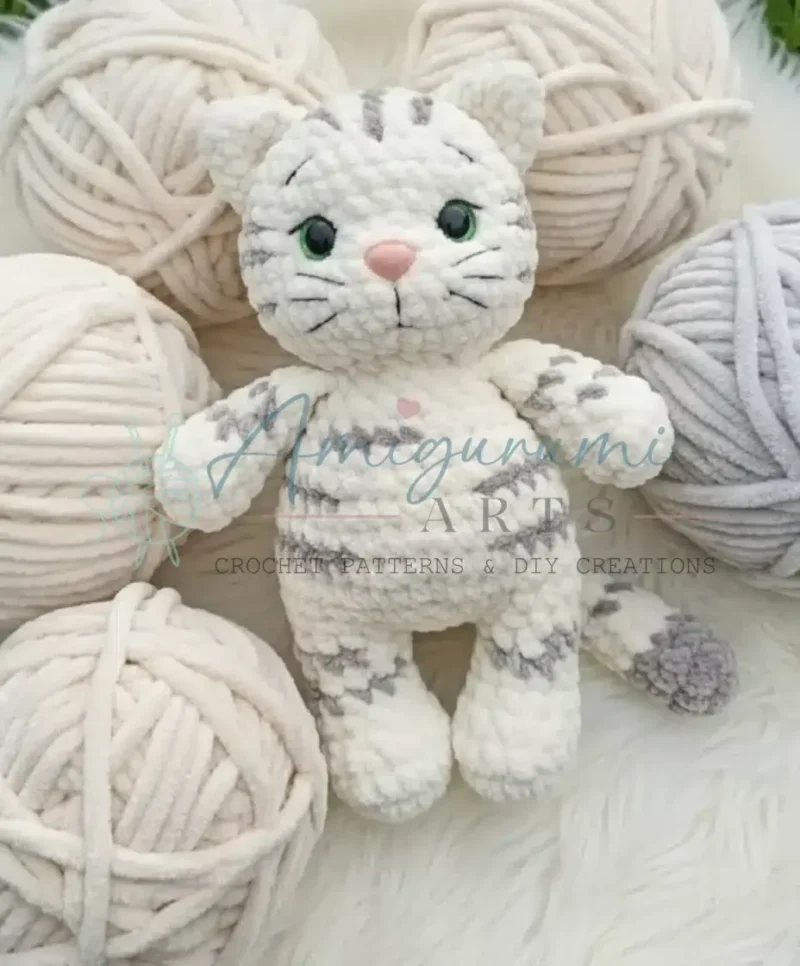
- Classic tabby Cream/white plush yarn fills the legs, arms, ears, tail, and the full body-head piece; gray embroidery marks tabby stripes across the head and down the tail after stuffing; the bodice and skirt are worked in teal, with green eyes and a pink embroidered nose.
- Stripe-forward Cream stays on the legs, arms, and bodice of the dress, while gray stripe embroidery is extended further down the back of the head and the full length of the tail for a heavier marked look; the skirt alone carries the teal, leaving the bodice cream so the stripes read as the main contrast.
Washing and blocking
Hand wash the body in cool water rather than machine washing — plush and chenille fibers mat and flatten under agitation, losing the dense pile that makes the fabric feel soft.
Lay the stuffed kitten flat to dry rather than hanging it, since a stuffed shape holds water at its center longer than the surface suggests; shape the hdc ears upright while still damp so they dry standing.
Store away from direct sunlight, since the teal dress yarn can fade with prolonged exposure, and keep the piece lying flat or loosely supported so the plush nap isn't crushed over time.
When it does not look right
- The legs come out lumpy instead of a smooth tube.
- This usually means a stitch count slipped after one of the increase rounds (6, 12, 18); recount stitches at the end of each round before moving on, and add stuffing gradually rather than packing it in all at once.
- The ears flop over instead of standing upright.
- This happens when the ears are worked in single crochet instead of the specified half double crochet — hdc is taller and firmer, which is what holds the ear shape without wire, so rework them in hdc and leave them lightly stuffed or unstuffed as directed.
- The dress bodice won't stretch over the head and body.
- The bodice is worked at a tighter 2.5mm gauge than the 3.5mm body fabric, so the opening is naturally smaller; check the bodice foundation width against the head before closing it up, and size up the hook slightly if it's too snug.
Close-ups


Questions people ask
Why does this pattern use two different hook sizes?
The 3.5mm hook works the plush or chenille body yarn into a dense, soft fabric that holds stuffing well. The 2.5mm hook works the thinner DK dress yarn into a tighter, more structured fabric that holds its shape like fitted clothing rather than draping loosely.
Can the arms and legs be sewn on instead of crocheted on?
Yes, both methods are used by makers of this pattern. Sewing is simpler and still strong if you go around each opening at least twice, which matters most if the kitten is headed for a child.
How is the tail attached to the body?
The tail is worked as its own piece over 9 rounds, then sewn onto the finished body-head piece once both parts are stuffed. Pinning it in place and checking the angle before stitching keeps it sitting naturally.
Can the gray tabby stripes be added after the body is finished?
Yes, the stripes are embroidered on top of the cream fabric rather than crocheted in, so they go on once the body and head piece is complete and stuffed. Working them after stuffing makes it easier to space the stripes evenly over the rounded surface.
New patterns, as they are filed
One short email when a batch lands, with the feel of each.