
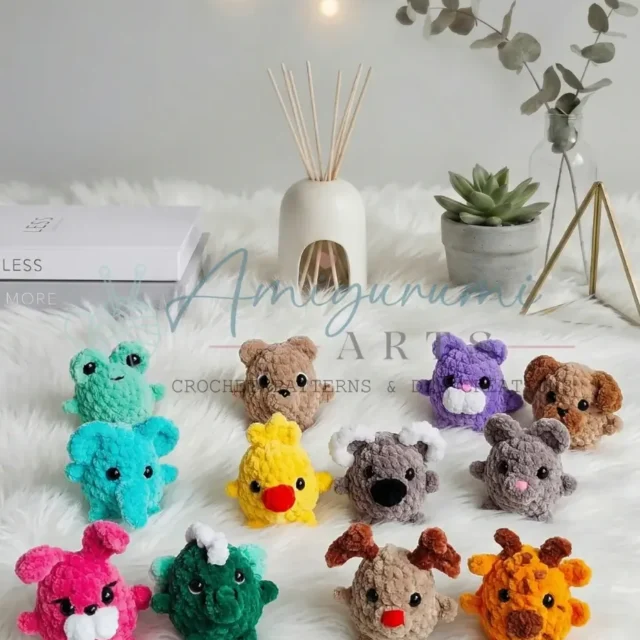
28 rounds · filed under dense · 12 of them
Amigurumi · added 6 Oct 2026
Ten tiny amigurumi animals in fingering weight yarn
Single crochet worked tight in a spiral builds dense, stuffing-proof fabric for ten tiny amigurumi animals.
- Skill
- Intermediate
- Time
- 3-5 hours
- Hook
- 2.25 mm
- Yarn
- Fingering (CYCA 1)
- Rounds
- 21
About this pattern
Single crochet worked in a continuous spiral, at a small B-1 / 2.25 mm hook against fingering or sock weight yarn, builds a fabric with almost no give. Each stitch sits close against its neighbors, so the surface feels dense and slightly stiff under the fingers rather than soft or drapey. That tightness is the point: it keeps stuffing locked inside instead of showing through the gaps, and it lets each tiny body hold its shape on its own, without a frame or wire support underneath.
Each animal starts at the crown with a magic ring and grows outward in rounds that widen and then hold steady, producing a small rounded body worked top-down rather than side-to-side. Ears, crests, horns, and wings attach directly into stitches on the finished head or body, so there is no separate piece to seam on afterward. Stuff the body firmly as you close the last rounds, lock any safety eyes or noses in place before that opening shuts, and weave every color-change tail to the inside where it won't show.
The swatch in numbers
- Rounds
- 21
- Parts
- 17
- Level
- Intermediate
- Time
- 3-5 hours
- Hook
- 2.25 mm
- Yarn
- Fingering (CYCA 1)
The yarn and the hook
Yarn
- Light fingering or sock weight yarn (CYCA weight 1) in your chosen colors; each animal uses small amounts — less than 20 g per figure
Hook size
- B-1 / 2.25 mm (or size appropriate to your yarn for tight amigurumi fabric)
- Plastic safety noses (where noted)
- Red embroidery thread (for Deer’s embroidered nose)
- Brown embroidery thread (for Giraffe’s spots)
Tools
- Stuffing / fiberfill — enough to fill each figure firmly
- Stitch markers — at least 2
- Yarn needle / tapestry needle
- Scissors
- Craft glue (optional — for Frog’s eyes)
Stitches, spelled out
ch Chain; dc Double CrochetDrape; dec Invisible Decrease (insert hook in front loop of next 2 sts, pull up loop, yarn over, pull through all 3 loops); hdc Half Double CrochetDense; inc Increase (2 sc in same stitch); MR Magic RingDense; sc Single CrochetDense; sl st Slip Stitch; SM Stitch Marker; st / sts Stitch / Stitches; tr Treble Crochet (used within Puff Stitches)Drape; Puff Stitch (4-dc puff) [Yarn over, insert hook in st, pull up loop] 4 times in same st, yarn over, pull through all 9 loops on hook.Squish; Puff Stitch (5-dc puff) [Yarn over, insert hook in st, pull up loop] 5 times in same st, yarn over, pull through all 11 loops on hook.Squish.
Tension and hand-feel
After round 3, the 18-stitch round should lie flat in your palm rather than cupping inward or flaring at the edge, since rounds 2 and 3 are the only increase rounds before the body holds steady. If it cups, the fabric is too tight and a half-size larger hook will relax it; if it ripples or won't hold the stuffing's shape, drop to a smaller hook for denser stitches.
Bunny — Body (worked top-down)
Dragon / Dino — Body (worked top-down)
Bunny — Ears (make 2)
Join yarn to the top of the head. Ch 6. Working back along the chain from the second ch from hook: 3 sl st, 1 hdc, 1 sc, sl st into the next adjacent stitch on the head (toward the crown). Fasten off and weave in ends. Work the second ear symmetrically on the opposite side of the crown.
Bear — Ears (make 2)
Join yarn to the head. Work 3 hdc into the next stitch (toward the crown); sl st into the following stitch. Fasten off and weave in ends. Work the second ear symmetrically.
Cat — Ears (make 2)
Join yarn to the head. Into the next stitch (toward the crown) work: 1 hdc, 1 dc, ch 2, 1 hdc. Sl st into the following stitch. Fasten off and weave in ends. Work the second ear symmetrically.
Mouse — Ears (make 2)
Join yarn to the head. Work 6 dc into the next stitch (toward the crown); sl st into the following stitch. Fasten off and weave in ends. Work the second ear symmetrically.
Dragon — Crest
Join yarn to the top center of the head. Into that same stitch work: 1 dc, ch 2; sl st into the next stitch. Into the following stitch: 1 dc, ch 2; sl st into the next stitch. Continue this pattern (dc + ch 2 in one st, sl st in next st) all the way down the spine to the tip of the tail. Fasten off and weave in ends.
Dragon — Wings (make 2)
Join yarn to the back, beside the crest. First wing lobe: Ch 4, work 3 sc back along chain. Second wing lobe: Ch 4, work 3 sc back along chain; sl st into the base of the wing. Fasten off. Work the second wing symmetrically on the opposite side of the crest.
Chick — Crest
Join yarn to the top of the head. (Ch 4, sl st into base of crest) × 3. Fasten off and weave in ends. Three little loops make a fluffy topknot.
Deer — Ears (make 2)
Join yarn to the side of the head (not at the crown — slightly to the side). Ch 3; work 2 sc back along chain; sl st into the base of the ear. Fasten off and weave in ends. Work the second ear symmetrically.
Deer — Antlers (make 2)
Join yarn near the crown. Ch 5; work 3 sc back along chain. First branch: Ch 4, work 3 sc back along chain; sl st into the base of the branch. Work 1 sc down the main chain toward the head; sl st into the base of the antler on the head. Fasten off. Work the second antler symmetrically.
Frog — Eyes (make 2)
Join yarn to the top of the head. Work 5 dc into the next stitch (toward the crown); sl st into the following stitch. Fasten off and weave in ends. Work the second eye bump symmetrically. Once both bumps are complete, glue 10 mm plastic eyes onto the center of each bump.
Koala — Ears (make 2)
Join yarn to the side of the head (not at the crown — position higher on the side for that classic koala look). Work 6 dc into the next stitch (toward the crown); sl st into the following stitch. Fasten off. Optional: edge the outer rim of each ear with sc in a fluffy yarn for a soft, textured finish. Work the second ear symmetrically.
Puppy — Ears (make 2)
Join yarn to the side of the head. Ch 4; working back along the chain, work 3 dc into one stitch, then 2 hdc into the next stitch, then 1 sc into the following stitch; sl st into the base of the ear or the adjacent stitch on the head. Fasten off and weave in ends. Work the second ear symmetrically.
Giraffe — Ears (make 2)
Join yarn to the side of the head (not at the crown — a little to the side). Ch 3; work 2 sc back along chain; sl st into the base of the ear. Fasten off and weave in ends. Work the second ear symmetrically.
Giraffe — Horns (make 2)
Join yarn near the crown of the head. Ch 3; sl st 2 times back along chain; sl st into the base of the horn at the head. Fasten off. Work the second horn symmetrically.
Elephant — Ears (make 2)
Join yarn to the side of the head (not at the crown — position wide on each side for those signature elephant ears). Work 7 dc into the next stitch (toward the crown); sl st into the following stitch. Fasten off and weave in ends. Work the second ear symmetrically.
How the texture is built
- The 6-12-18 stitch progression across rounds 1 through 3 places every increase in the first three rounds, so the body's widest curve forms close to the crown and the rounds that follow build straight sides rather than continuing to round outward.
- Ears are not a separately crocheted round shape at all — a six-chain finished in slip stitch, half double, and single crochet of decreasing height, then anchored with a final slip stitch straight into a stitch on the head, which is why there's no flat ear panel to seam on later.
- Rounds join nowhere — the spiral runs continuously, which is why a stitch marker has to track the round start by hand; the dragon's snout puff is worked mid-round, after 8 sc and before 9 sc, so a single raised stitch interrupts the smooth spiral without changing the stitch count.
Putting the pieces together
If you swap the yarn
| Wool-nylon sock blend, fingering weight | Closest match to the yarn the pattern calls for; keeps the dense, slightly springy hand and lets the B-1 / 2.25 mm hook produce the same tight stitch with stuffing fully hidden. |
|---|---|
| Mercerized cotton, fingering weight | Produces a stiffer, less elastic fabric with crisper stitch definition; size up to roughly a 2.5 mm hook so it doesn't go board-stiff, and stuff slightly less firmly since the fabric itself holds shape. |
| Acrylic, fingering or sock weight | Lighter and a touch fuzzier at this gauge, with softer stitch definition than wool or cotton; the same B-1 / 2.25 mm hook still works, but firm stuffing matters more to keep the edges from going limp. |
Colorways
- Two-Tone Contrast Keep the body and ears in a single main color and let contrast come from thread work instead of extra yarn — red embroidery thread for the nose, brown embroidery thread for the spots — so the dense crochet fabric stays one solid block of color.
Washing and blocking
Hand wash in cool water only when needed — each figure uses less than 20 g of yarn, so a full wash cycle risks matting the dense single crochet fabric more than it cleans it.
Reshape ears, antlers, and crests by hand while still damp, pressing them flat against a towel so they dry holding the angle set rather than curling.
Store finished animals stuffed and upright instead of flattened in a drawer, since the tight single crochet fabric holds a crease once compressed for long periods.
When it does not look right
- Stuffing shows through as pale patches on the body
- The stitches are spaced too loosely for the yarn weight; drop to a smaller hook than the B-1 / 2.25 mm suggested and keep each single crochet pulled snug so the spiral closes up completely.
- Ears lie flat against the head instead of standing up
- The joining slip stitch landed too far from the crown or the working chain ran long before turning back in sl st/hdc/sc; rejoin closer to the top of the head and keep the chain the length given so the shorter end sits upright.
- The dragon's snout reads as a flat bump rather than a raised puff
- The puff stitch loops weren't pulled tight before the closing yarn-over, letting it relax back into the surrounding sc rounds; cinch the puff firmly before finishing it so it holds above the 18-stitch round.
Close-ups
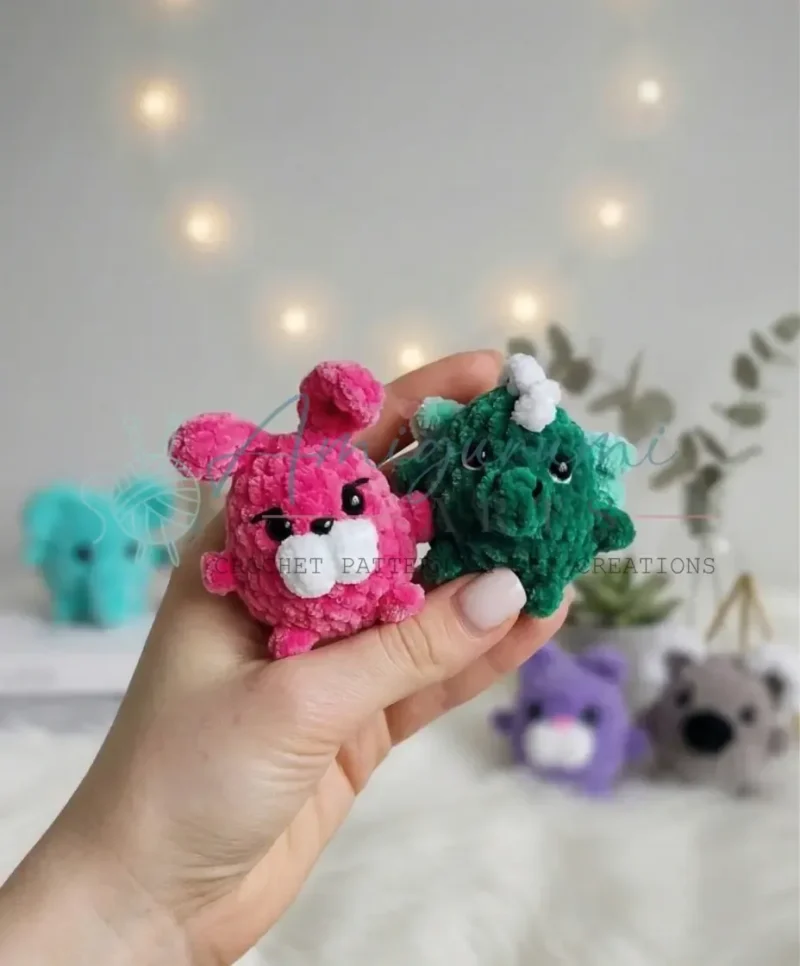

Questions people ask
Why does the pattern insist on continuous spiral rounds instead of joining each round?
Joining each round with a slip stitch would leave a visible seam and a step at every round change, which stands out more at this small a gauge. Working in a spiral keeps the fabric smooth on all sides, which is why a stitch marker is needed to track where each round starts.
How much yarn should be set aside for one animal?
Each figure uses less than 20 g of fingering or sock weight yarn, including the body, ears, and any small accent pieces. One small skein is enough for several animals from this collection.
Can embroidered features replace the plastic safety eyes?
Yes — the pattern already calls for red embroidery thread for the deer's nose and brown thread for the giraffe's spots, so thread-based features are built into the collection. Any safety eyes or noses that are used still need to be locked in place before the final opening is closed, since they can't be added after stuffing.
What happens to the fabric if a heavier yarn is used instead of fingering weight?
A heavier yarn through the same B-1 / 2.25 mm hook opens up the stitches and loosens the fabric, making stuffing more likely to peek through. Move up a hook size or two to match the thicker yarn and keep the same tight, stuffing-proof hand the pattern is built around.
New patterns, as they are filed
One short email when a batch lands, with the feel of each.