
6 rounds · filed under lace · 2 of them
Garments · added 1 Oct 2026
Crochet block stitch summer top with shaped neckline and sleeves
Modified treble crochet builds an open block texture for a relaxed, boxy summer top with shaped neckline and set-in sleeves.
- Skill
- Beginner-friendly
- Time
- 8-14 hours
- Yarn
- Light to Medium (DK/Worsted)
- Rounds
- 4
About this pattern
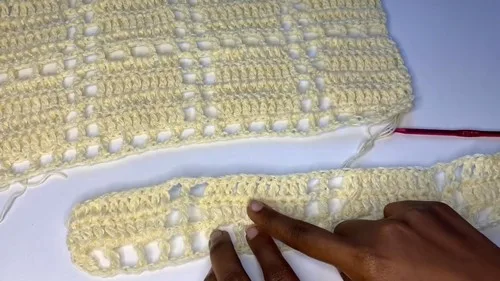
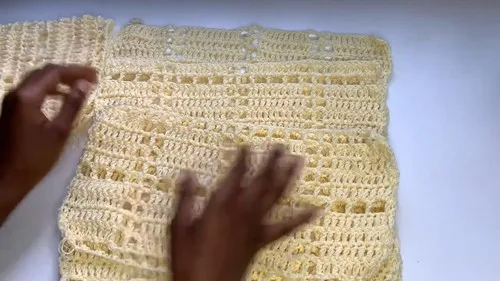
Under the hand this fabric has body without being heavy — the modified treble pulls each stitch tighter and more upright than a standard treble, so instead of a loose, floppy open-work the blocks hold their shape and the chain-2 gaps between them stay crisp. The result reads as a grid with depth: raised clusters of ten stitches sit slightly forward of the mesh rows beneath them, giving the surface a dimension you can feel as well as see. It stays breathable without going limp.
The shape is boxy and relaxed, with a wide neckline and short set-in sleeves that sit close to the shoulder rather than drop low. Front and back panels are worked flat, shaped at the neckline, and seamed at the shoulders and sides, so what you're handling for most of the project is a flat rectangle rather than a fitted piece — good for layering loose over a tank or wearing on its own in warm weather.
Difficulty: Beginner-friendly with one special stitch technique to learn upfront — once you have the modified treble crochet, the rest of the pattern repeats cleanly. Estimated time: 8–14 hours depending on yarn weight and top size.
The swatch in numbers
- Rounds
- 4
- Parts
- 2
- Level
- Beginner-friendly
- Time
- 8-14 hours
- Yarn
- Light to Medium (DK/Worsted)
The yarn and the hook
- Light to medium weight cotton or cotton-blend yarn (smooth yarn shows the block stitch most clearly)
- Crochet hook sized to match your yarn
- Darning needle or yarn needle for seaming
- Stitch markers (optional but helpful for marking armhole openings)
- Scissors
Stitches, spelled out
ch chain; st stitch; sl st slip stitch; sc single crochetDense; hdc half double crochetDense; dc double crochetDrape; inc increase; dec decrease; mr magic ringDense; fo finish off; tr treble crochetDrape.
Tension and hand-feel
After the first couple of cluster rows, measure the width of one 10-stitch treble cluster against your swatch and check the panel is tracking toward the 14-inch width the pattern calls for.
Main Pattern
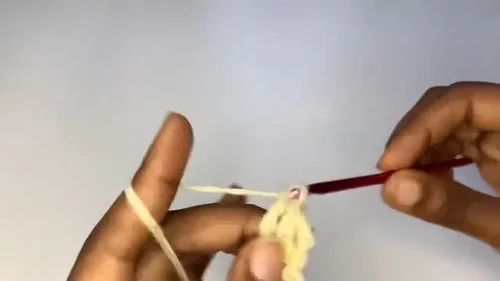
The Special Stitch This top uses a modified treble crochet that sits tighter and more upright than a standard treble. Work it like this: yarn over twice, insert your hook into the stitch, pull up a loop, then pull that same loop directly through the first loop on your hook. Yarn over and pull through two loops, then yarn over and pull through the remaining two loops. It behaves like a treble but with a slightly different lean — closer to a herringbone texture. Every stitch in this pattern uses this technique, so spend a few minutes practicing it on a small swatch before you start.
Step 1: Back Panel
Foundation chain Make a slip knot and chain in multiples of 15 plus 12 until the chain measures approximately 14 inches — this is the shoulder-to-shoulder width of the top.
Step 2: Front Panel (with Neckline Shaping)
Follow the exact same pattern as the back panel through Row 17.
At this point the front panel measures roughly 11 inches long and the neckline shaping begins.
Complete the row.
Left neckline side
Repeat the same three-row shaping process on the other side of the front panel to mirror the neckline.
Step 3: Joining the Shoulder Seams Place the front and back panels together with right sides facing each other.
Align the outer 10-stitch sections at each shoulder.
Using a darning needle or crochet hook, sew or slip stitch the front and back panels together at the shoulder sections only — leave the neckline open between them.
Step 4: Joining the Side Seams Turn the joined body piece inside out so the wrong side faces outward.
Align the side edges carefully — match Row 1 to Row 1, and keep the block rows lining up with each other as you go.
Stitch up from the bottom hem on each side, leaving a 7-inch opening unstitched at the top of each side seam. These openings become the armholes.
Step 5: Sleeves
Making the sleeve panels Make two identical rectangular panels, each starting with the same chain width used for the body (approximately 14 inches) and worked for 10 rows — approximately 7 inches long — using the same block stitch pattern throughout.
Attaching the sleeves Fold each sleeve panel in half so the short ends meet. Keep the main body inside out (wrong side facing outward). Keep each sleeve right-side out and insert it into the armhole opening from the inside, so the right sides of the sleeve and body are facing each other. Align the sleeve seam with the body's underarm seam. Whipstitch or sew all the way around the armhole opening to attach the sleeve. Repeat for the second sleeve.
How the texture is built
- Each cluster row works ten trebles across ten stitches, then chains 2 and skips the chain-2 space below before starting the next cluster directly on top of the previous one — that offset is what keeps the block pattern staggered rather than stacking into a plain grid.
- The mesh row (row 1) repeats with four cluster rows in a fixed sequence until the panel reaches length, so the open, breathable texture and the firmer clustered texture alternate in a predictable rhythm rather than being randomly placed.
- Panels are worked flat and only joined at the shoulder sections and side seams — the neckline is deliberately left unseamed between the shoulders, which is what lets the wide neckline shape stay open instead of closing up like a set-in collar.
Putting the pieces together
If you swap the yarn
| Mercerized cotton, light to medium weight | Gives crisper stitch definition and holds the block shape more squarely, with almost no drape change — use the same hook called for in the pattern. |
|---|---|
| Cotton-linen blend, sport weight | Produces a lighter, more fluid drape and a slightly larger stitch per treble, so size down one hook to keep the block texture from loosening. |
| Bamboo-rayon blend, DK weight | Adds noticeably more drape and weight to the hang of the panel, which can lengthen the piece over 20 rows — size down the hook if you want the blocks to stay structured rather than relax flat. |
| Avoid fuzzy or highly textured yarns | Hairy or bouclé yarns will swallow the mesh row detail and muddy the overall look of the top, so steer clear of highly textured fibers and stick with a smooth cotton, cotton-linen, or bamboo blend that lets the block stitch pattern show clearly. |
Colorways
- Two-Tone Blocks Work the mesh rows (row 1 and its repeats) in pale blue and the cluster rows in natural white, so the open mesh shows as thin blue bands running between solid white block sections.
Washing and blocking
Hand wash in cool water — cotton and cotton-blend yarn have no memory, so stitches won't spring back on their own if stretched while wet.
Lay the top flat to dry and block it gently into its finished width and length, since wet cotton carries weight and will stretch if hung.
Store folded rather than on a hanger — hanging pulls on the open mesh rows over time and can leave the neckline area baggy.
When it does not look right
- The ten-stitch clusters tilt instead of
- A stitch count slipped within a cluster — recount each group of ten trebles and confirm the modified treble is worked with the loop pulled through the first loop before finishing off, which is what keeps the clusters upright.
- The two neckline sides don't match when
- The left and right shaping rows were worked a different number of times — keep a row count for each side and check both against the panel width before joining the shoulder seams.
Close-ups
Questions people ask
Do I need to know how to set in a sleeve before starting this?
Not at all — the sleeve attachment here is straightforward because both the body and sleeve panels are flat rectangles. There is no curved armhole to navigate. As long as you match your seams and sew all the way around the opening, it will sit neatly.
Can I adjust the length of the top?
Yes, easily. Continue repeating the block stitch sequence past 20 rows for a longer body, or stop a few rows earlier for a cropped version. The same applies to the sleeves — work more rows for a longer sleeve or stop at 5 rows for a cap-sleeve look.
What if my panels are slightly different sizes after blocking?
Wet block both panels before seaming. Pin them flat to the same dimensions and let them dry fully. Cotton yarn is especially responsive to wet blocking and will even out any small tension differences between panels.
The mesh row looks looser than the cluster rows. Is that normal?
Yes — that open-mesh row is intentional and is part of what creates the block pattern contrast. If it looks significantly looser than expected, try going down half a hook size for the mesh rows only, or consciously work a slightly tighter tension on those rows.
New patterns, as they are filed
One short email when a batch lands, with the feel of each.