

13 rounds · filed under drape · 11 of them
Garments · added 14 Oct 2026
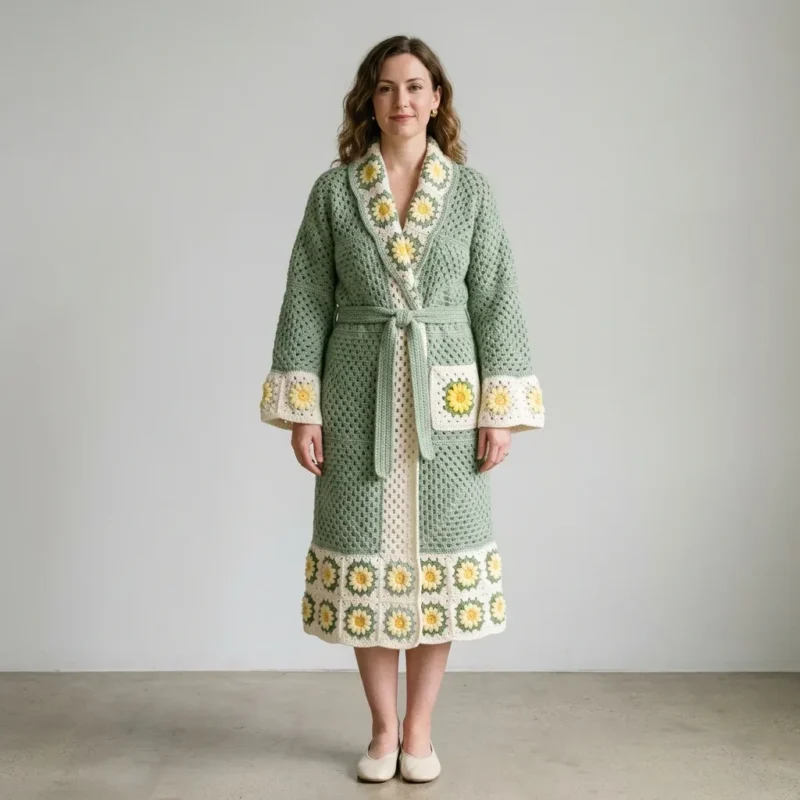
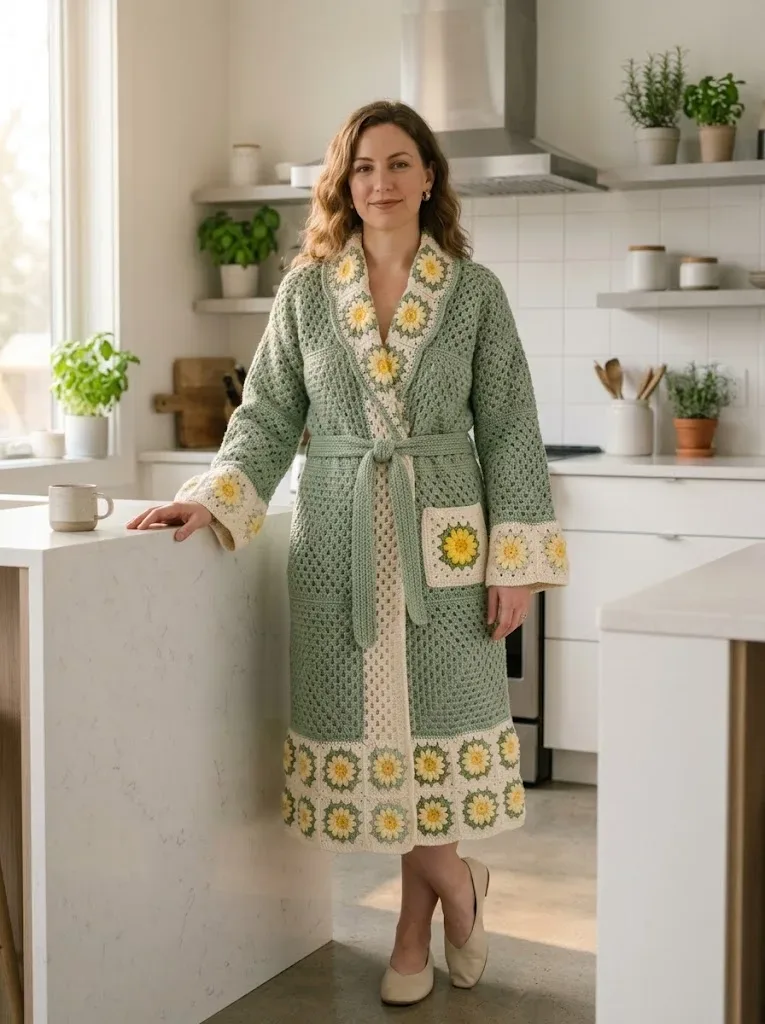
Sage green mesh crochet robe pattern with granny square trim
Double crochet mesh builds an airy, open lattice with soft drape for a sage green crochet robe with granny square trim.
- Skill
- Intermediate
- Time
- 4-6 hours
- Hook
- 5.0 mm
- Yarn
- Worsted
- Rounds
- 13
About this pattern
Under your hand this fabric moves like a loose net, not a solid wall. The dc, ch-1, dc repeat leaves a row of open squares between every post, so the mesh has give when you tug it crosswise and falls into soft folds when it hangs. It is light for its width, and the open spacing means it breathes against skin instead of sitting heavy on the shoulders the way a solid dc fabric would.
The piece builds as three long flat rectangles: one back panel and two front panels, each worked row by row rather than in the round. Once the back measures 38 inches and the fronts match it with neck shaping worked in at the top edge, the panels are meant to be seamed at the shoulders and sides, left open down the center front, and finished at the hem with the daisy granny squares for a robe that wraps and drapes rather than pulls on.
The swatch in numbers
- Rounds
- 13
- Parts
- 5
- Level
- Intermediate
- Time
- 4-6 hours
- Hook
- 5.0 mm
- Yarn
- Worsted
The yarn and the hook
- for Your Crochet Robe
Yarn
- Main Color (MC): Sage green, worsted weight yarn, approximately 1,400 yards
Color A
- Cream or off-white, worsted weight yarn, approximately 400 yards
Color B
- Yellow, worsted weight yarn, approximately 100 yards
Hook
- Size H/8 (5.0 mm) crochet hook, or size needed to obtain gauge
Notions
- Tapestry needle for weaving in ends
- Stitch markers
- Scissors
- Rust-proof pins for blocking
- Gauge
Mesh Pattern
- 14 stitches and 8 rows = 4 inches in the mesh pattern after blocking
Daisy Granny Square
- Each finished square measures 4 inches x 4 inches after blocking
- Gauge matters for wearables. Take time to make a swatch before starting. If your stitches are too tight, go up a hook size. If they are too loose, go down a hook size.
- Stitch Abbreviations and Definitions
- Dc3tog = Double crochet 3 together. A decrease that combines 3 double crochet stitches into one. Work each dc until 2 loops remain on hook, then yarn over and pull through all 4 loops at once.
Stitches, spelled out
ch chain; st stitch; sl st slip stitch; sc single crochetDense; dc double crochetDrape; tr treble crochetDrape.
Tension and hand-feel
After the first few rows of the mesh pattern, lay the swatch flat and measure 14 stitches and 8 rows against a 4-inch span once it has been blocked, since the open ch-1 spaces relax and widen under steam or a light wet block.
If the swatch measures smaller than 4 inches, move up a hook size; if it measures larger, drop down a size, since the back panel's 22-inch width depends on this count holding steady for its full 38-inch length.
Notions
Tapestry needle for weaving in ends Stitch markers Scissors Rust-proof pins for blocking Gauge Mesh Pattern: 14 stitches and 8 rows = 4 inches in the mesh pattern after blocking
Daisy Granny Square: Each finished square measures 4 inches x 4 inches after blocking
Gauge matters for wearables. Take time to make a swatch before starting. If your stitches are too tight, go up a hook size. If they are too loose, go down a hook size.
Stitch Abbreviations and Definitions
Ch = Chain. Wrap yarn over hook, pull through loop on hook. This creates the foundation for most crochet work.
Sl st = Slip stitch. Insert hook, yarn over, pull through both the stitch and the loop on your hook in one motion. Used for joining and moving across stitches without adding height.
Sc = Single crochet. Insert hook, yarn over, pull up a loop (2 loops on hook), yarn over, pull through both loops. The shortest basic stitch.
Dc = Double crochet. Yarn over, insert hook, yarn over, pull up a loop (3 loops on hook), yarn over, pull through 2 loops, yarn over, pull through remaining 2 loops. A taller stitch that creates the open, airy mesh fabric.
Dc3tog = Double crochet 3 together. A decrease that combines 3 double crochet stitches into one. Work each dc until 2 loops remain on hook, then yarn over and pull through all 4 loops at once.
Tr = Treble crochet. Yarn over twice, insert hook, yarn over, pull up a loop, (yarn over, pull through 2 loops) 3 times. An even taller stitch used in some granny square variations.
Pattern Notes Before You Begin
This robe is constructed in pieces and then seamed together. You will make the following components: 1. Back panel (1 piece)
2. Front panels (2 pieces, mirror images)
3. Sleeves (2 pieces)
4. Daisy granny squares (approximately 36 squares total)
5. Belt (1 piece)
6. Pocket panels (2 pieces)
A note about the mesh pattern: The open mesh creates a lacy, breathable fabric. It works up faster than you might expect because the chain spaces move quickly. Do not worry if it looks loose and floppy before blocking. Blocking transforms this fabric into something structured and beautiful.
Daisy Granny Square Pattern
You will need approximately 36 daisy granny squares for this robe. Make them all before assembling, so you can lay them out and plan your placement.
With Color B (yellow), make a magic ring.
This round creates the petal effect. Fasten off Color A.
Part 3
Front Panels Pattern (Make 2)
With MC, ch 42.
Part 4
Shaping the Neckline Continue working the mesh pattern while decreasing at the neck edge.
Decrease Row: At the beginning of the row (neck edge), ch 3, dc in first ch-1 space (skipping the first dc), continue in pattern across. Turn.
Work one decrease row every 4 rows, 6 times total. (14 dc, 13 ch-1 spaces remain)
Continue without decreasing until the front panel matches the back panel length.
Fasten off. Make a second front panel, reversing the neckline shaping by working decreases at the end of the row instead of the beginning.
Sleeves Pattern (Make 2)
With MC, ch 50.
Part 5
Part 6
Pocket Panels (Make 2)
Each pocket is made from 2 daisy granny squares joined together with a solid crochet border.
Join 2 squares: Place two daisy squares side by side. Using MC, sl st through both layers along one edge to join.
Border: With MC, work 1 round of sc evenly around all edges of the joined squares, working 3 sc in each corner. Sl st to join. Fasten off. (approximately 68 sc)
Assembly Instructions
This is where your robe comes together. Take your time with seaming. Neat, consistent seams make a huge difference in the finished look.
Step 1: Attach Hem Border
Join 9 daisy granny squares in a row for the back hem border. Join 5 daisy granny squares for each front hem border.
Using MC and a whip stitch or mattress stitch, sew the granny square borders to the bottom edge of each panel.
Step 2: Seam Shoulders
Place the back panel and front panels right sides together. Using MC, sl st or whip stitch along the shoulder seams, leaving the center open for the neck.
Step 3: Attach Sleeves
Find the center of each sleeve. Match it to the shoulder seam. Pin in place, then seam the sleeve to the body, easing in any fullness.
Step 4: Seam Sides and Underarms
Working in one continuous seam on each side, join the side of the body and the underarm of the sleeve. Leave an opening approximately 4 inches from the hem on each front panel for the belt loops.
Step 5: Add Cuff Borders
Join 6 daisy granny squares in a ring for each sleeve cuff. Sew the joined squares to the bottom edge of each sleeve, matching the circumference and easing if necessary.
Step 6: Create the Collar
Join 10 daisy granny squares in a long strip. Sew this strip along the front opening edges and around the back neck, creating the shawl collar shown in the design.
Step 7: Attach Pockets
Position one pocket panel on each front, approximately 6 inches below the waist and centered on the front panel. Using MC, whip stitch along the bottom and sides, leaving the top open.
Step 8: Add Belt Loops
Using MC, ch 15. Sl st to the side seam at waist height. Fasten off. Repeat on the other side. These loops will hold your belt in place.
Step 9: Thread Belt and Block
Thread the belt through the loops. Block your entire finished robe according to your yarn’s care instructions. Lay flat to dry, pinning the collar and hem to your desired shape.
Finishing Tips for a Professional Look
Weave in all ends thoroughly. With this many color changes in the granny squares, you will have a lot of ends. Take your time and weave each one in multiple directions so nothing pops loose during wear or washing.
Block aggressively. The mesh fabric really opens up and relaxes with blocking. Pin it out wider than you think you need to. It will spring back slightly when dry.
Consider a slip stitch edging around the collar for extra structure if your fabric feels floppy. One round of sl st in MC will firm things up without adding bulk.
Customization Ideas
How the texture is built
- Row 1 of each panel starts with a dc in the 4th chain from the hook, letting the skipped ch-3 stand in as the first dc, which sets the stitch count for every mesh row that follows.
- Row 2 opens with a ch 4 that counts as a dc plus a ch-1 space, so each turn rebuilds the same lattice at the edge instead of tightening or flaring the mesh as the rows stack up.
- The front panel's decrease row works a ch 3 into the first ch-1 space and skips the first dc, which pulls the neckline in from one edge only, while the opposite edge keeps the same ch-1 spacing as the back panel for the full length of the robe.
If you swap the yarn
| Cotton, worsted weight | Drape becomes heavier and the mesh holds its open squares more rigidly; size up the hook slightly if the ch-1 spaces start pulling tight, since cotton has less give than an acrylic blend. |
|---|---|
| Wool-acrylic blend, bulky weight | Each panel grows faster and the mesh squares open wider, so fewer rows are needed to reach 38 inches; move up to a larger hook and expect a warmer, thicker fabric with less drape through the body. |
| Acrylic, fingering weight | The mesh becomes finer and more see-through, better suited to a lightweight wrap than a robe meant for warmth; drop down to a smaller hook and plan on considerably more rows to match the same panel length. |
Colorways
- Sage body, cream and yellow trim Back panel and both front panels worked entirely in sage green, with the daisy granny squares at the hem using cream for the petal rounds and yellow for the center, keeping the mesh body a single solid color against a lighter, patterned border.
Washing and blocking
Hand wash in cool water with a mild detergent, since a soft acrylic or cotton blend worsted yarn can felt or shrink under hot water and agitation.
Lay the panels flat to dry rather than hanging them, as the open mesh will stretch lengthwise under its own damp weight if left on a hanger.
Re-pin and block the mesh panels to their original width and length after each wash to keep the ch-1 spaces even, and fold the robe flat for storage instead of hanging it long-term.
When it does not look right
- The panel edges curl or wave instead of lying flat
- This usually comes from an inconsistent ch-4 turning chain at the start of each row; keep that turning chain relaxed and block the finished panel pinned out to its stated 22-by-38-inch measurement.
- The ch-1 spaces look bigger on one side of the panel than the other
- This points to skipping the wrong stitch at the turn; place a stitch marker in the first dc of each row so the skip-and-dc sequence stays consistent across the full row.
- The front panel's neckline edge looks stepped or puckered after the decrease rows
- This happens when the two front panels are decreased at different rates; count the decrease rows on both panels and match the length worked before the Decrease Row begins so the neckline shapes evenly on both sides.
Close-ups
Questions people ask
How long and wide should the back panel be before adding the border?
The back panel should measure approximately 22 inches wide and 38 inches long before the granny square border is added at the hem. If your gauge swatch matched 14 stitches and 8 rows to 4 inches, the row count given will land you close to this width without extra measuring.
Do the two front panels need to be worked at the same time?
No, the construction is flat and separate, so each front panel can be worked on its own. What matters is that both panels match the back panel's 38-inch length before the neckline decrease rows begin, so the finished robe hangs even on both sides.
How much yarn does the whole robe use?
The pattern calls for about 1,400 yards of sage green for the main panels, 400 yards of cream for the granny square trim, and 100 yards of yellow for the granny square centers. That split reflects how much mesh fabric the panels take compared to the smaller granny square border.
Does the mesh stretch much when the robe is worn?
The ch-1 spaces give the fabric some vertical ease, but the double crochet posts keep it from stretching much side to side, so the robe drapes on the body rather than clinging or sagging out of shape.
New patterns, as they are filed
One short email when a batch lands, with the feel of each.