
9 rounds · filed under drape · 4 of them
Garments · added 28 Sep 2026
Granny square sweater pattern for beginners
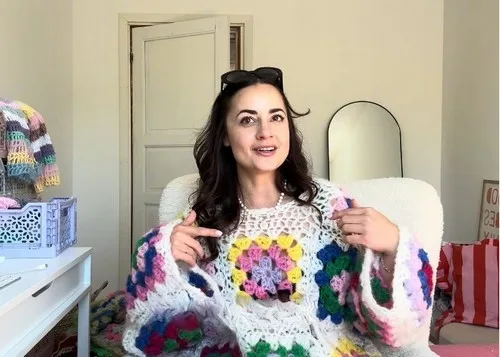
Double crochet clusters build a thick, textured granny fabric into a boxy, join-as-you-go sweater.
- Skill
- Intermediate
- Time
- 4-6 hours
- Yarn
- Worsted
- Rounds
- 3
About this pattern
Under the hand this fabric sits thick and slightly fuzzy, thanks to the mohair blended into the yarn, while the double crochet clusters give it a chunky, ridged surface rather than a smooth one. Each square is worked in rounds of three double crochet groups separated by chain-2 corners, so the fabric has open, airy gaps between clusters even though the stitch itself is dense. It has enough body to hold its shape as a square but enough gap between groups to flex when you pick it up.
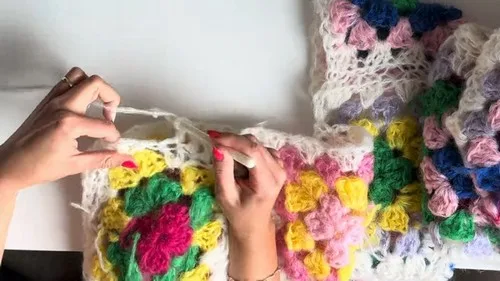
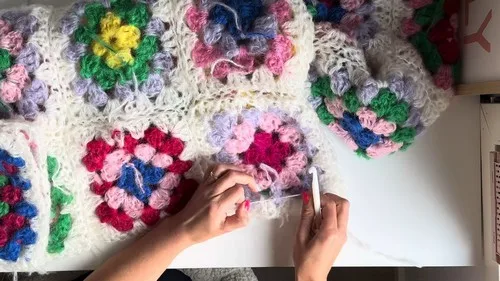
The finished piece is built from two sizes of the same square, small ones for the body and larger ones for the sleeves, joined edge to edge into a boxy silhouette with set-in seams at the shoulders and sides. Lay the squares out flat before seaming so the color placement and corner alignment match across panels, then keep the needle-and-yarn seams loose enough that the joins flex with the rest of the granny texture instead of pulling it tight.
The swatch in numbers
- Rounds
- 3
- Level
- Intermediate
- Time
- 4-6 hours
- Yarn
- Worsted
The yarn and the hook
- Mohair yarn and an acrylic wool polyester blend
- Main border color in white
- Hook size 9 or 10
- Needle for seaming
Stitches, spelled out
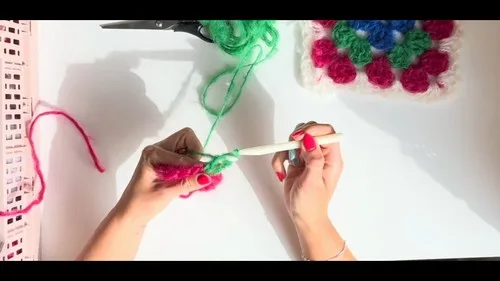
ch chain; sl st slip stitch; dc double crochetDrape; hdc half double crochetDense.
Tension and hand-feel
After Round 1, measure the ring and the four corner chain-spaces to see that the square sits flat rather than cupping or ruffling at the edges.
Granny Square
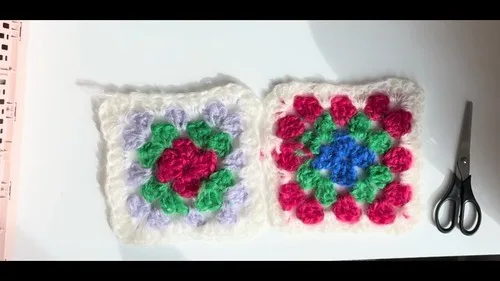
Make 30Body squares made with 4 colorful rounds plus 1 border round
Sleeve squares made with 5 colorful rounds plus 1 border round
How the texture is built
- Each round adds its increases only at the four chain-2 corner spaces, so the square grows outward evenly on all sides while the straight edges simply add one more 3-double-crochet group per round without any shaping.
- Every square is worked in the round and joined with a slip stitch rather than turned and worked flat, which is what keeps the right side of the double crochet clusters facing forward consistently across all 30 squares.
- Sleeve squares carry one extra colorful round before the border compared to body squares, so joining new yarn at the corner on that fifth round is what makes the sleeve squares finish larger than the body squares before assembly.
Putting the pieces together
If you swap the yarn
| Wool, worsted weight | Drops the halo the mohair gives so cluster edges look crisper and more defined; drape stays similar and the size 9 or 10 hook still suits it. |
|---|---|
| Cotton-acrylic blend, worsted weight | Produces a heavier, less airy fabric with much less stretch across the seams, so size down the hook slightly to keep the double crochet groups from looking loose. |
| Acrylic, bulky weight | Makes each square grow larger from the same 3-round or 4-round count, so plan for a shorter sleeve join and step up to a hook larger than the size 9 or 10 listed. |
Colorways
- Tonal center, white frame Work Rounds 1 through 3 (or 1 through 4 on sleeve squares) in a single tonal color family for the body of each square, then join white only for the final border round so every square reads as a colored center in a white grid.
- Mixed rounds, unified border Change color at the start of each colorful round so Round 1, Round 2, and Round 3 (plus Round 4 on sleeves) each land in a different shade, then close every square the same way with the white border round to tie the mixed squares together.
Washing and blocking
Hand wash in cool water and lay the sweater flat to dry, since the acrylic-wool-polyester blend can stretch out of shape if hung wet, and mohair fibers mat faster under agitation.
Reshape each granny square gently while damp, easing the corners back into their chain-2 points so the whole panel dries square rather than skewed.
Store folded rather than hung, since the seamed joins between squares carry the weight of the fabric and a hanger will pull them long over time.
When it does not look right
- The square cups or domes instead of lying flat
- The corner chain-2 spaces are too tight relative to the double crochet groups, pulling the middle up; loosen the chain stitches at each corner or move up a hook size.
- The border round doesn't line up with the corners underneath
- The white yarn was joined into a side space instead of a true corner space; unravel back to the join and restart Round 4 by locating the chain-2 gap specifically.
- Seams between squares look bulky or stiff
- The whip stitch seam was pulled too tight against the double crochet clusters; reseam with a looser tension so the join flexes the same way the granny fabric does.
Close-ups
Questions people ask
Why do sleeve squares use five colorful rounds instead of four?
The extra round adds one more layer of double crochet clusters before the border, which grows the square just enough to give the sleeve panel its wider finished size compared to the body squares.
Can the hook size be adjusted for a tighter or looser fabric?
Yes, the size 9 or 10 hook is a starting point; moving up loosens the double crochet clusters for more drape, while moving down tightens the fabric and makes the squares slightly smaller.
How loose should the seams be when joining squares?
Loose enough that the seam flexes when you fold the fabric, since a tight seam fights against the natural give of the granny clusters and can pucker the join.
New patterns, as they are filed
One short email when a batch lands, with the feel of each.