

17 rounds · filed under dense · 7 of them
Garments · added 27 Sep 2026
Striped polo shirt built from a 6-dc group stitch
6-dc groups form a ridged, airy fabric with color-block stripes for a fitted, collared crochet polo shirt.
- Skill
- Intermediate
- Time
- 4-6 hours
- Yarn
- Worsted
- Rounds
- 12
About this pattern
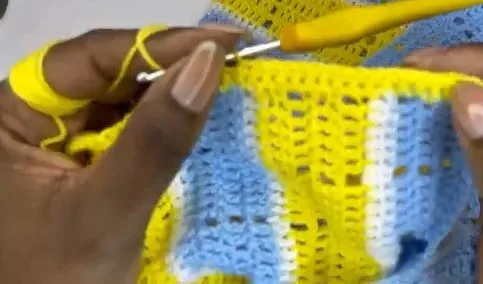
Under the hand this fabric reads ridged rather than smooth: each 6-dc group sits as a raised block, separated by a chain-1 gap that the next row's hdc pass fills in. That fill-in row is what keeps the surface from feeling holey — it closes the gaps into a firmer, slightly nubby texture with just enough give to move with the body, not the loose drape of plain dc rows.
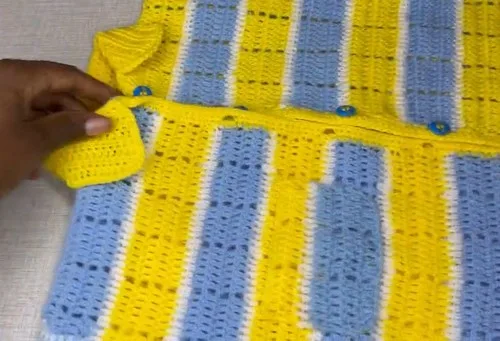
Three flat panels — one back, two fronts — build the body, joined at the sides up to the armhole marker and at the shoulders. Sleeves pick up at the armhole and turn to working in the round, so the same 6-dc rhythm continues without a seam down the arm. Add the collar and plackets last, then the pocket gets sewn on once the fronts are finished. You can personalize the shirt with different color combinations to suit any season or occasion.
The swatch in numbers
- Rounds
- 12
- Parts
- 4
- Level
- Intermediate
- Time
- 4-6 hours
- Yarn
- Worsted
The yarn and the hook
- Worsted weight yarn
- Crochet hook (size to suit your yarn)
Stitches, spelled out
ch chain; sc single crochetDense; dc double crochetDrape; hdc half double crochetDense; sl st slip stitch.
Tension and hand-feel
After round 1 of a body panel, lay it flat and check that the 6-dc groups sit evenly with their ch-1 gaps closed rather than gaping, and that the piece doesn't cup or ruffle at the edge.
If the fabric buckles or the groups crowd against each other, go up or down a hook size until the row lies flat under a light stretch.
Body Panels (6-DC Group Main Stitch Pattern)
Make 3The core pattern consists of groups of six double crochet (dc) stitches separated by a chain-one (ch 1) space.
This 6-dc group pattern forms one back panel and two front panels.
This example uses 4 rows of the main color between each color change row.
Sleeves
Make 2Button Plackets (Front Opening)
Make 2Polo Collar
How the texture is built
- The chain-1 gap between each 6-dc group is left open in the pattern rows on purpose — the hdc color-change row is what closes it, so the stripe break also doubles as the row that firms up the fabric.
- The button plackets are worked directly into the row-ends of the dc panel at two sc per dc row space, which ties the density of the placket to the height of the body rows rather than to a separate stitch count.
Putting the pieces together
If you swap the yarn
| Cotton, worsted weight | Holds the ridged texture of the 6-dc groups crisply and drapes less, which keeps the placket edges from curling; use the same hook size as called for. |
|---|---|
| Cotton-acrylic blend, DK weight | Produces a lighter, more fluid fabric with softer ridges; size down a hook to keep the chain-1 gaps from opening too wide. |
| Linen blend, worsted weight | Adds structure and a slightly stiffer hand that suits the collar and plackets especially well, though the sleeves will drape less around the arm; keep the hook at the pattern's size or slightly larger to avoid a tight, board-like fabric. |
Colorways
- Classic stripe rhythm Main color for the 4 rows of dc body pattern on all three panels and both sleeves, with a contrast color worked only on the hdc row after every 4th row; collar and plackets stay in the main color.
- Reversed emphasis Contrast color for the dc body rows throughout, main color reserved for the hdc fill-in rows only, then the collar and plackets worked in the contrast color to frame the neckline against the striped body.
Washing and blocking
Hand wash or use a gentle machine cycle in cool water to keep cotton fibers from felting at the ridged 6-dc rows.
Lay flat to dry rather than hanging, since a wet garment of this weight can stretch out of shape at the shoulder seams.
Reshape the collar and plackets by hand while damp, then fold rather than hang for storage to keep the panels from drooping.
When it does not look right
- The panel edges curl or won't lie flat after a few rows
- This usually means the hdc fill-in row was skipped or worked too loosely to close the chain-1 gaps; work the hdc row snugly into every stitch and every ch-1 space as instructed.
- The buttonholes on the placket gape
- The ch-2, skip-2 buttonhole spacing is sensitive to tension; keep the chain-2 loose enough to match the width of two skipped sc stitches so the button sits without strain.
- The sleeve pattern doesn't line up
- Because the sleeve starts with its own hdc round at the armhole before the 6-dc pattern begins, its stripe rhythm starts a round later than the body; plan the color changes on the sleeve separately rather than matching row-for-row with the panels.
Close-ups
Questions people ask
Why does the pattern call for a chain-1 skip between each 6-dc group instead of working straight across?
That gap is left open so the hdc color-change row has somewhere to land — it fills each ch-1 space with a stitch, which is what closes the fabric up after every color break. Without the gap, the hdc row would have nothing to fill and the stripe transition would sit differently.
Can the sleeves be worked flat instead of in the round?
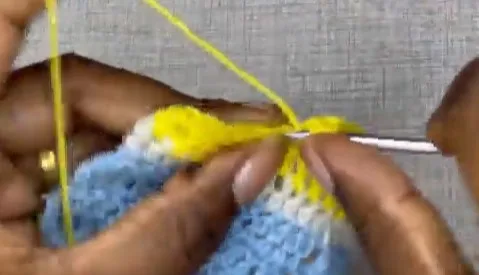
The pattern joins the sleeve with a slip stitch each round specifically so there's no seam down the arm, which keeps the ridged 6-dc texture continuous. Working it flat would mean adding a seam and matching the ch-1 gaps across it by hand.
How is the fit adjusted since there's no shaping in the panel rounds?
Fit comes from the armhole marker placed 13 cm from the edge and the shoulder seam marked 9 cm from the collar opening, not from increases or decreases in the stitch pattern. Moving those markers in or out changes the fit without altering the 6-dc rows themselves.
Does the pocket need to be worked as part of the front panel?
No — the pocket is built separately in the same stitch pattern and then sewn onto the front panel once both pieces are finished. This keeps the panel's row count clean for seaming before the pocket is added.
New patterns, as they are filed
One short email when a batch lands, with the feel of each.