

11 rounds · filed under ridge · 3 of them
Garments · added 4 Oct 2026
Spring Crochet Cardigan with Turtleneck Collar
Back-loop single crochet creates a dense, ribbed fabric for this cozy turtleneck cardigan with full-length sleeves.
- Skill
- Intermediate
- Time
- 4-6 hours
- Hook
- 6 mm
- Yarn
- Worsted
- Rounds
- 6
About this pattern
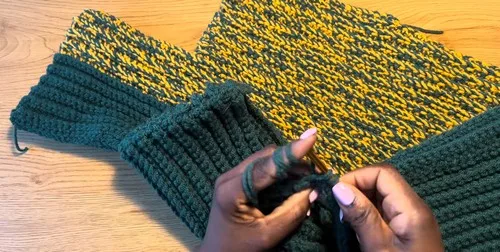
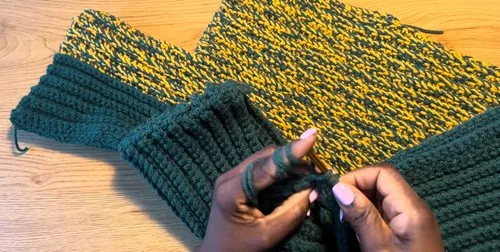
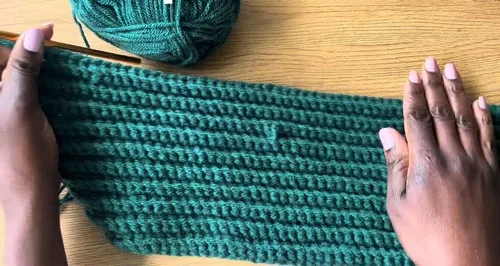
Single crochet worked in back loops only across twenty rows builds a dense, firm fabric with almost no stretch, the kind that holds its shape instead of draping. Each row sits in tight, braided ridges because the back-loop-only technique leaves the front loop standing as a visible line of texture, giving the surface a faint ribbed look even though every row uses the same stitch. Under the hand it feels solid and a little stiff at first, softening only after wear or a wash.
Two identical body panels seamed at the shoulders and sides form a straight, boxy cardigan body, left open at the armholes for sleeves worked separately and joined in. A chained extension at the top becomes a turtleneck collar once its edges are joined into a tube, so the piece moves from flat panel to standing neckline without a separate pattern piece. Treat it as a layering piece over a fitted top, since the dense fabric and straight cut add bulk rather than cling.
The swatch in numbers
- Rounds
- 6
- Parts
- 2
- Level
- Intermediate
- Time
- 4-6 hours
- Hook
- 6 mm
- Yarn
- Worsted
The yarn and the hook
Yarn
- T yarn, 100% acrylic (double the strands for thickness or use chunky yarn)
- Hook: 6 mm
Measurement
- Shoulder-to-shoulder (e.g., 50 cm)
Stitches, spelled out
ch chain; st stitch; sl st slip stitch; sc single crochetDense.
Tension and hand-feel
After Row 1, lay the chain flat and check that its width matches your shoulder-to-shoulder measurement (for example 50 cm) before committing to the next nineteen rows.
If the fabric feels loose and the row sags under its own weight, drop to a smaller hook than the 6 mm called for; if the stitches feel tight and hard to pull through, move up a size.
Main Body Panels (Make 2 Identical Pieces)
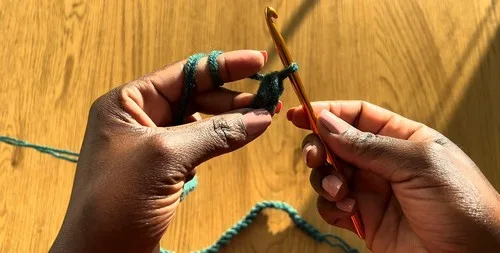
Starting Chain: Make a chain matching your shoulder-to-shoulder measurement.
Sleeves (Make 2)
Attach yarn at the underarm.
Chain 61 for sleeve length.
How the texture is built
- The main body is worked flat in rows rather than in the round, which lets two identical panels be seamed together afterward instead of shaping a single tube, and keeps the turtleneck chain extension a simple add-on at the top edge of each panel.
- Back-loop-only single crochet runs across all 20 rows of the body with no increases or decreases, so the panel holds a constant width from hem to collar; all shaping comes from seaming the shoulders and sides, not from changing stitch counts.
- Sleeves are attached with a slip stitch into the armhole at the end of every row rather than sewn in after the fact, so the sleeve grows directly onto the body edge as each row is worked, combining construction and finishing into a single step.
Putting the pieces together
If you swap the yarn
| cotton-acrylic blend, worsted weight | Gives the back-loop-only rows crisper stitch definition and less bounce, so the panels hang straighter and heavier; keep the 6 mm hook. |
|---|---|
| wool, chunky weight | Adds loft and warmth, and the turtleneck collar stands taller instead of slouching; size up to a 6.5 mm hook to let the thicker strand move through each single crochet. |
| alpaca-blend, DK weight held double | Produces a softer, lighter drape so sleeves fall closer to the arm; the 6 mm hook still works since doubling the strand restores the original bulk. |
Washing and blocking
Machine wash cold on a gentle cycle; the acrylic yarn does not need hand washing, but a mesh bag keeps the dense single crochet rows from stretching against the drum.
Lay flat to dry rather than hanging, since hanging pulls the firm single crochet panels and the turtleneck collar out of shape while damp.
Fold for storage instead of hanging on a hook; the boxy shape holds a smoother line folded flat, and acrylic needs no re-blocking even after repeated washes.
When it does not look right
- The turtleneck collar flops instead of standing up.
- The 21-chain extension or its continuation rows were worked too loosely; redo that section with firmer tension so the back-loop-only stitches hold the tube upright.
- The armhole gapes or puckers where a sleeve meets the body.
- A slip stitch joining a sleeve row to the armhole loop was skipped or doubled up; slip stitch into the next armhole loop at the end of every sleeve row without missing one.
- The body panel curls at the side edges.
- Back-loop-only single crochet repeated across 20 rows builds directional pull toward one edge; block the panel flat with light steam or a damp press and pin the edges before seaming.
Close-ups
Questions people ask
When do you start the turtleneck collar chain?
The 21-chain for the collar is added right after Row 20 of the main body panel, not before. Row 21 then works single crochet down those new 21 chains before continuing across the rest of the panel.
Can you change the sleeve length?
Yes, the sleeve starts with a chain of 61, so adding or removing chains before Row 1 changes the finished sleeve length. Keep the stitch count even across both sleeves so the pair matches at the armhole.
Does this fabric have any stretch for pulling over the shoulders?
Very little. Back-loop-only single crochet locks the loops into a firm, almost rigid fabric, so the cardigan relies on its open front rather than stretch to get on and off.
New patterns, as they are filed
One short email when a batch lands, with the feel of each.